
The Loring house was designed by William Ralph Emerson, a prominent architect specialazing in summer cottages during the late nineteenth century.
Commissioned by Gen. Charles G. Loring in 1881 the house was completed in 1884.
When you walk around the property of this shingle style home, perched upon a high granite ledge overlooking the bay with it's numerous paths meandering around large boulders, slopes and more boulders and ledges, it immerses you in a dreamy state which immediately transports you 200 years back in time.

The upper garden with it's formal 15th century Italianate style symmetric layout is simple and elegant at the same time. The elevated setting and the view is breath taking. I can only imagine the intricacy of working on the layout, elevations and building the structures of this fantastic property nestled around the countless boulders and ledges. The music of the ocean waves crushing on the beach and the schooners and tall ships coming and going from the nearby busy Salem Harbor.
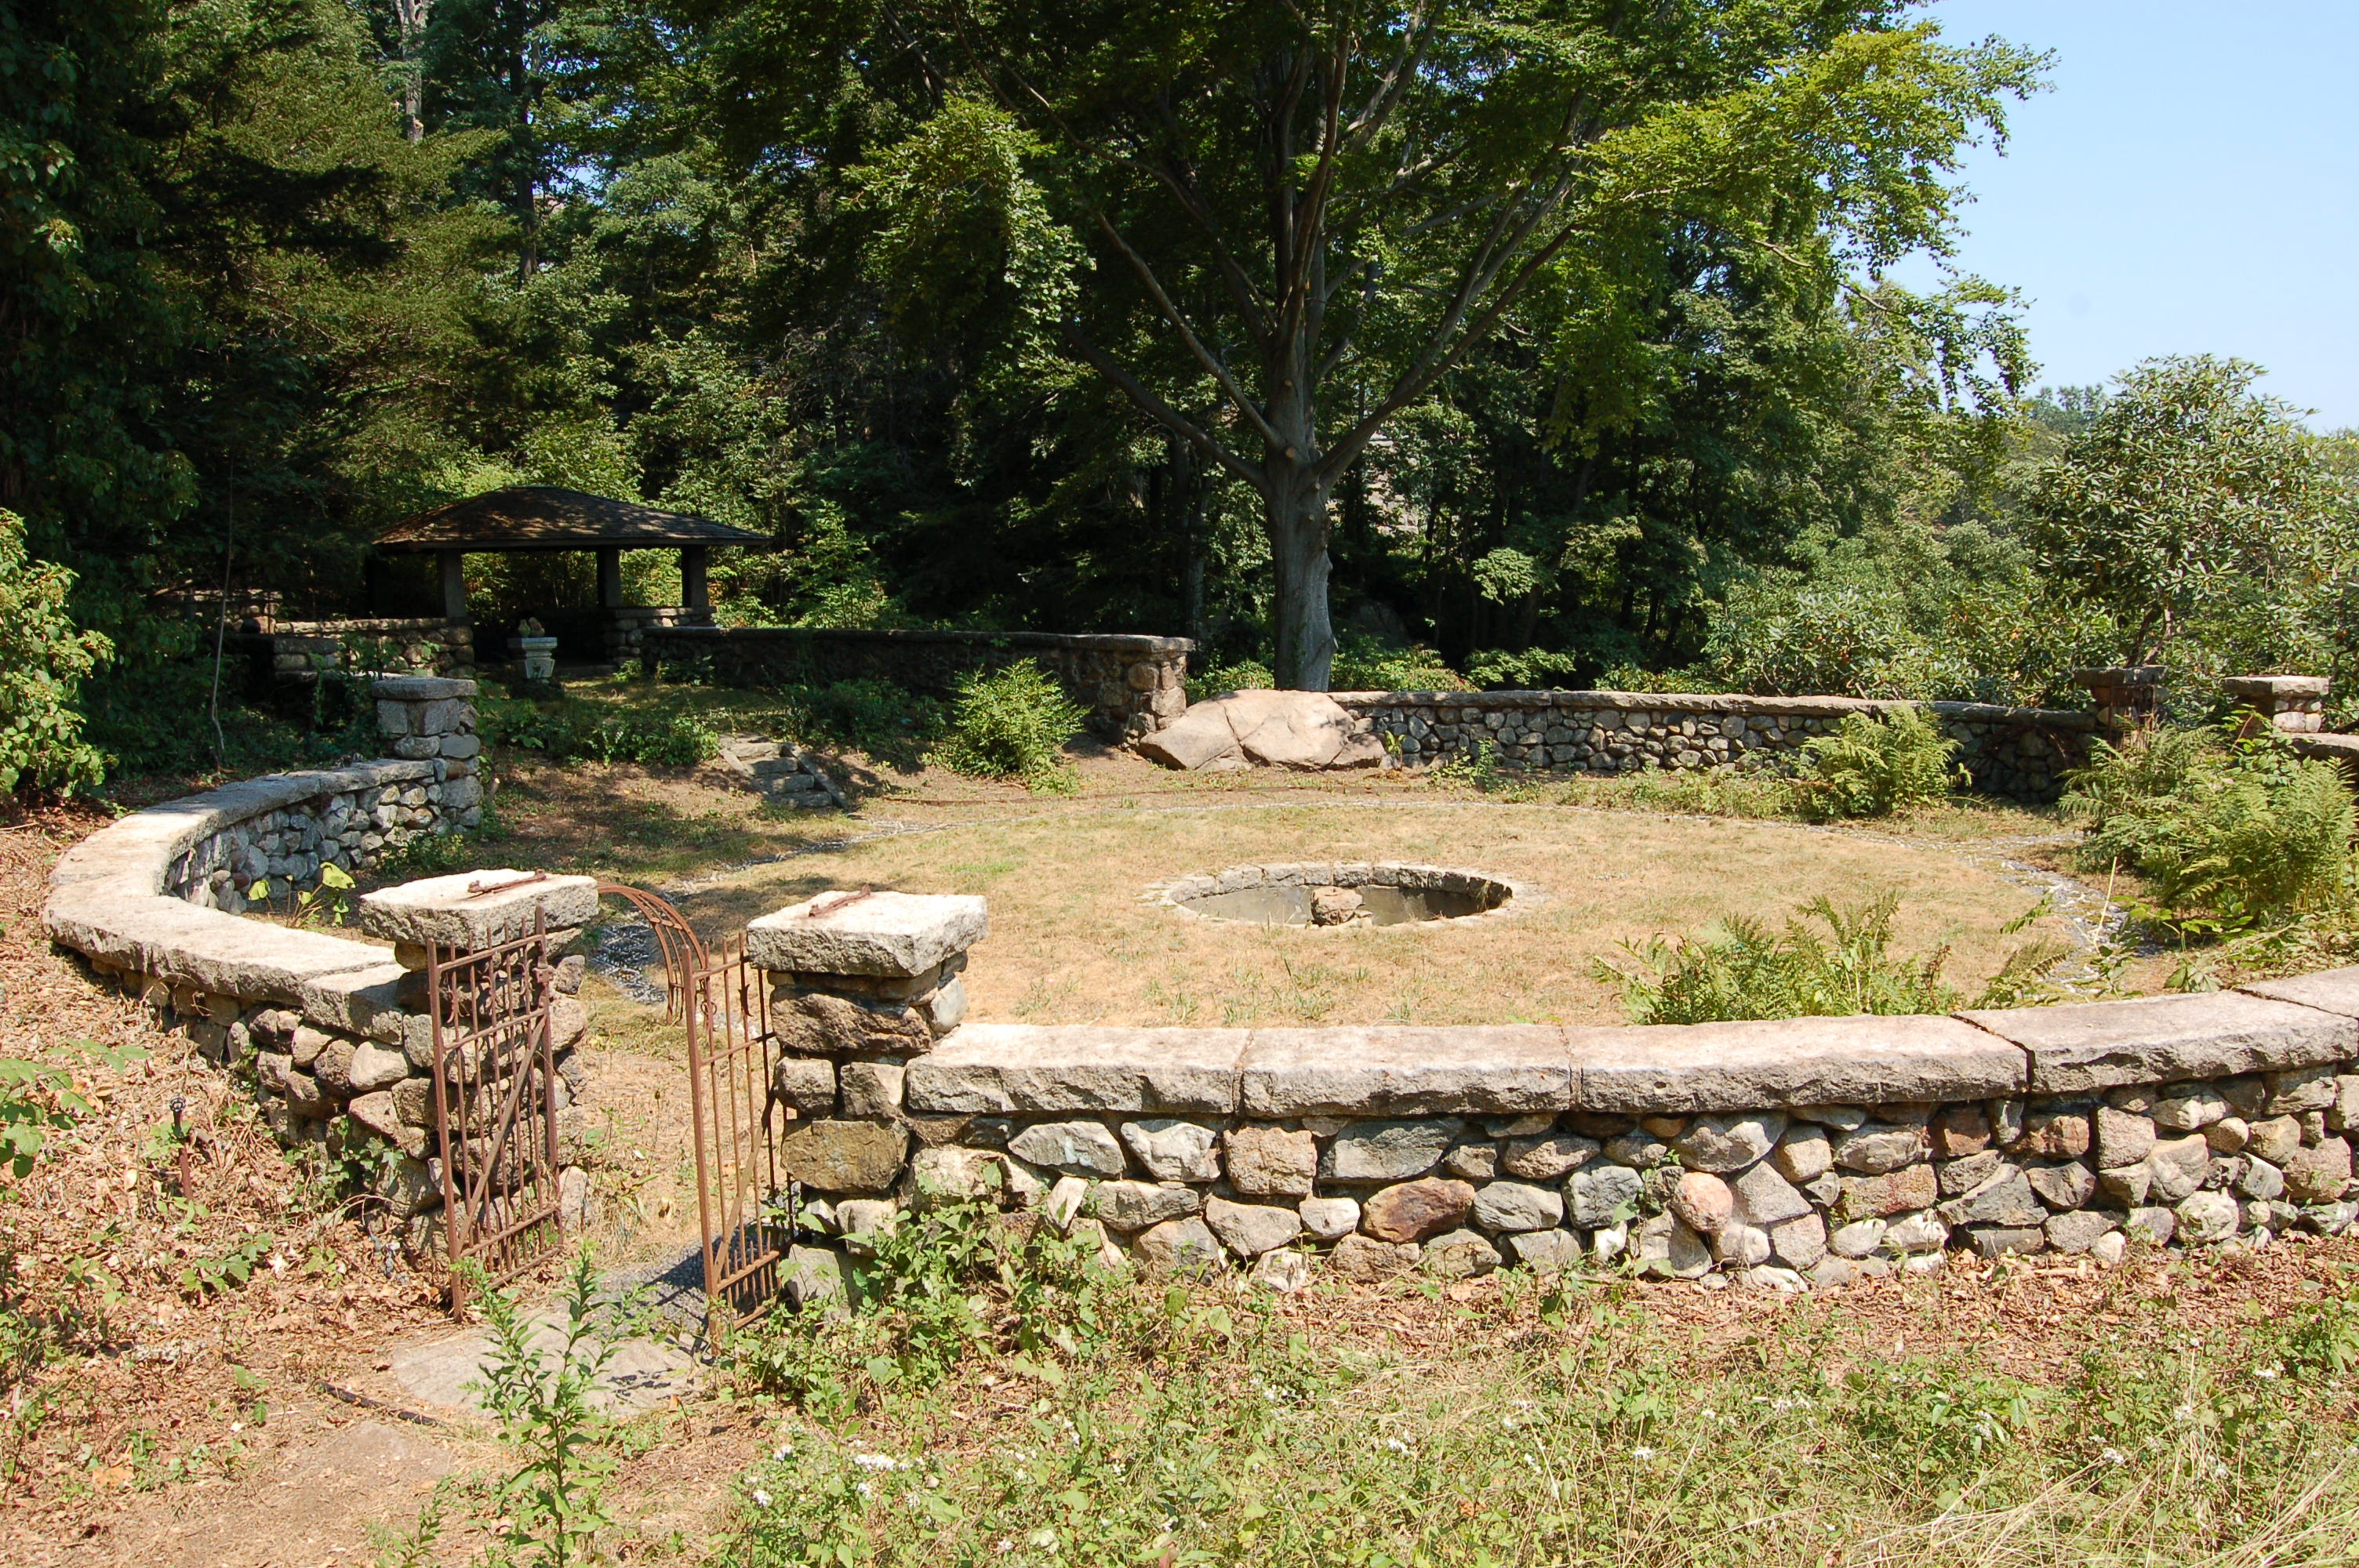
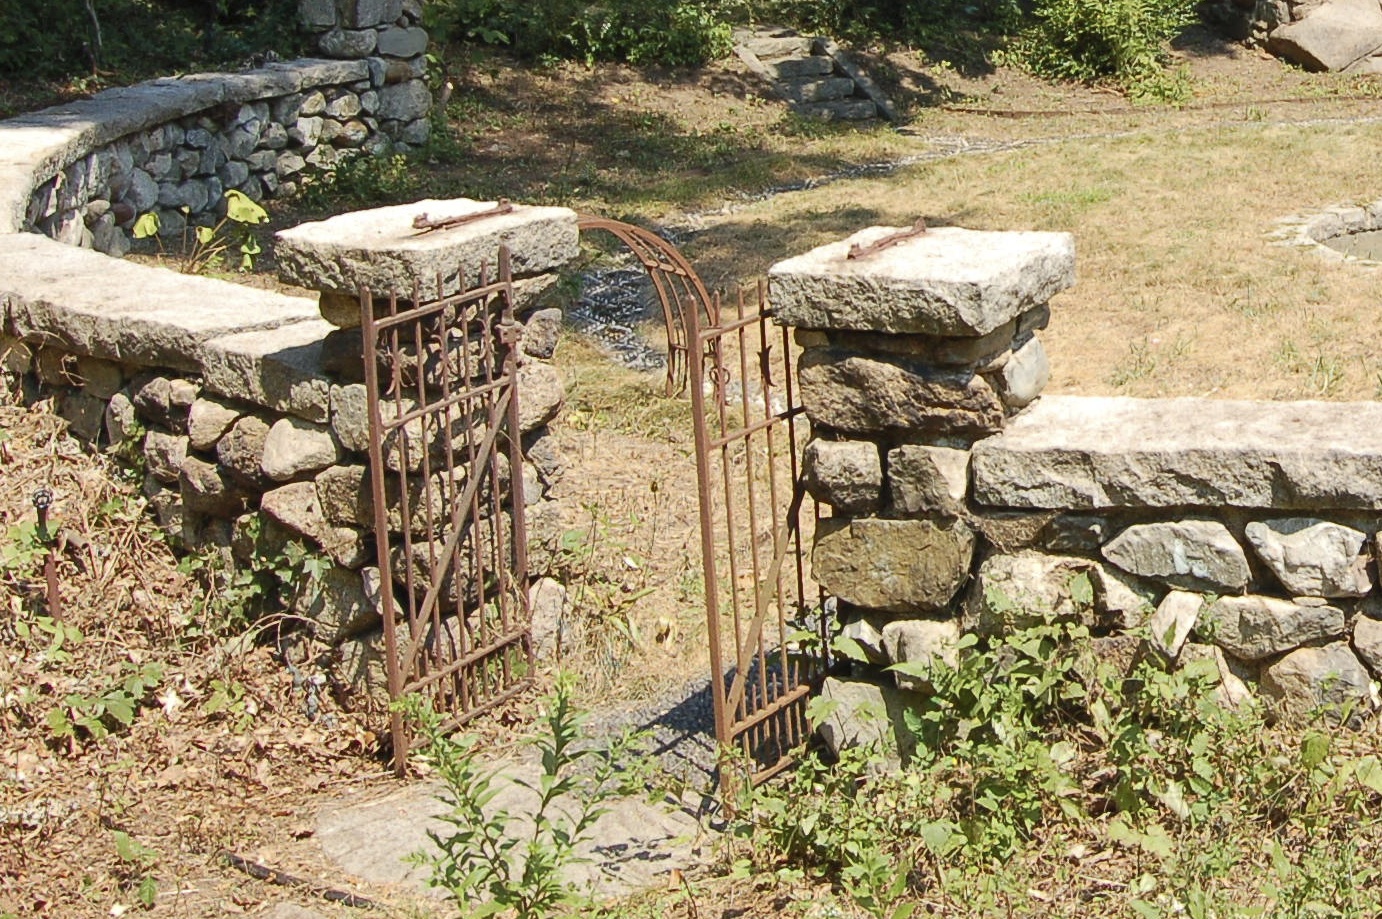
Completely overgrown, the masonry had suffered from years of neglect. A large tree root at the left of the west gate had grown under the wall lifting it and tilting the column offsetting the left side gate. The two arbors rusted out at their base and had fallen off and were all bent and out of shape.
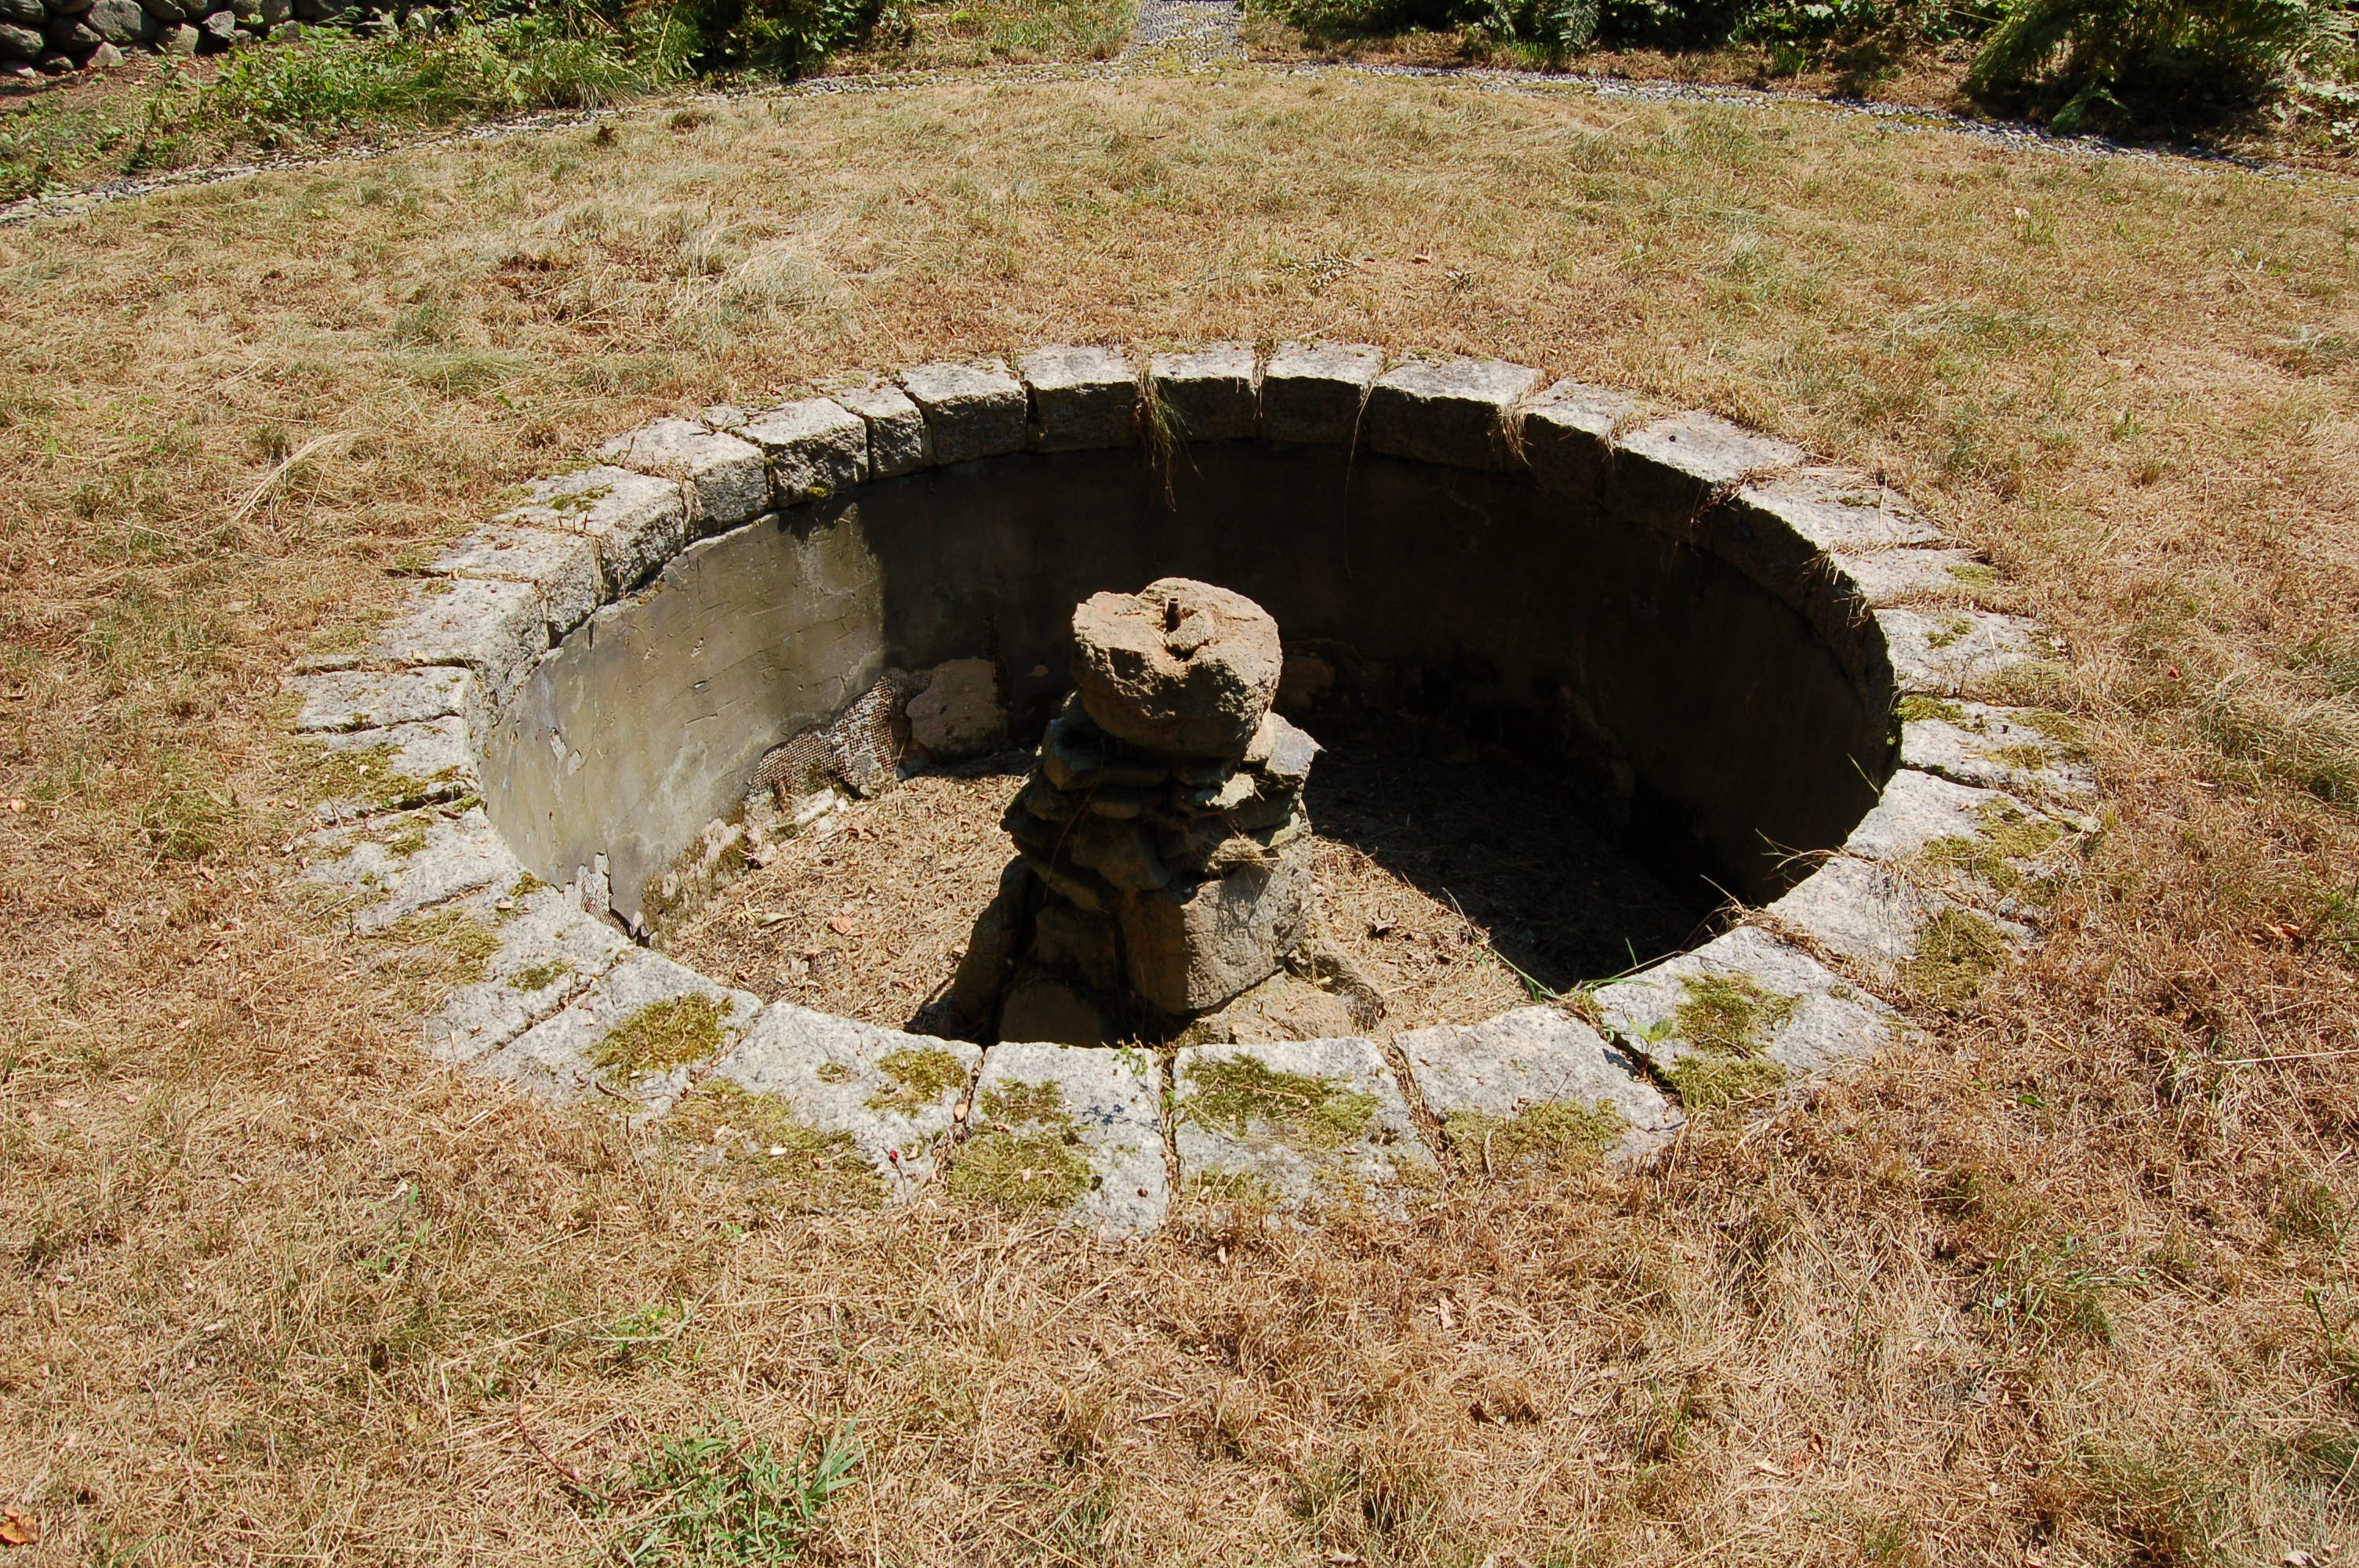
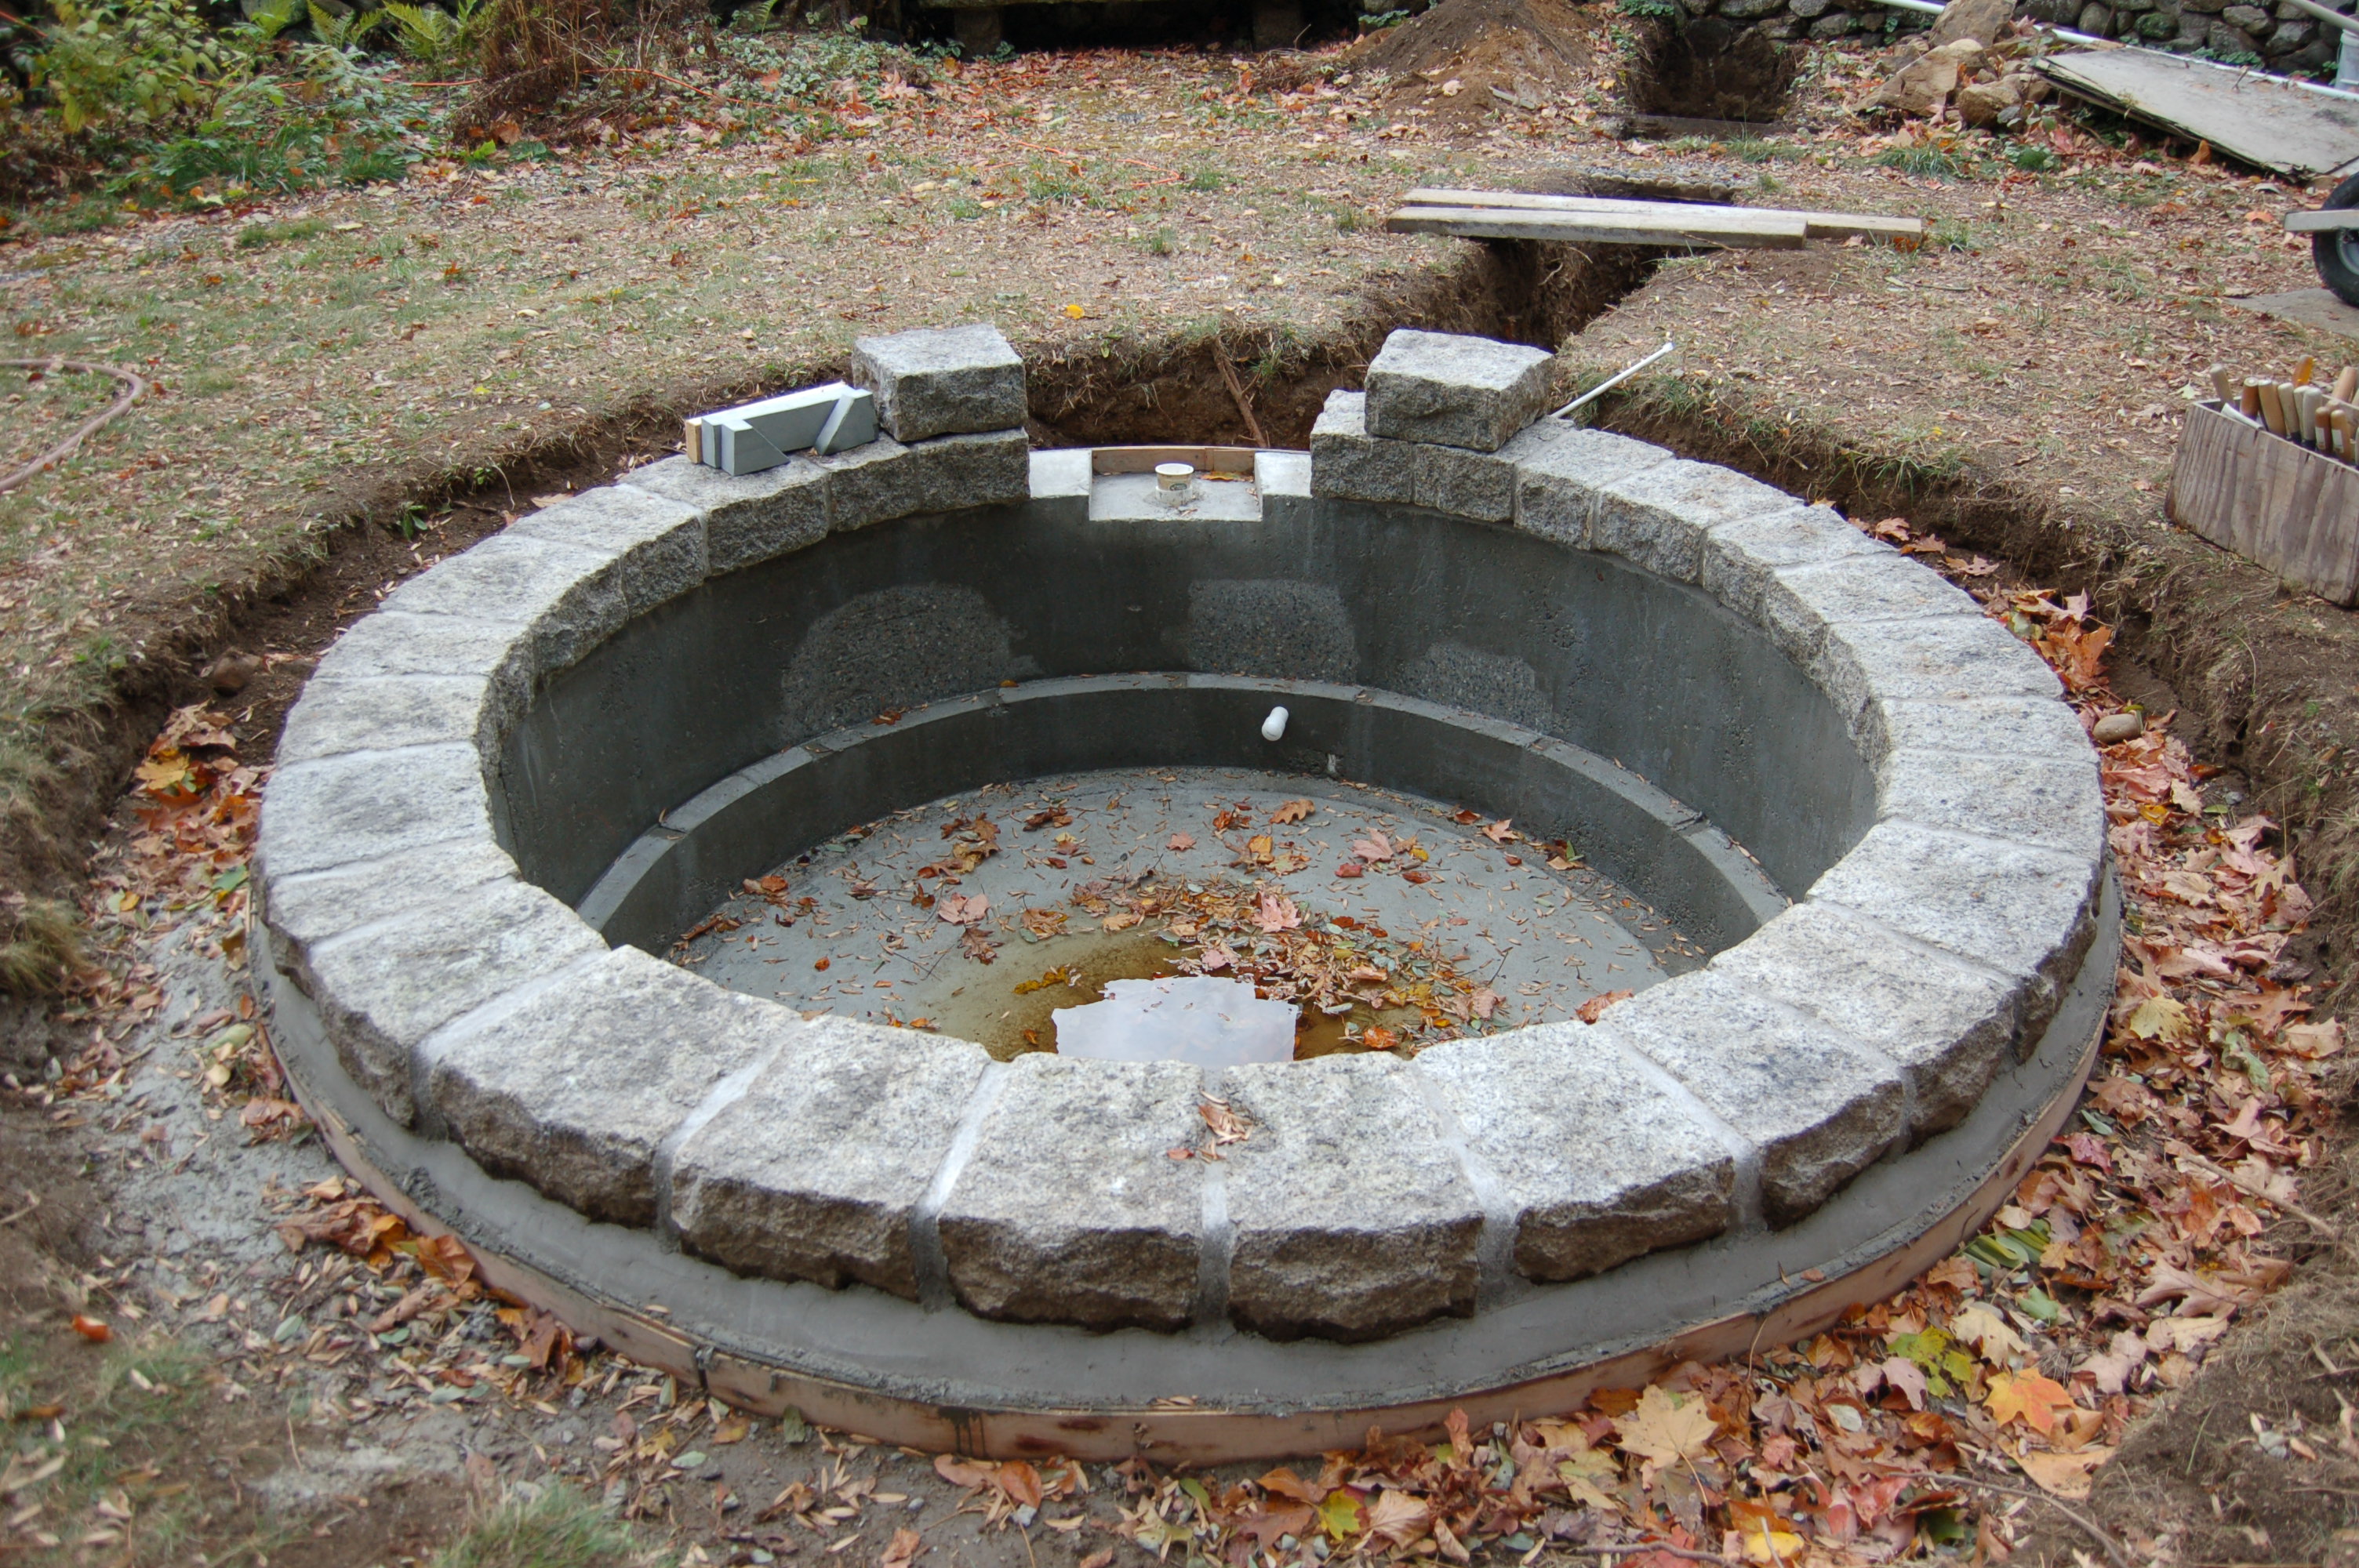
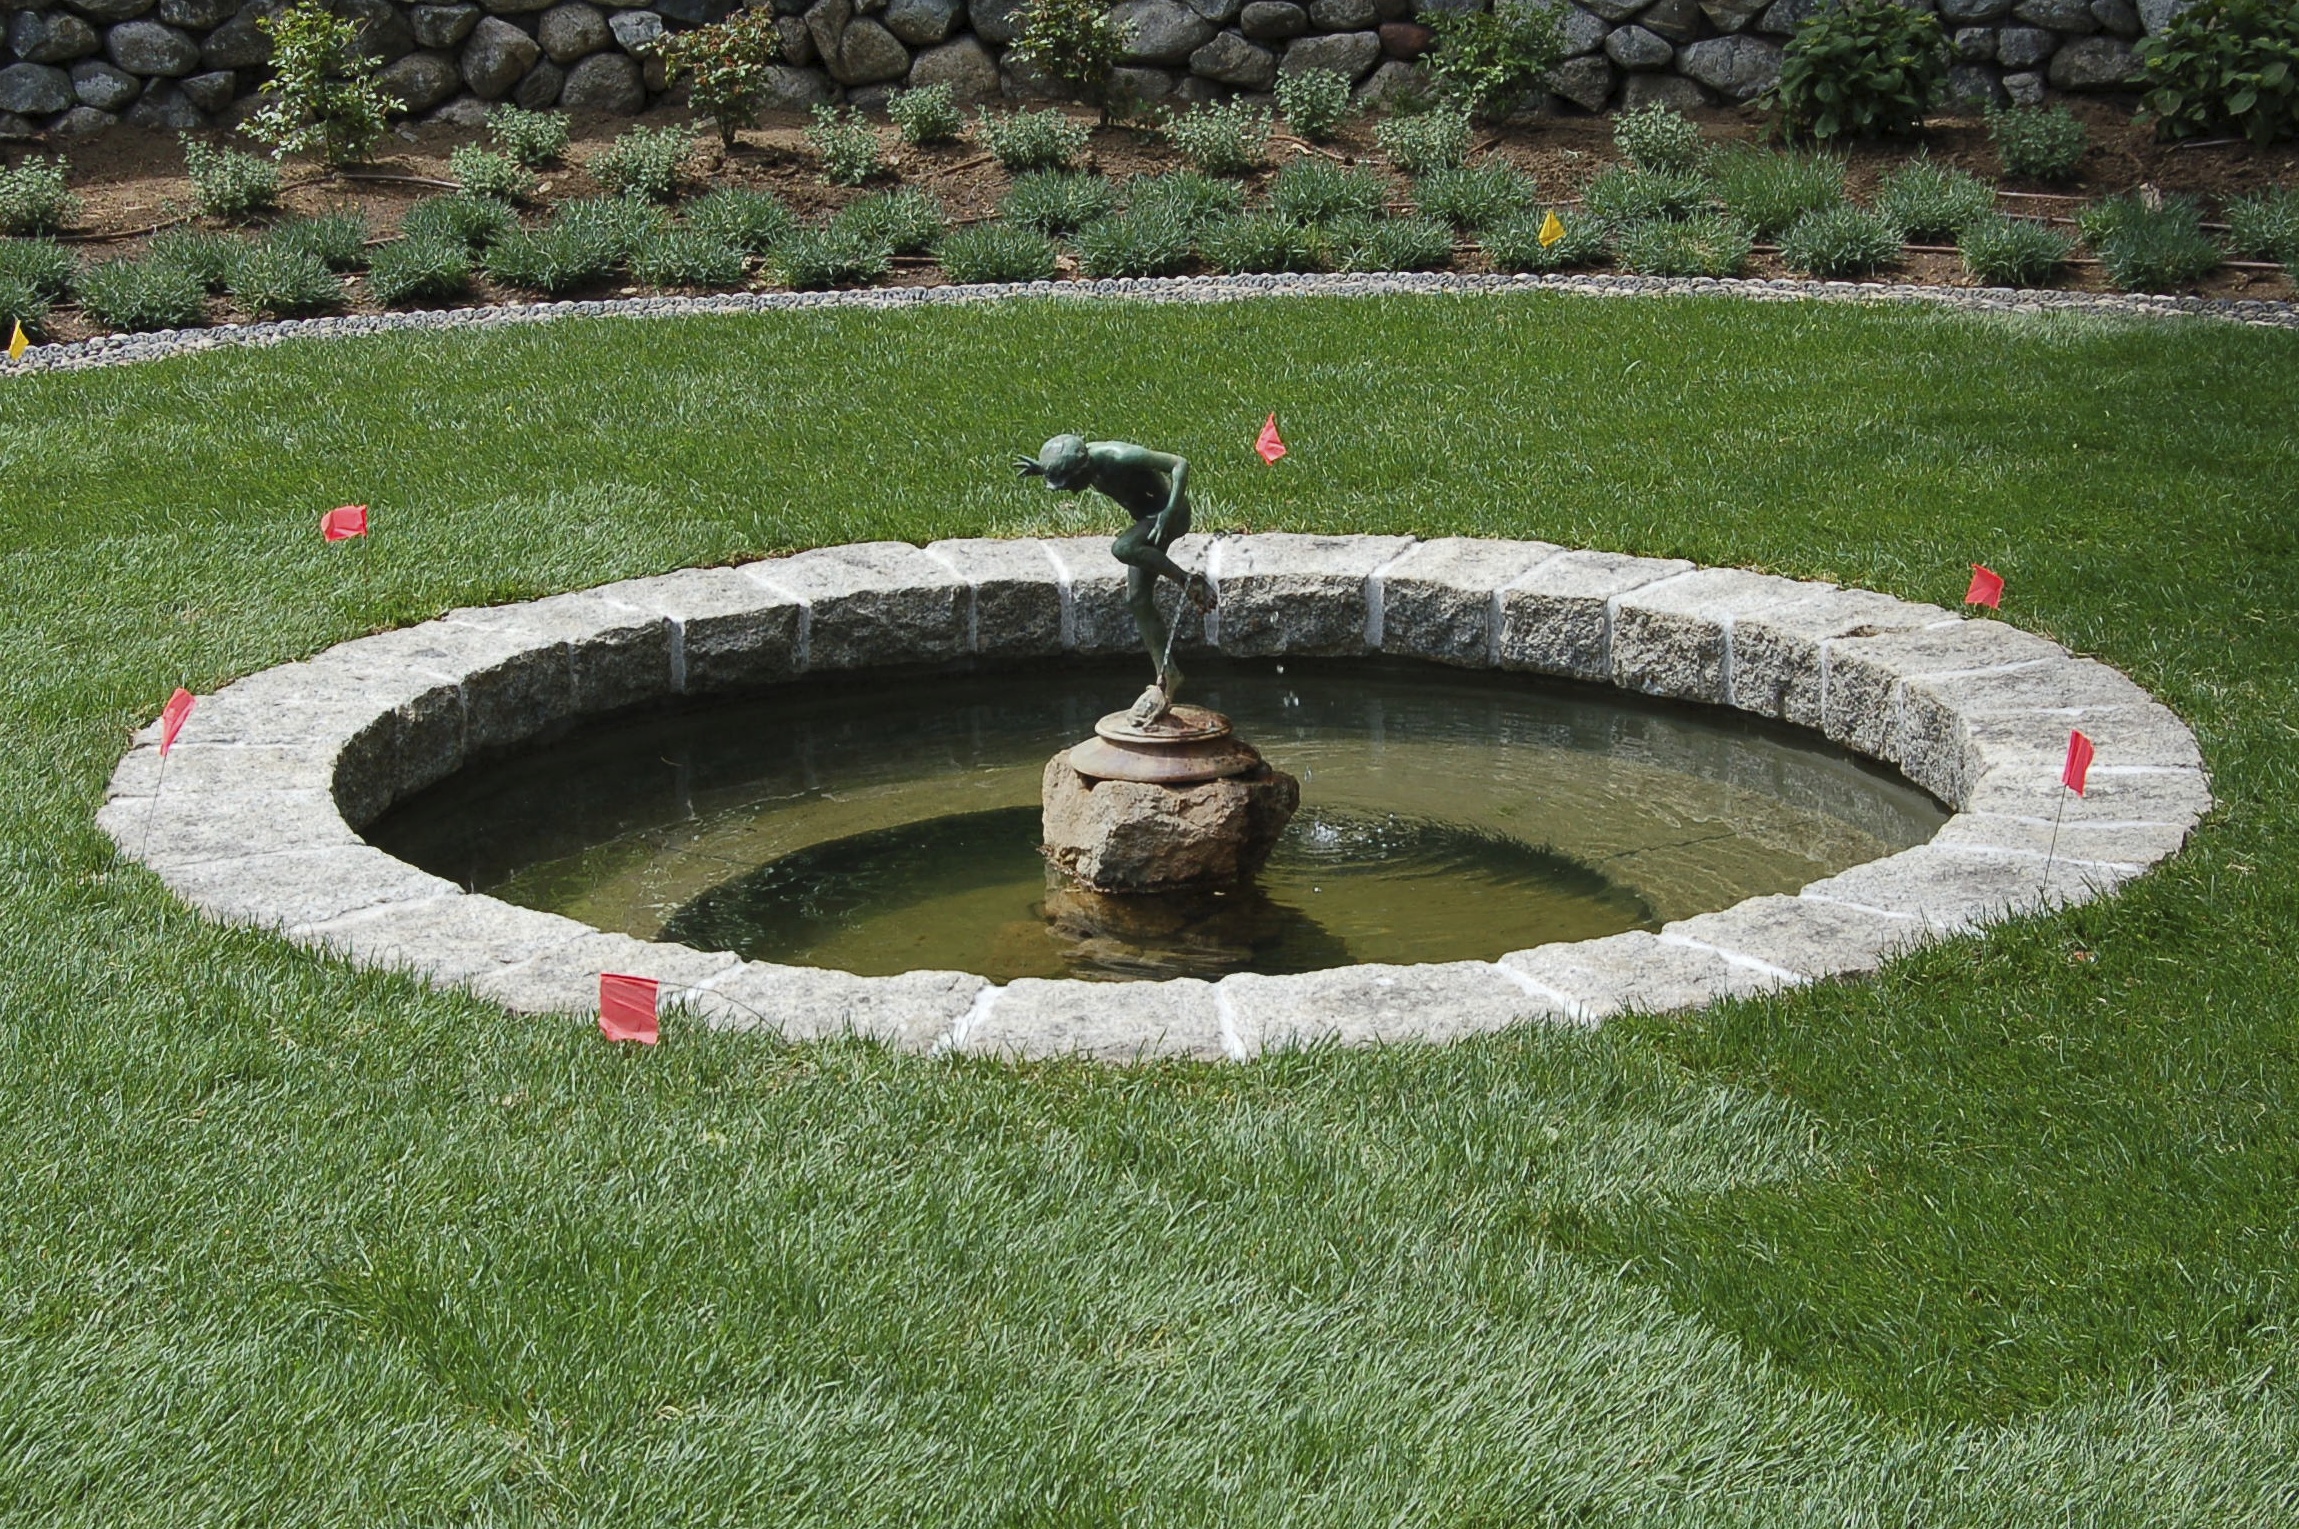
The concrete pond was in complete disrepair.
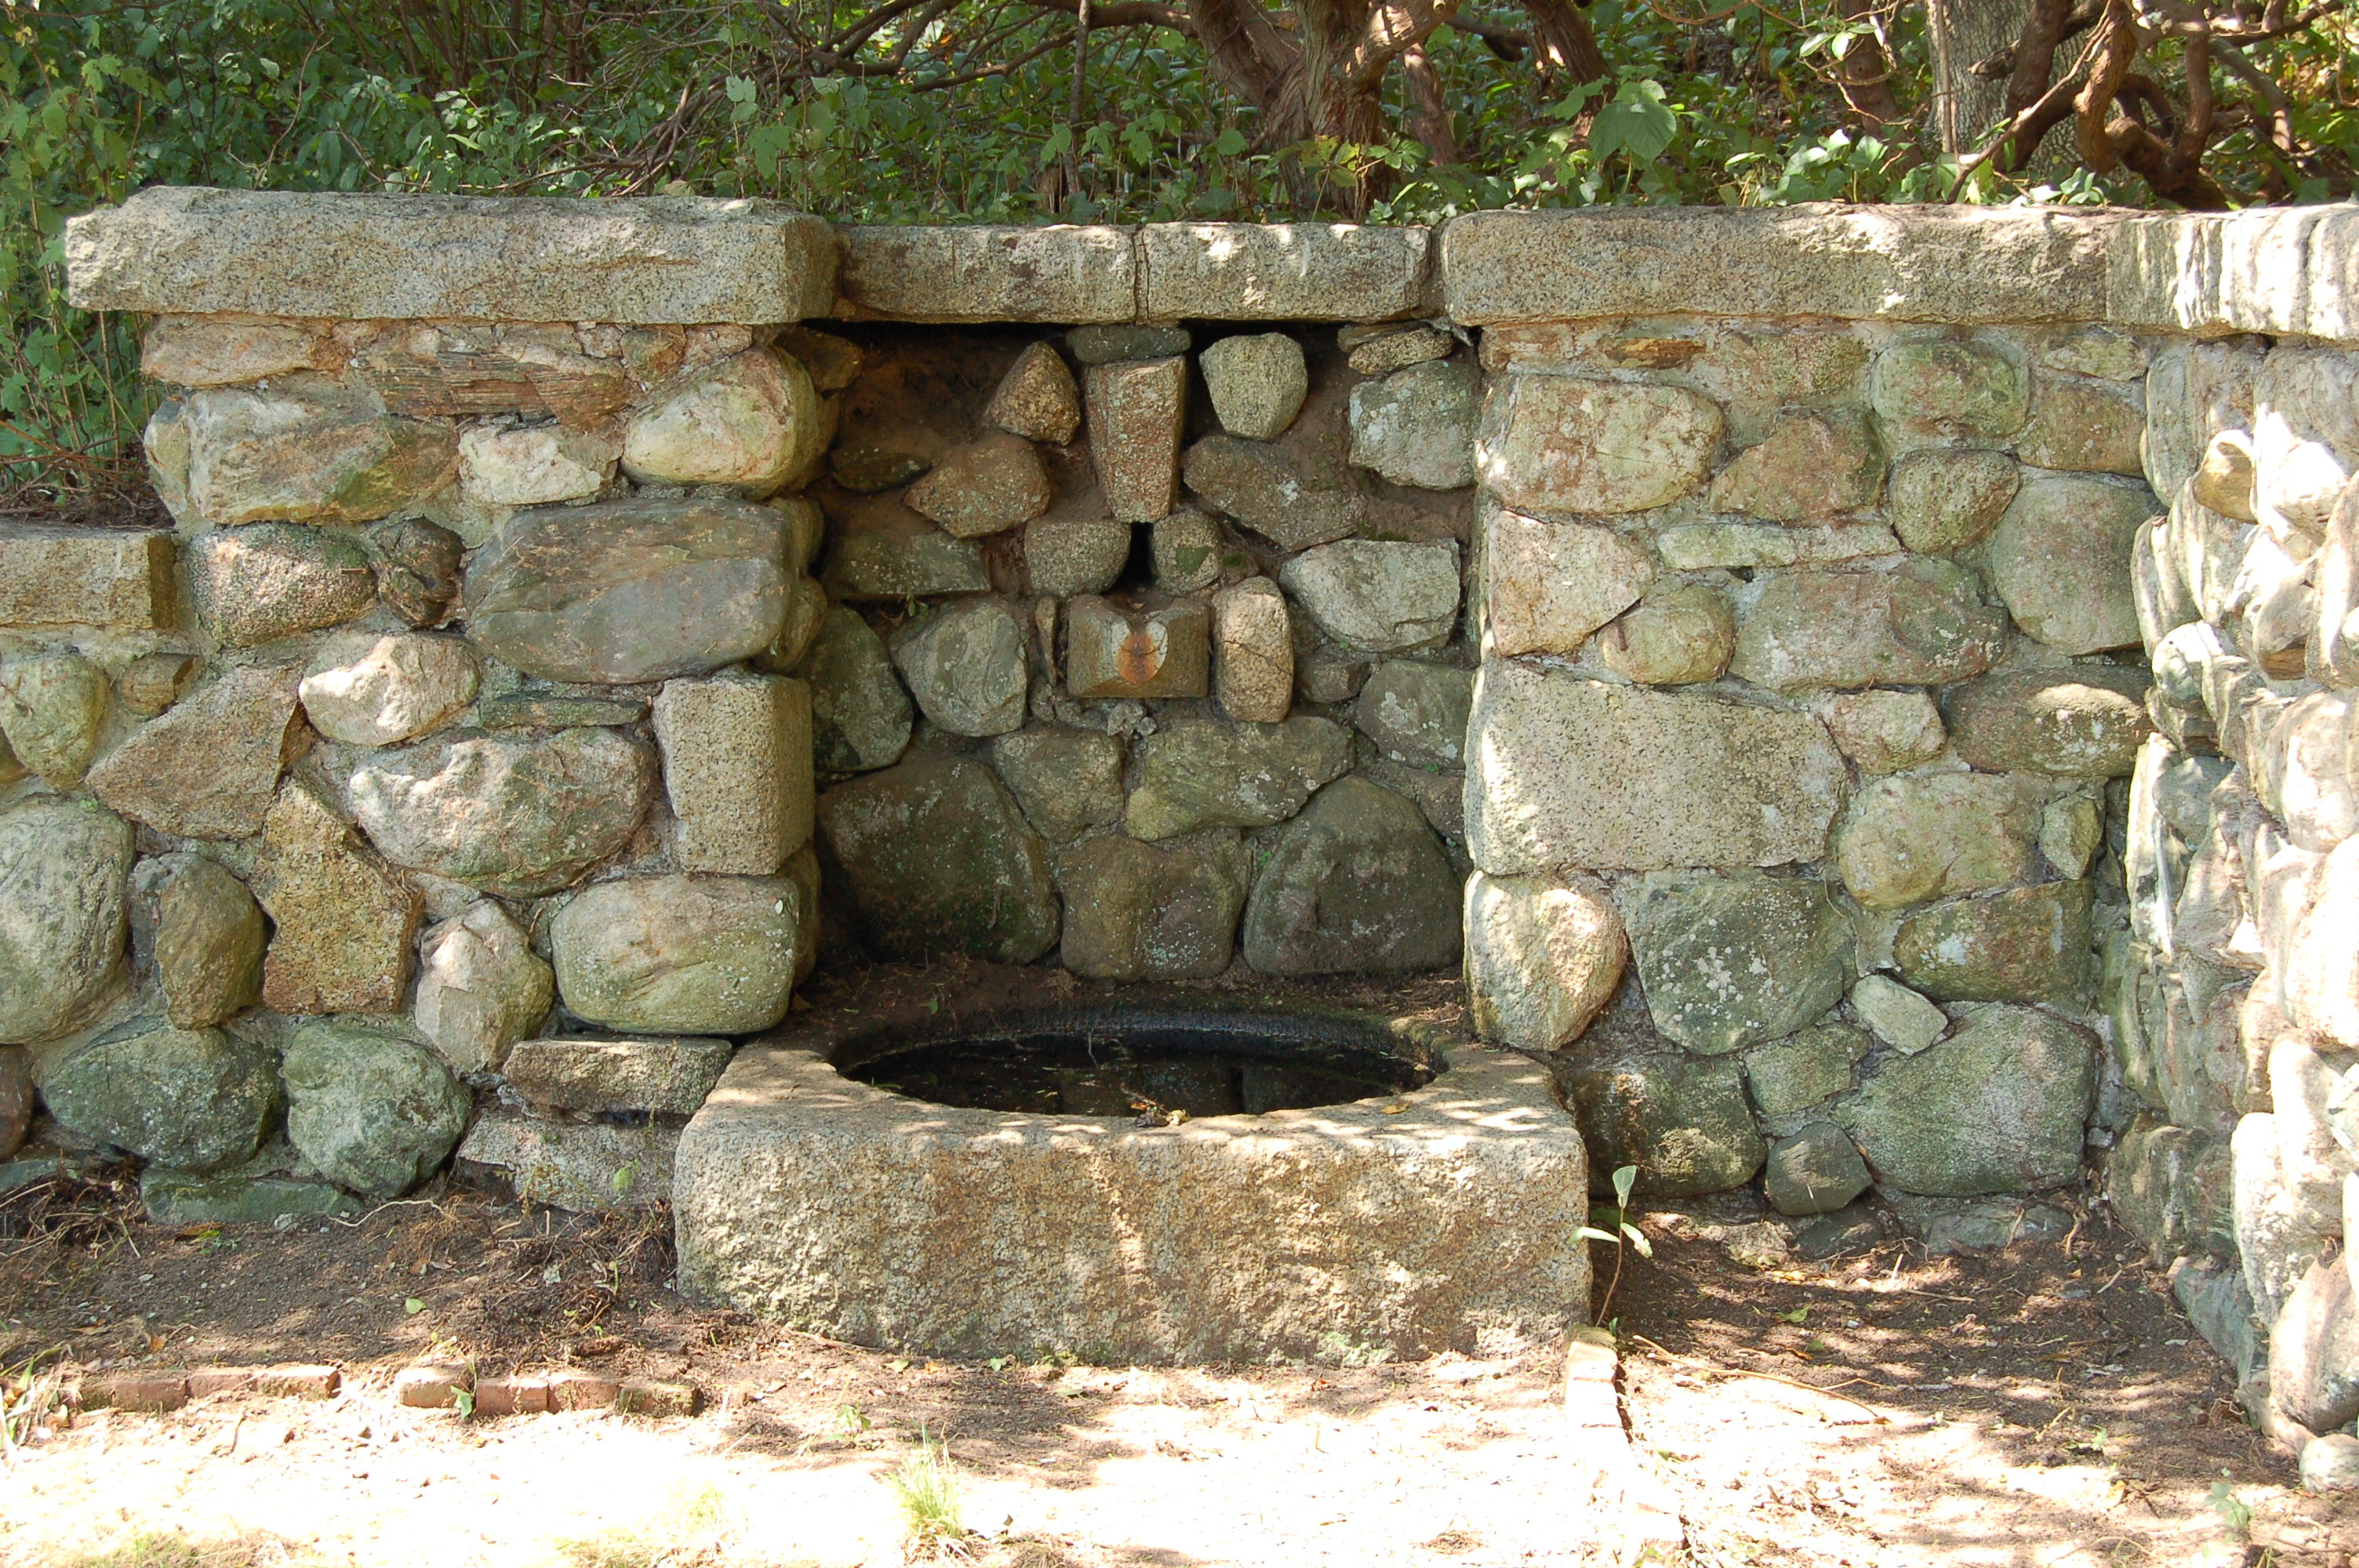
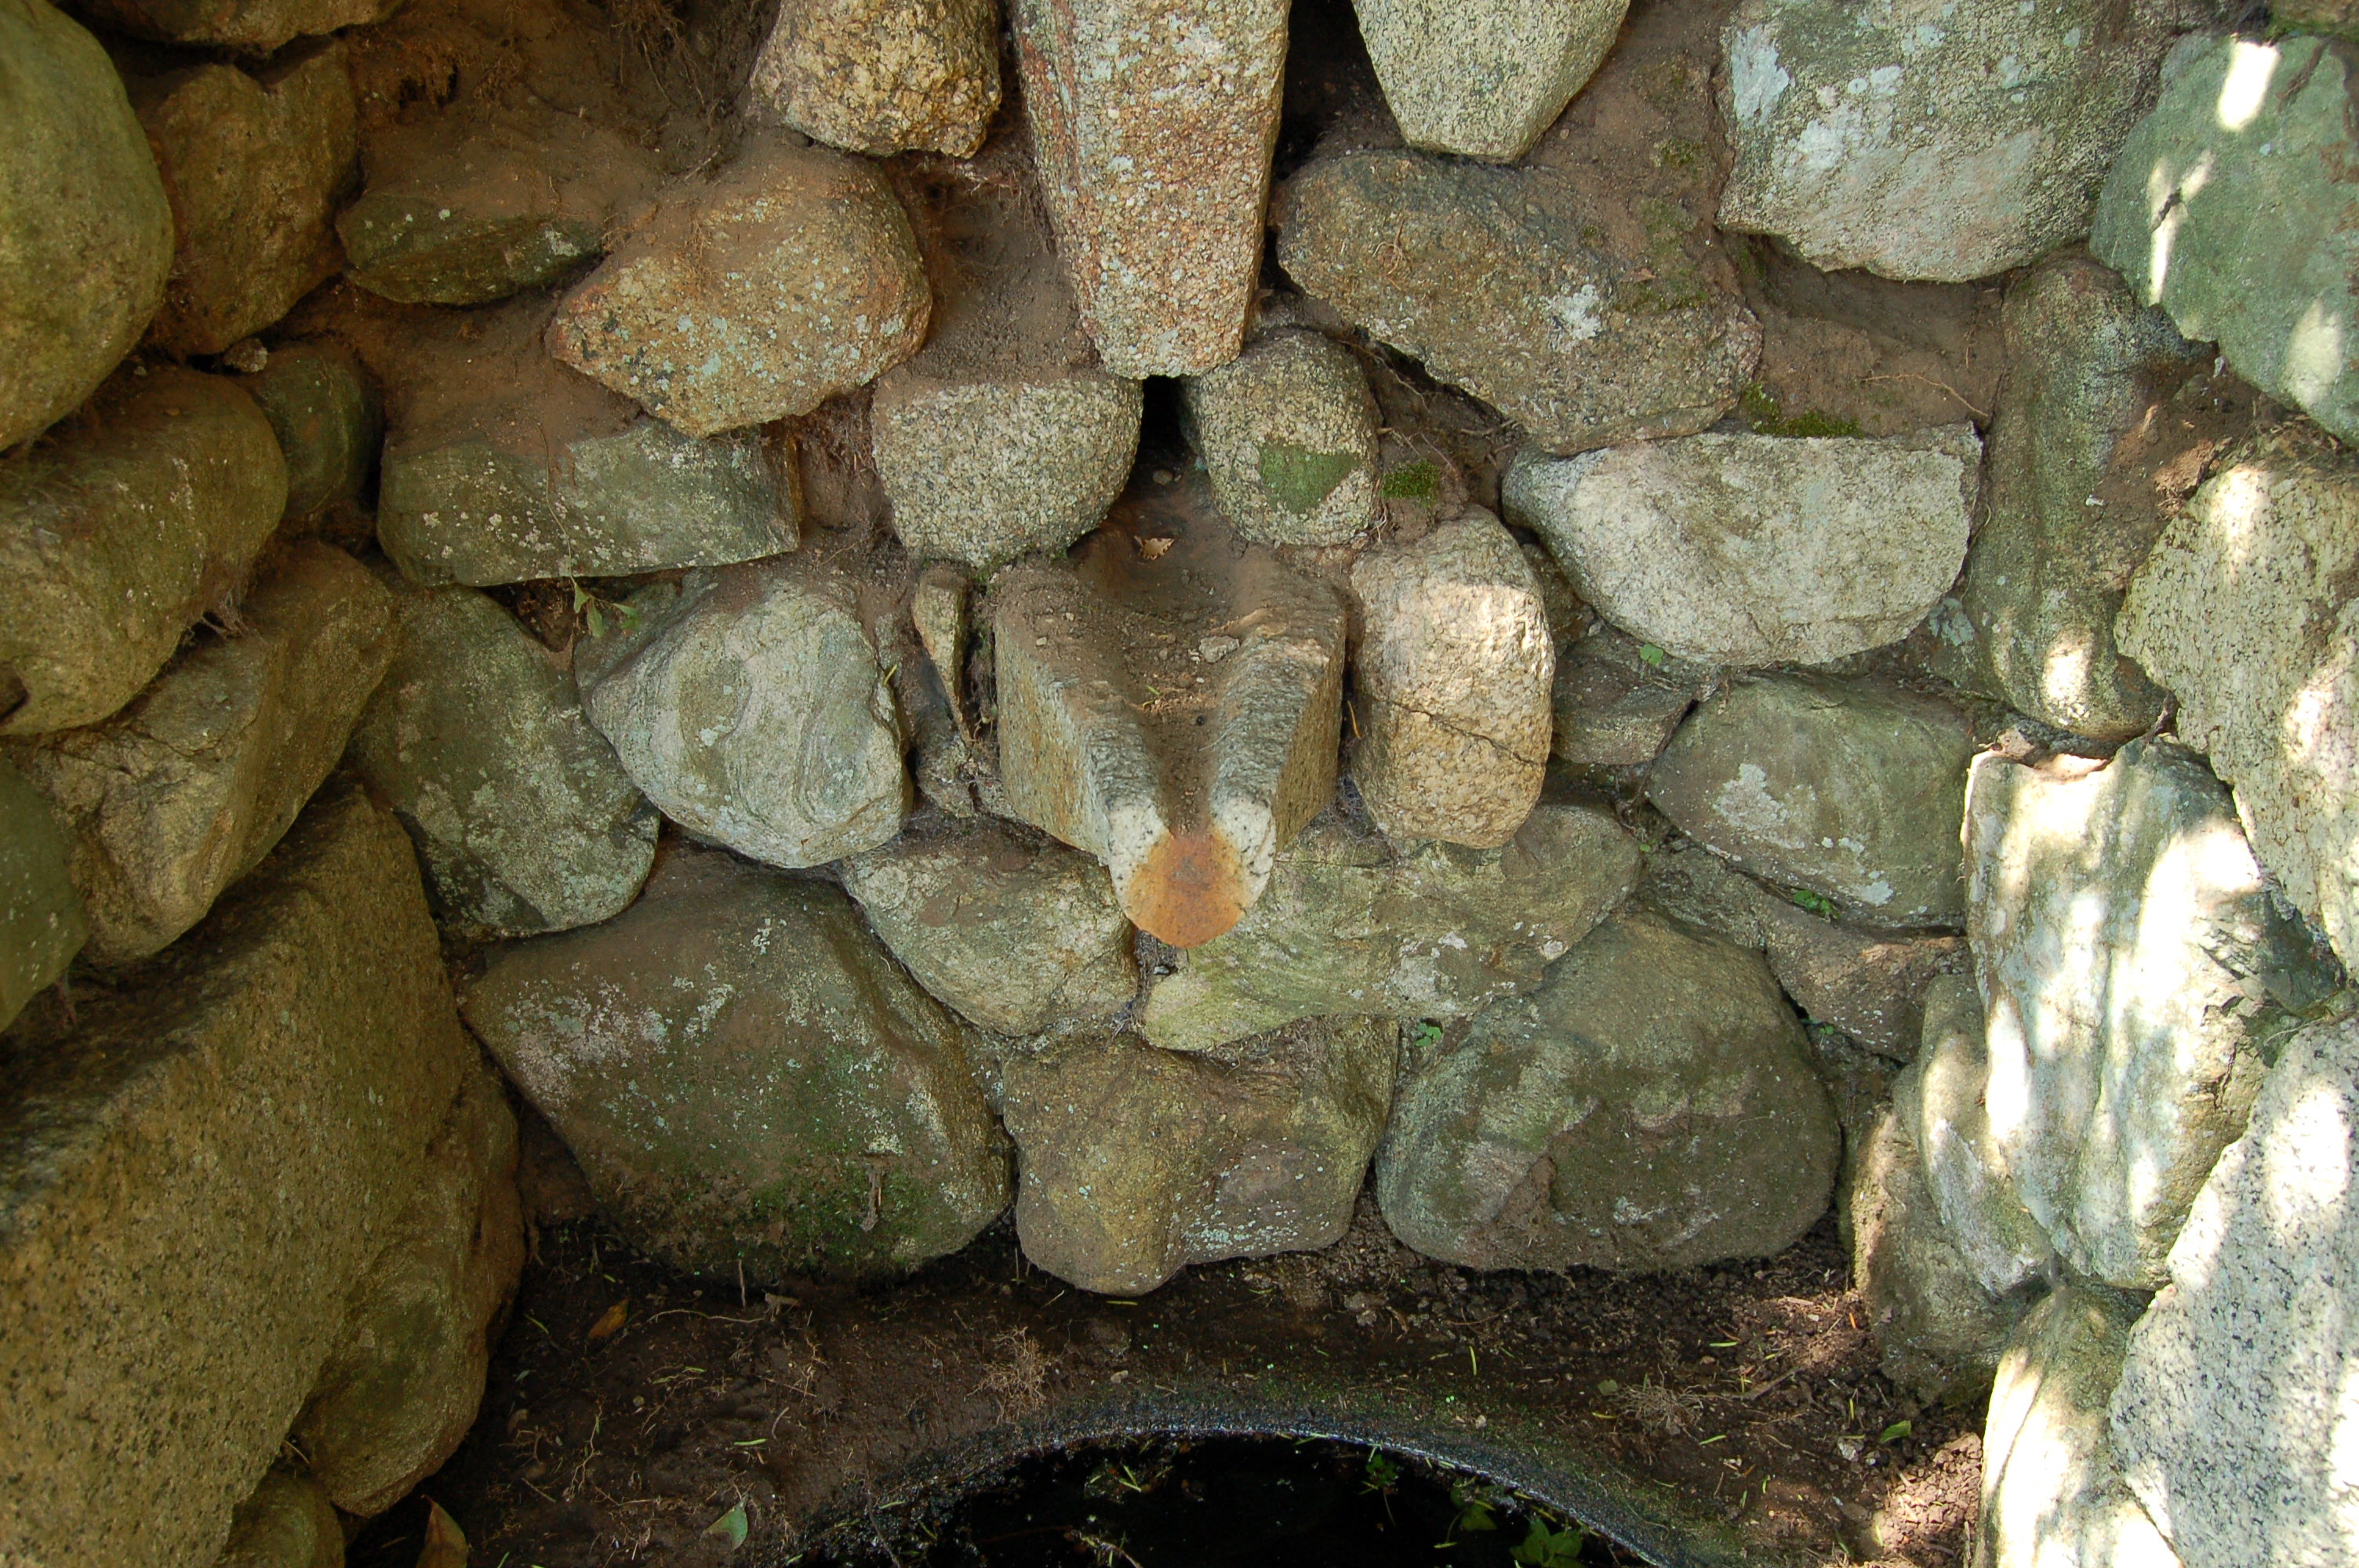
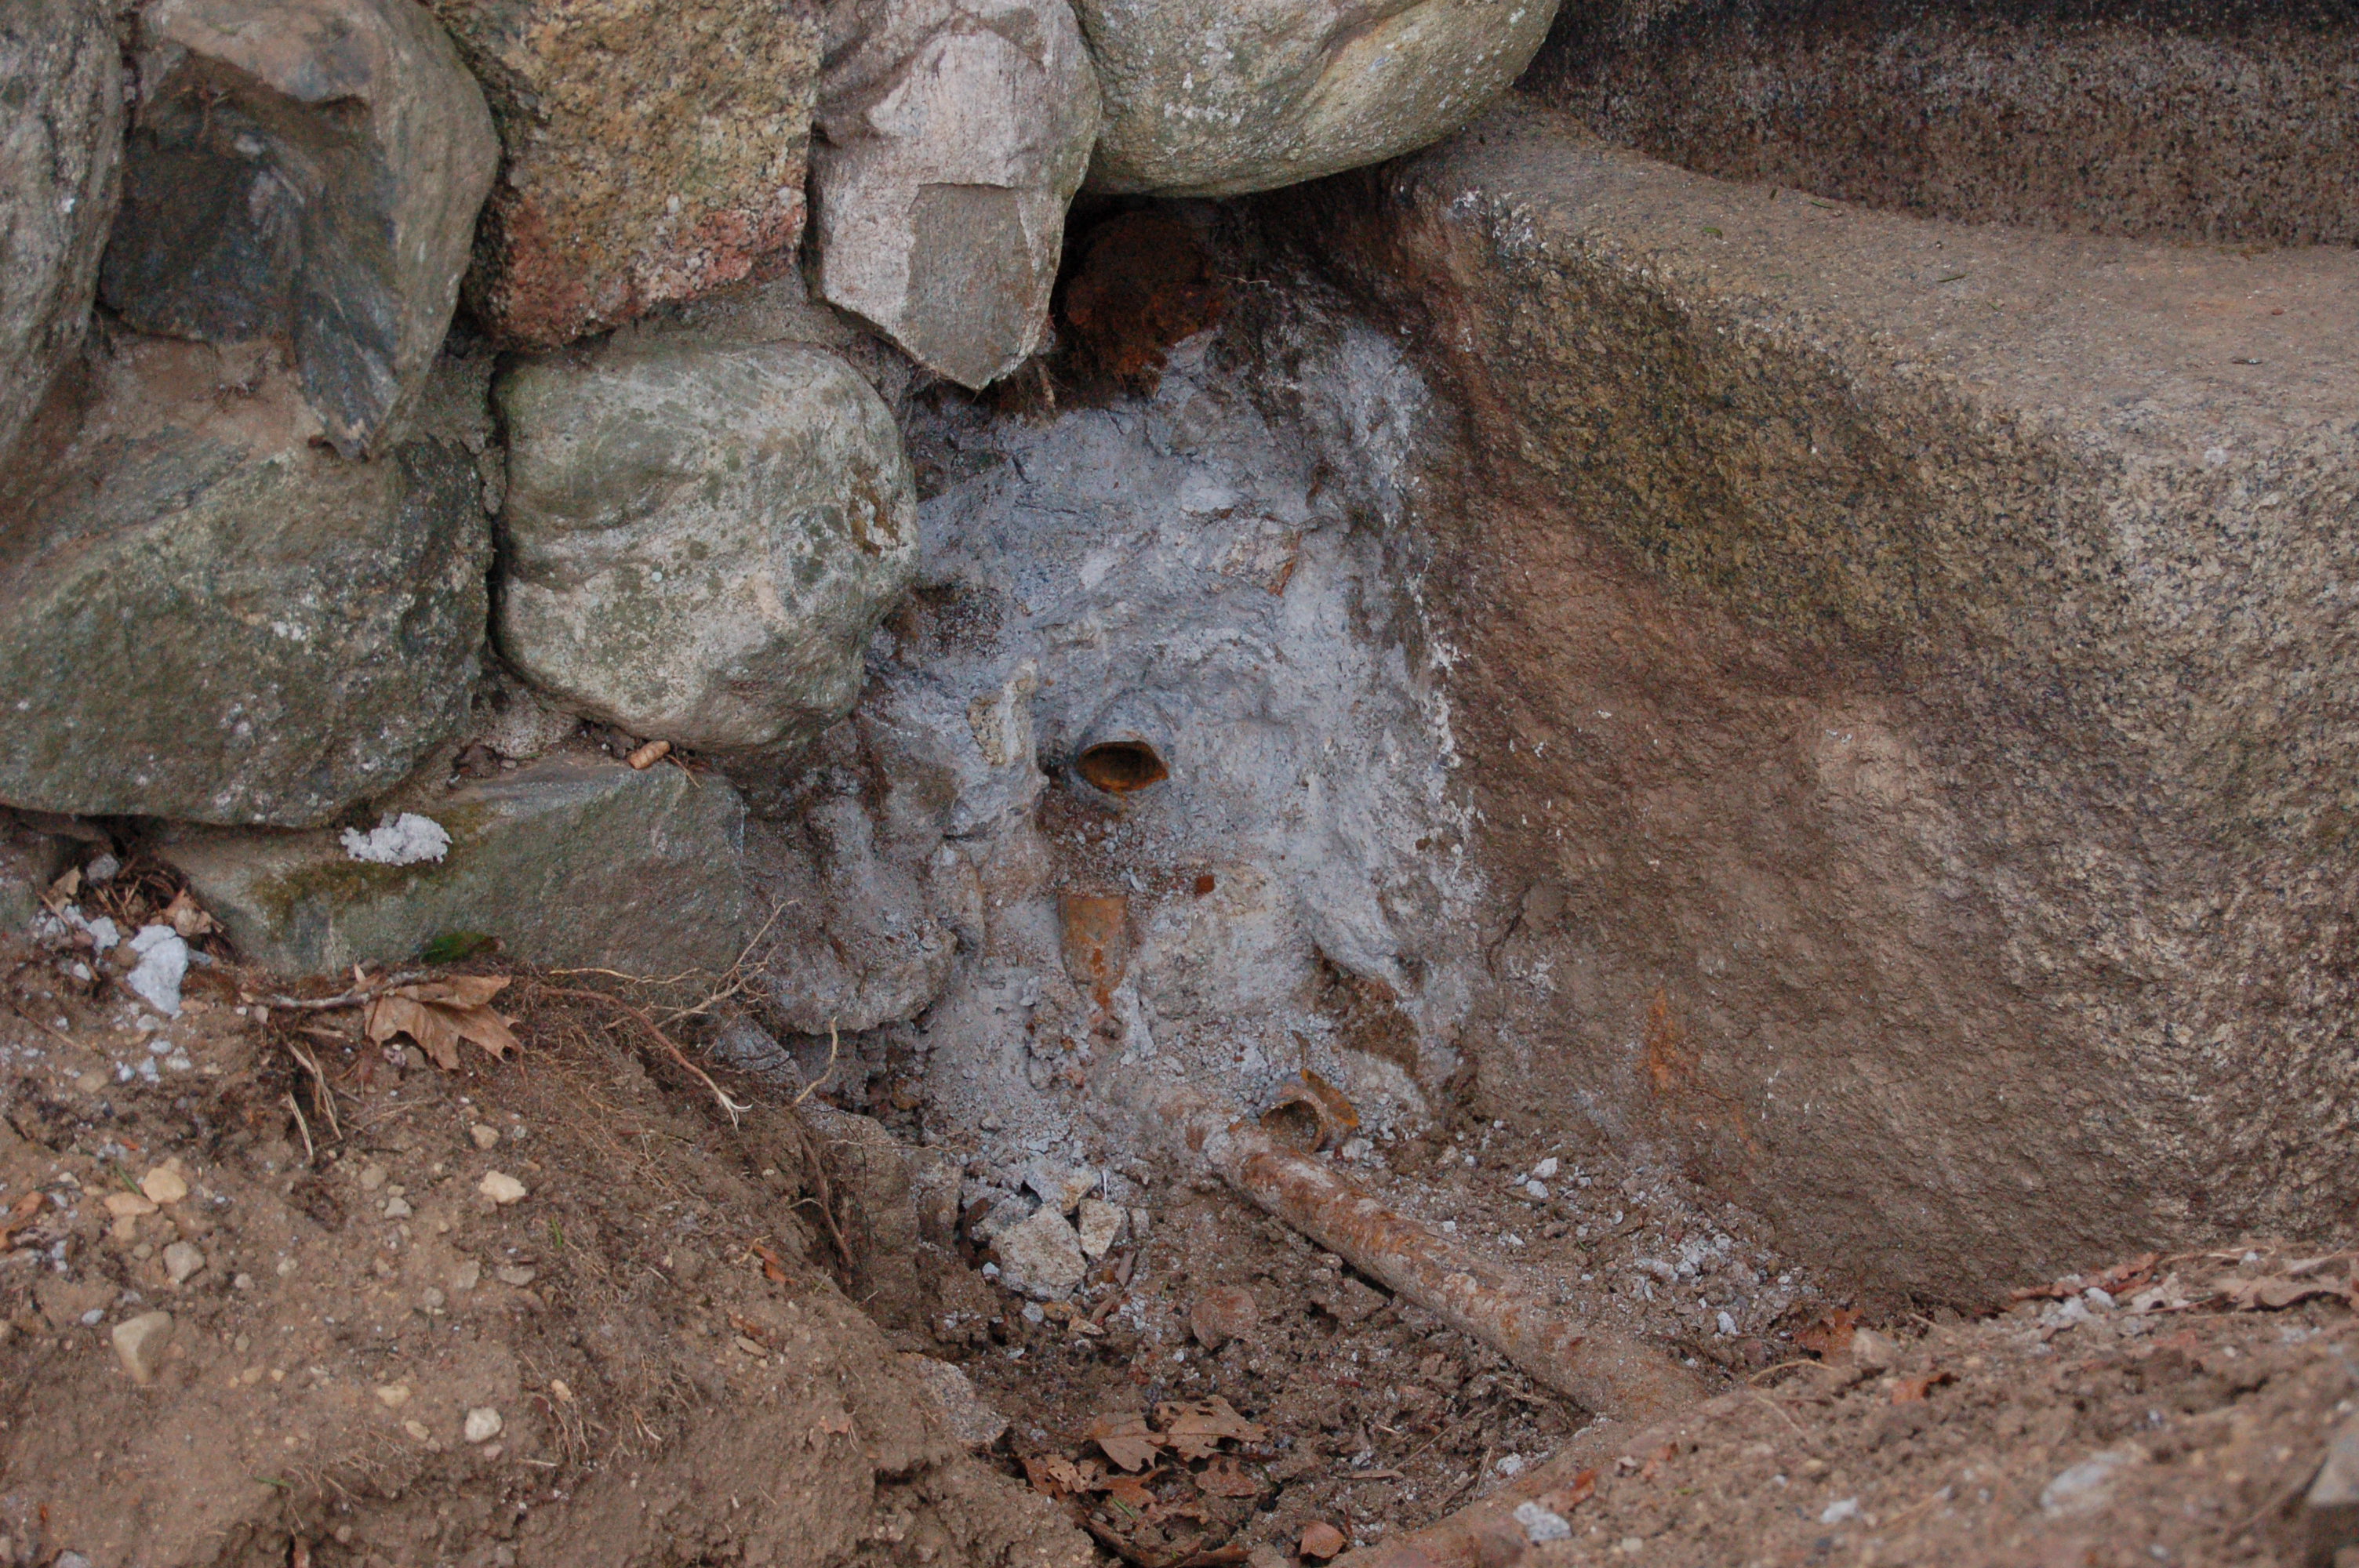
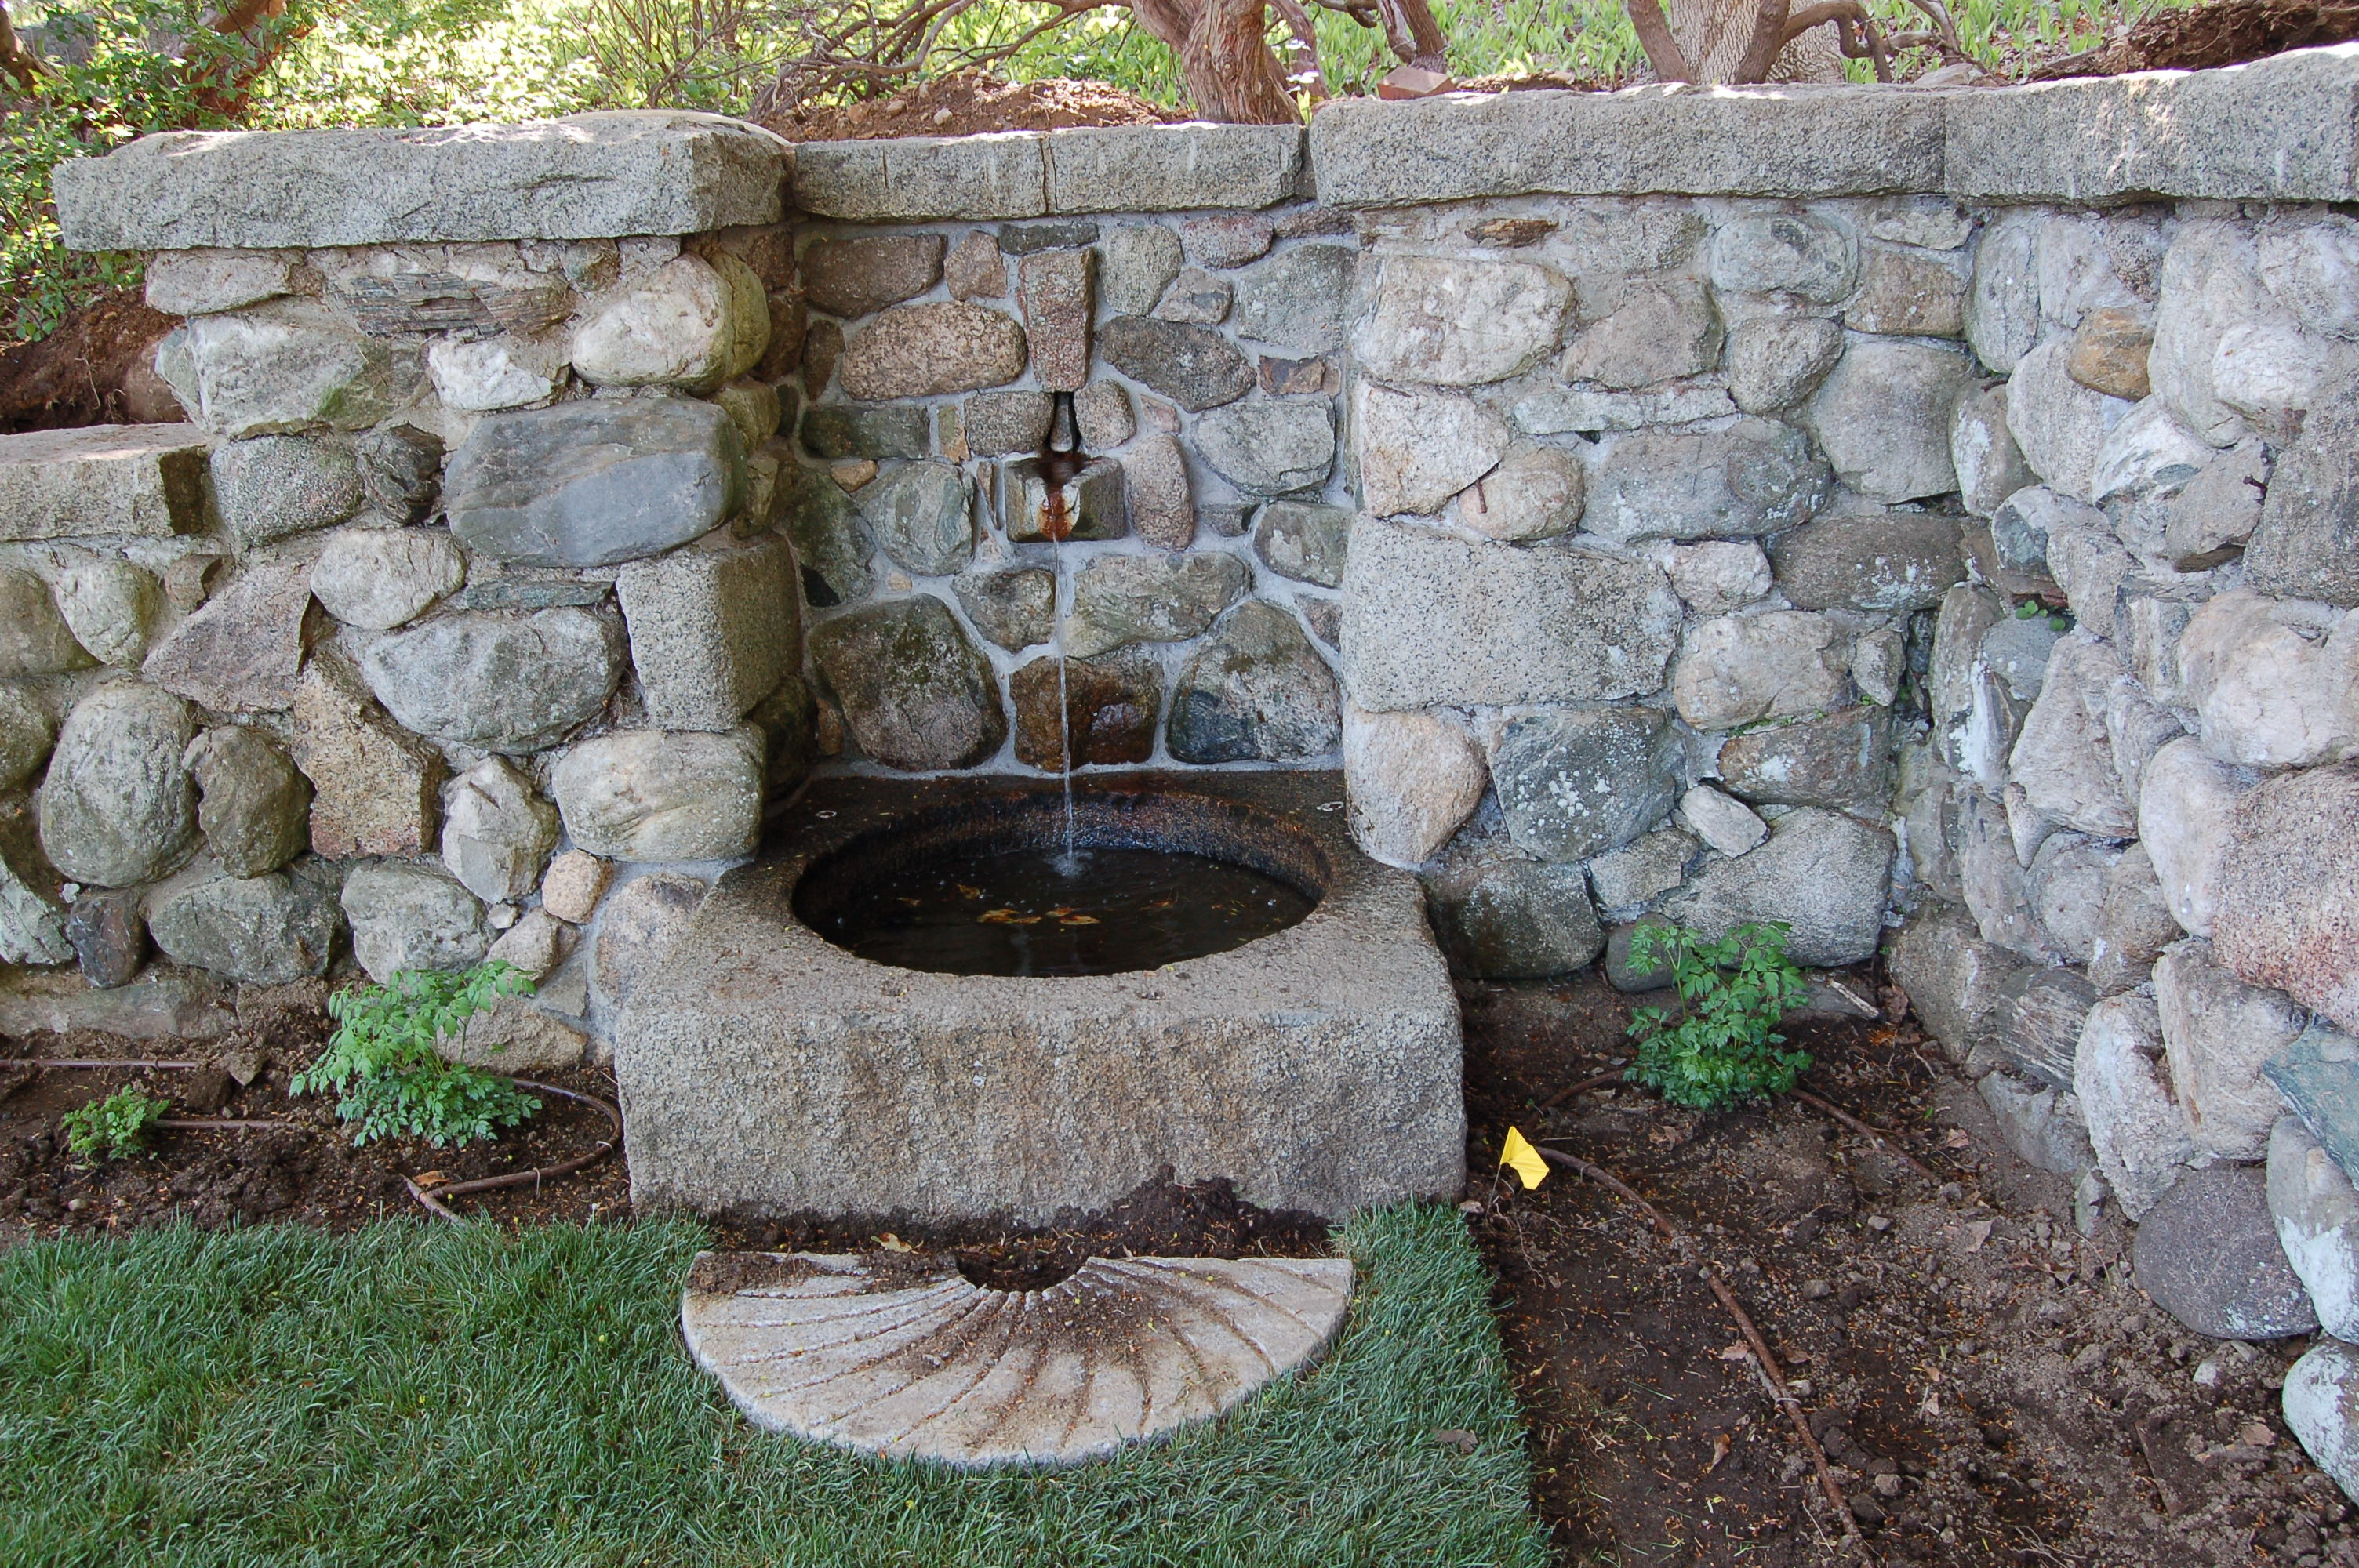
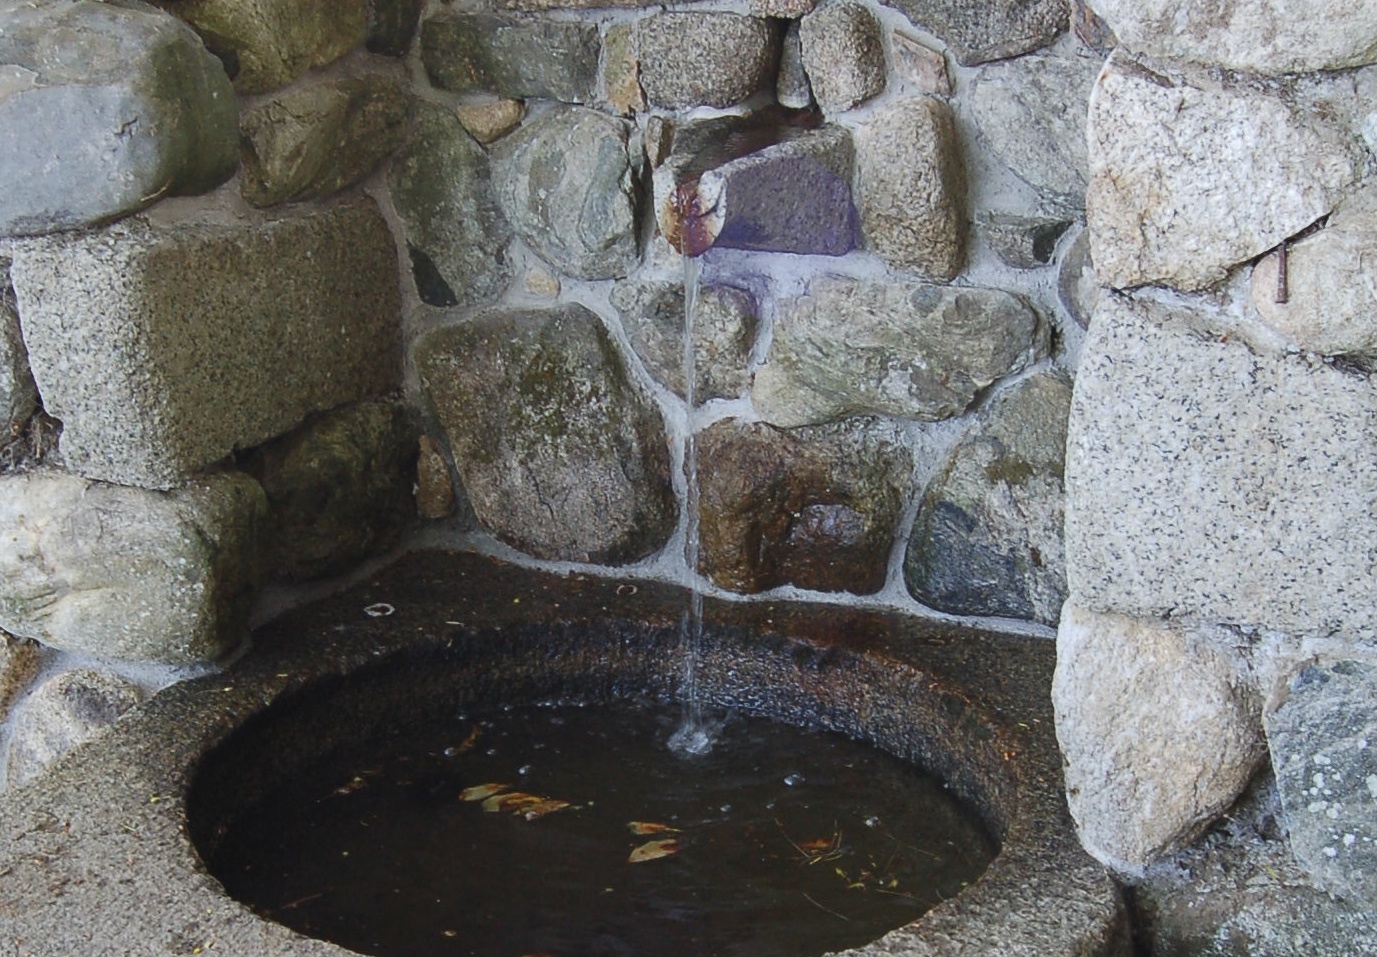
The small fountain's back and side walls were deeply infiltrated with roots and soil almost at the verge of collapse.
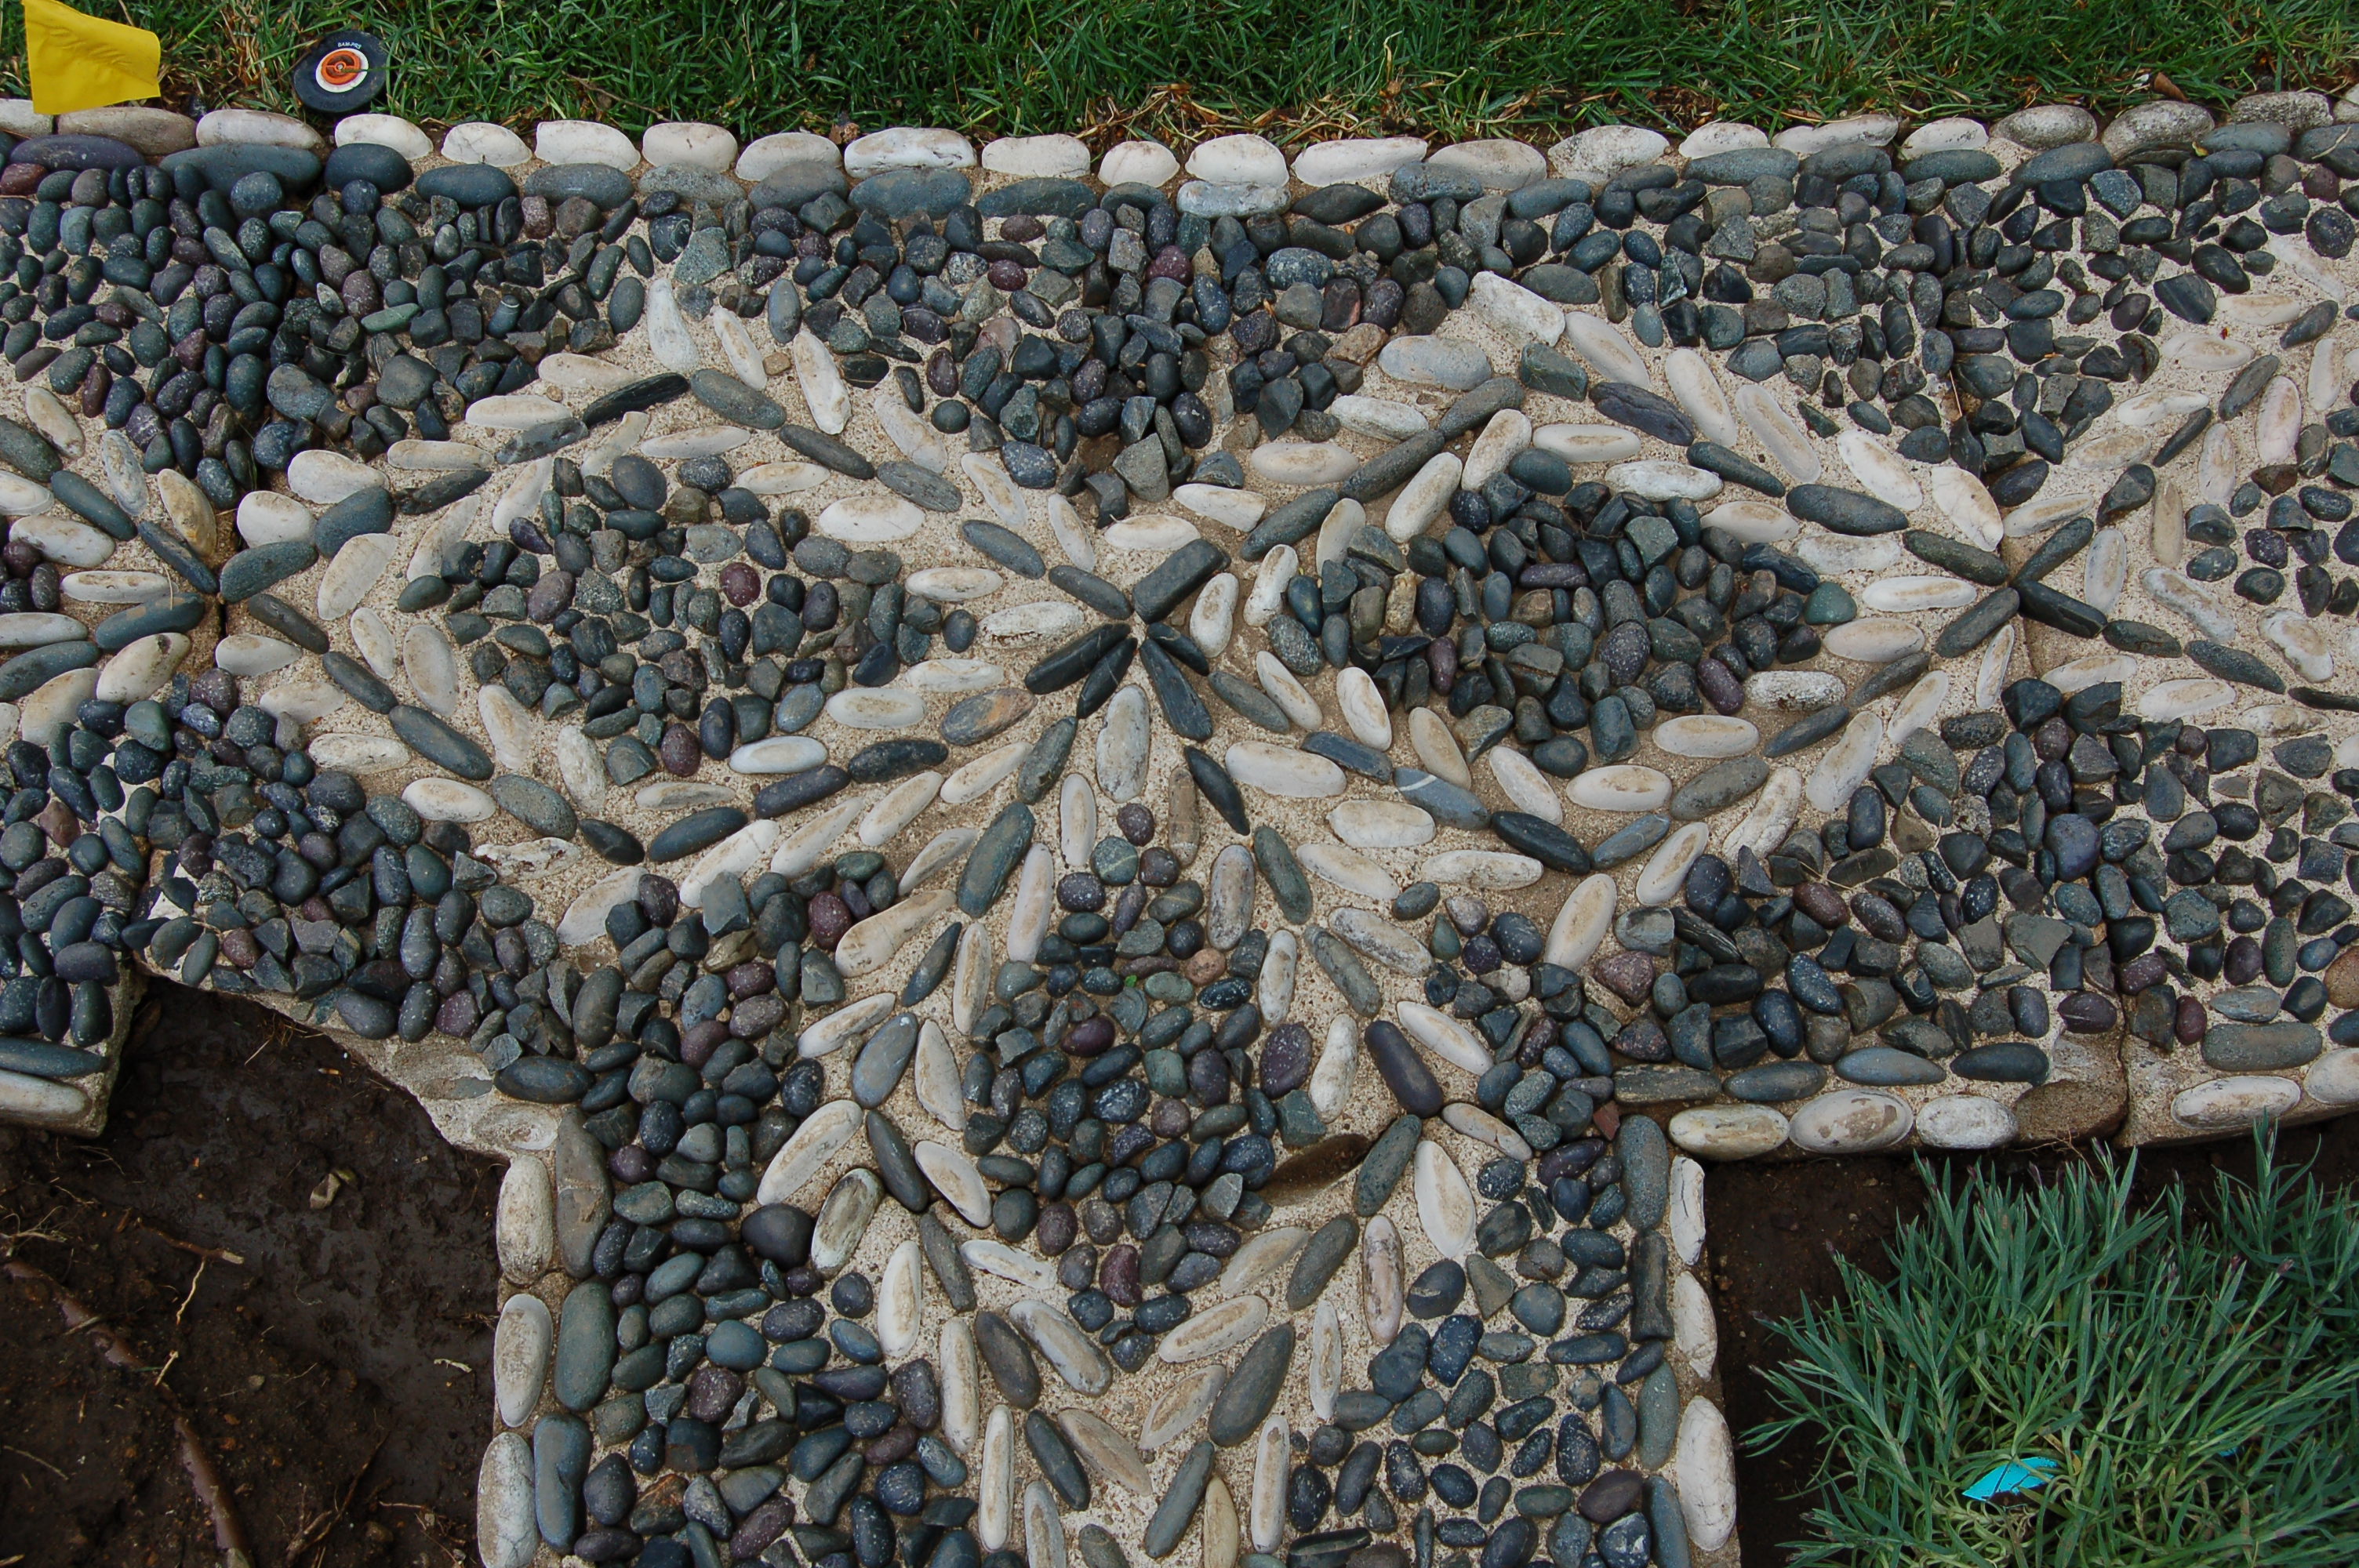
The exquisit pebble mosaic path was overgrown with moss and weeds, tree roots lifted the path in some areas. A considerable amount of pebbles were dislodged and missing.
The pond concrete liner was heavily damaged. It was cracked all the way around at about half height and the concrete disintegated as the water and soil ate through it.
It had layers upon layers of surface repair attempts added through the years, none of which seemed to have been very effective at keeping the vessel from leaking.
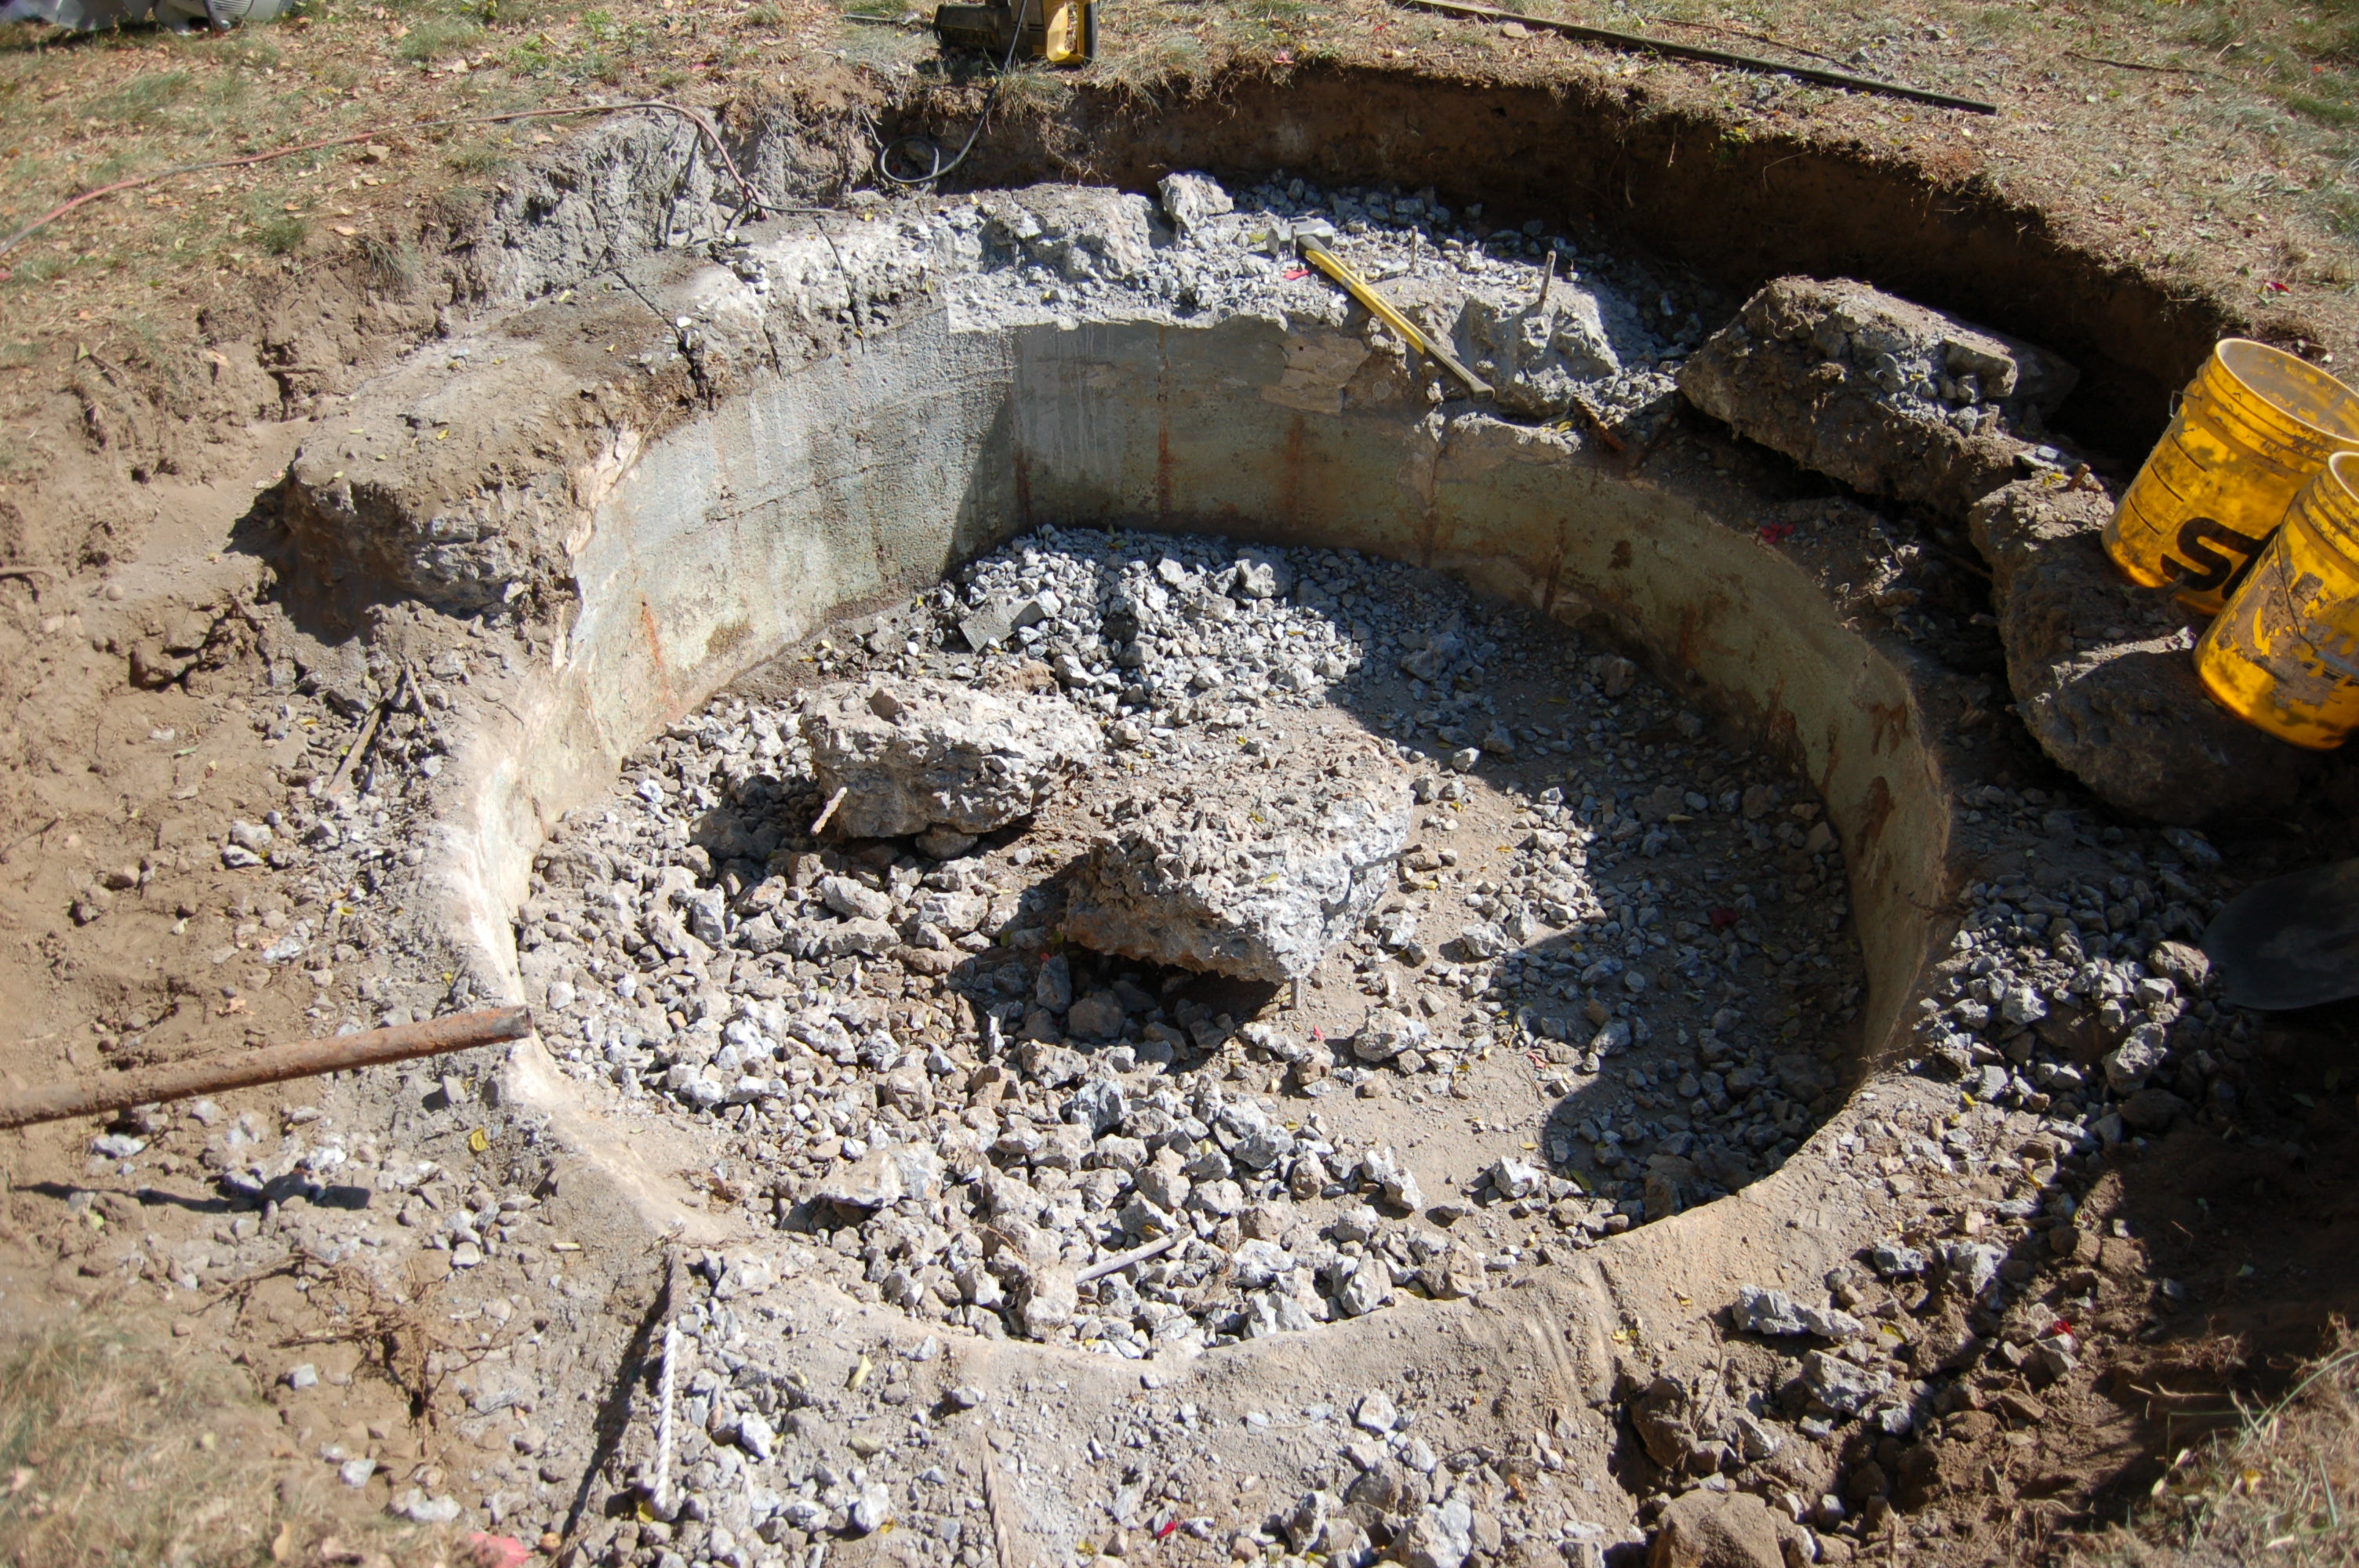
I removed all the compromised concrete just to about 8 inches above the pond floor, chipped away at the inside surface of the remaining vertical wall, roughened the floor and built a form over the original concrete base. My goal was to "encapsulate" the remaining concrete structure maintaining the original size and put back the original granite coping.. I built a custom form, a steel cage was put in place and anchored onto the remaining outer wall and new concrete was poured.
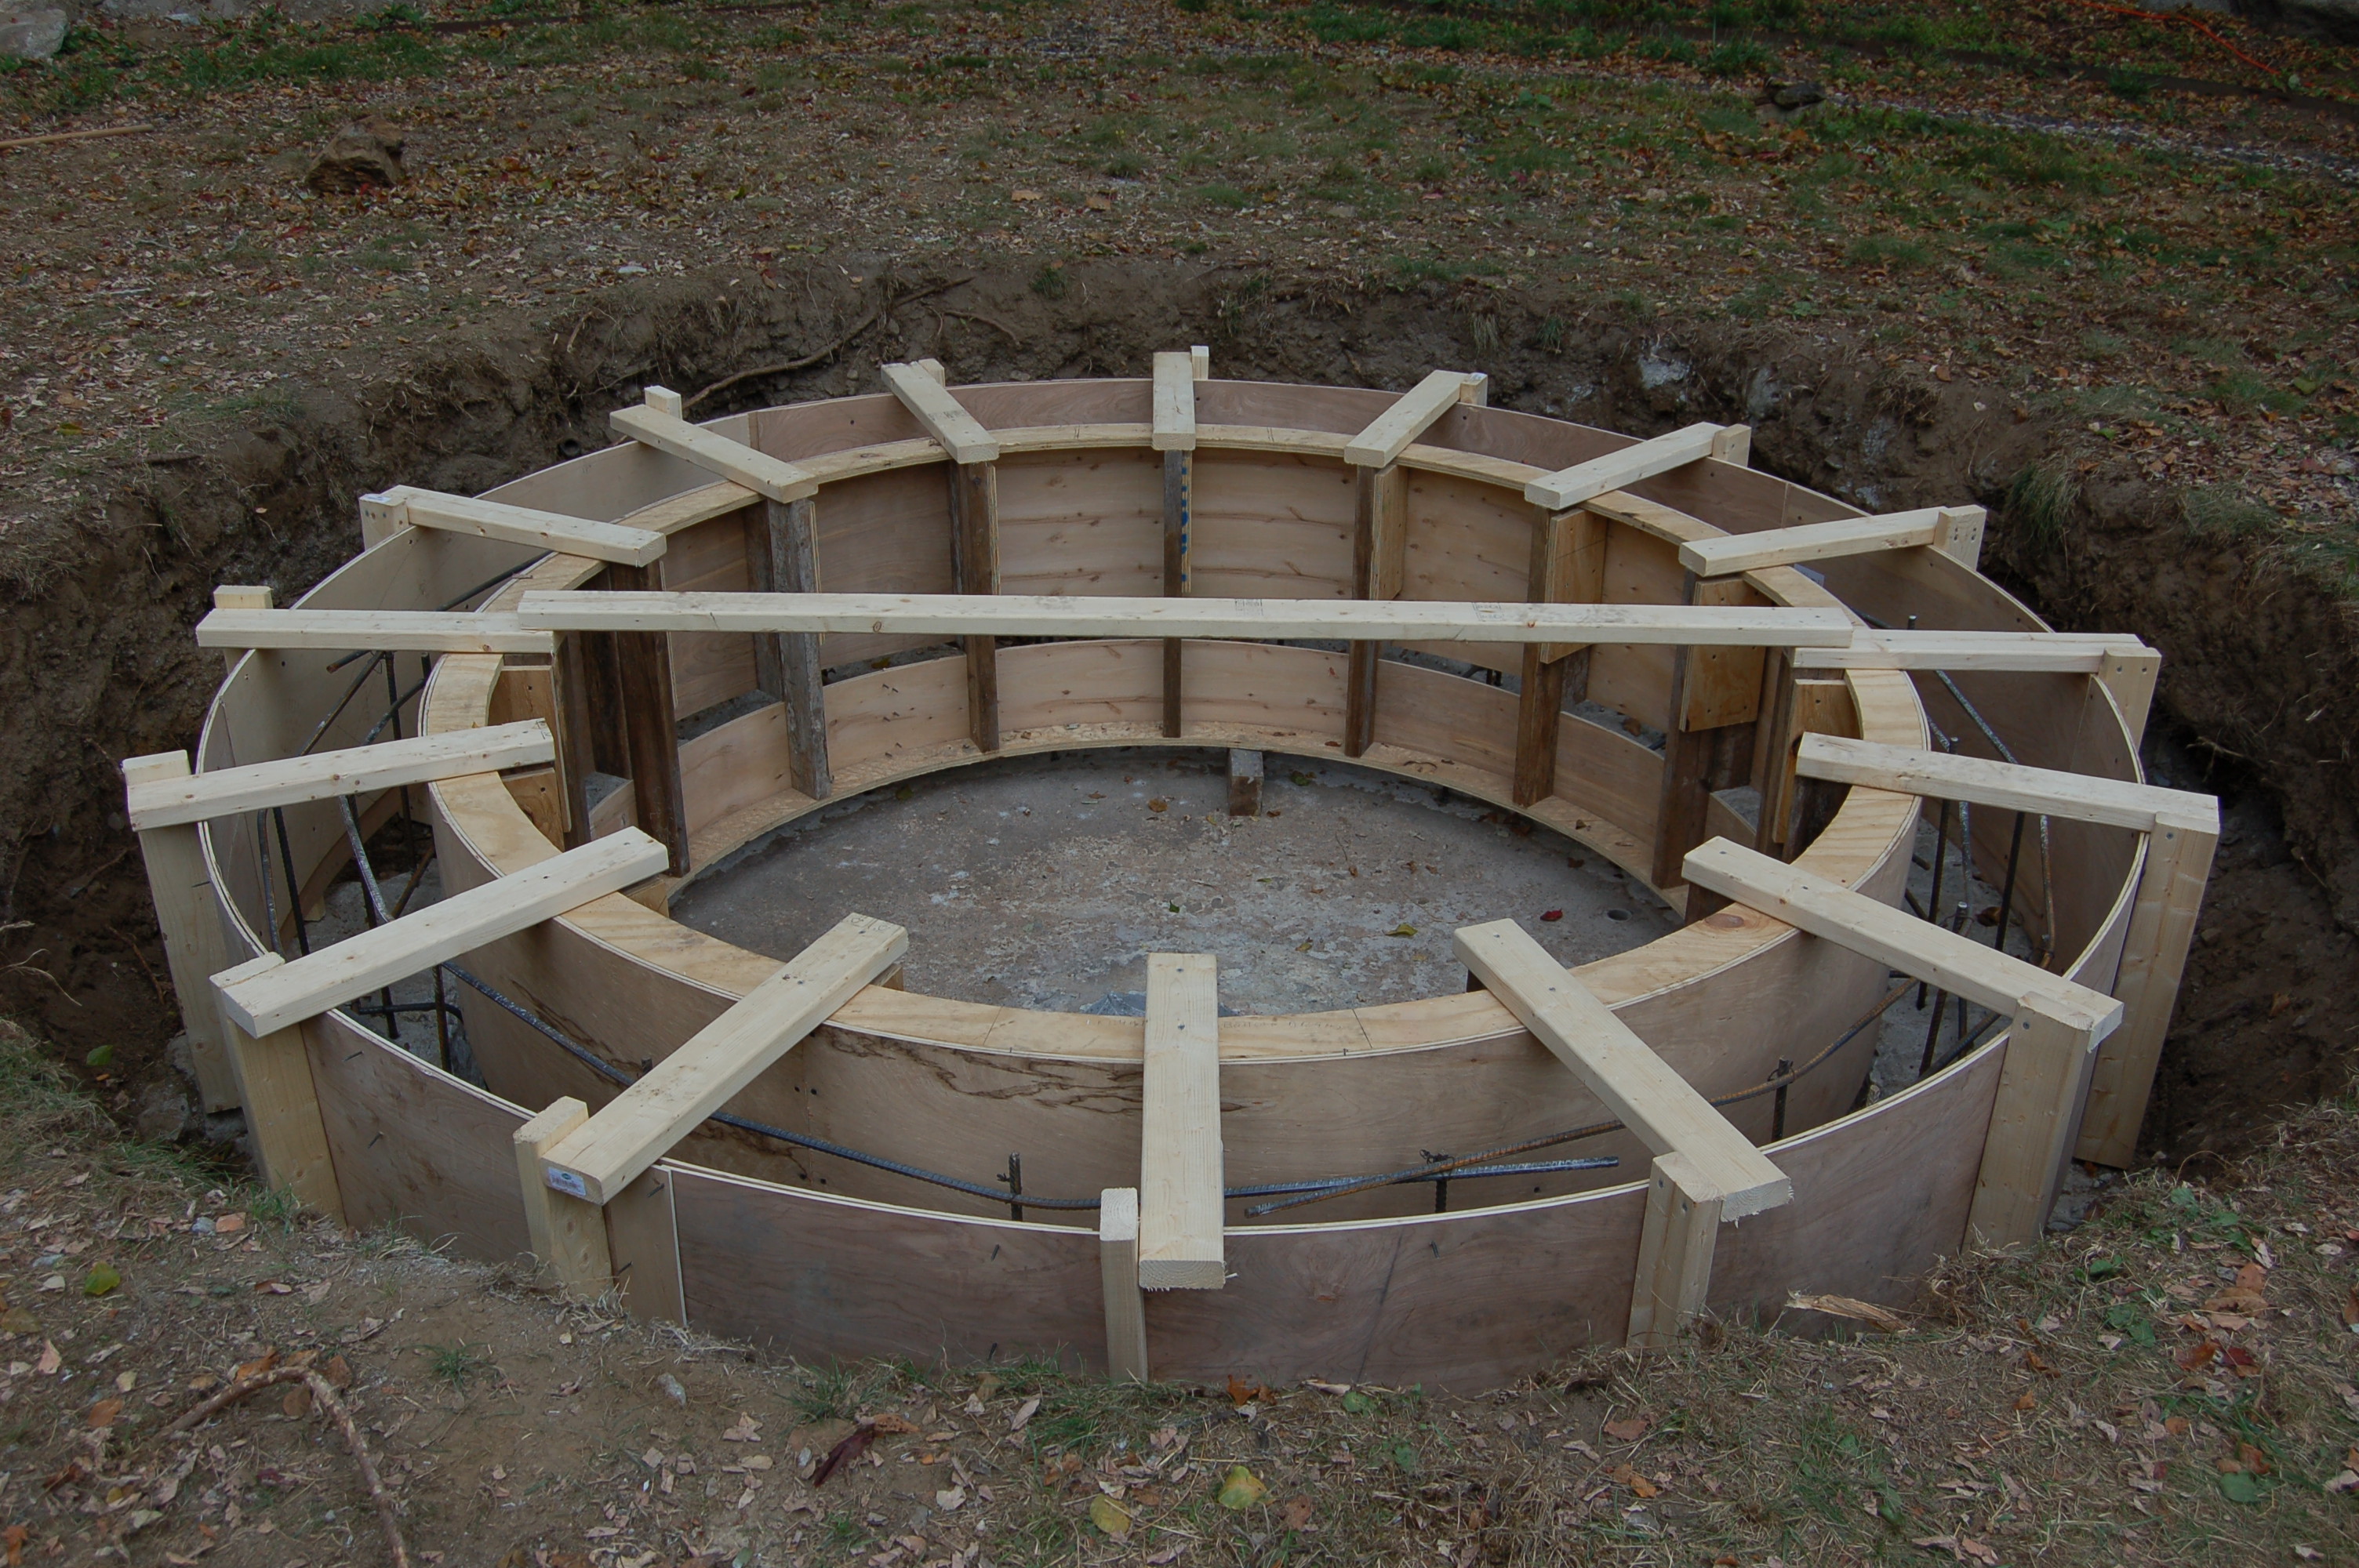
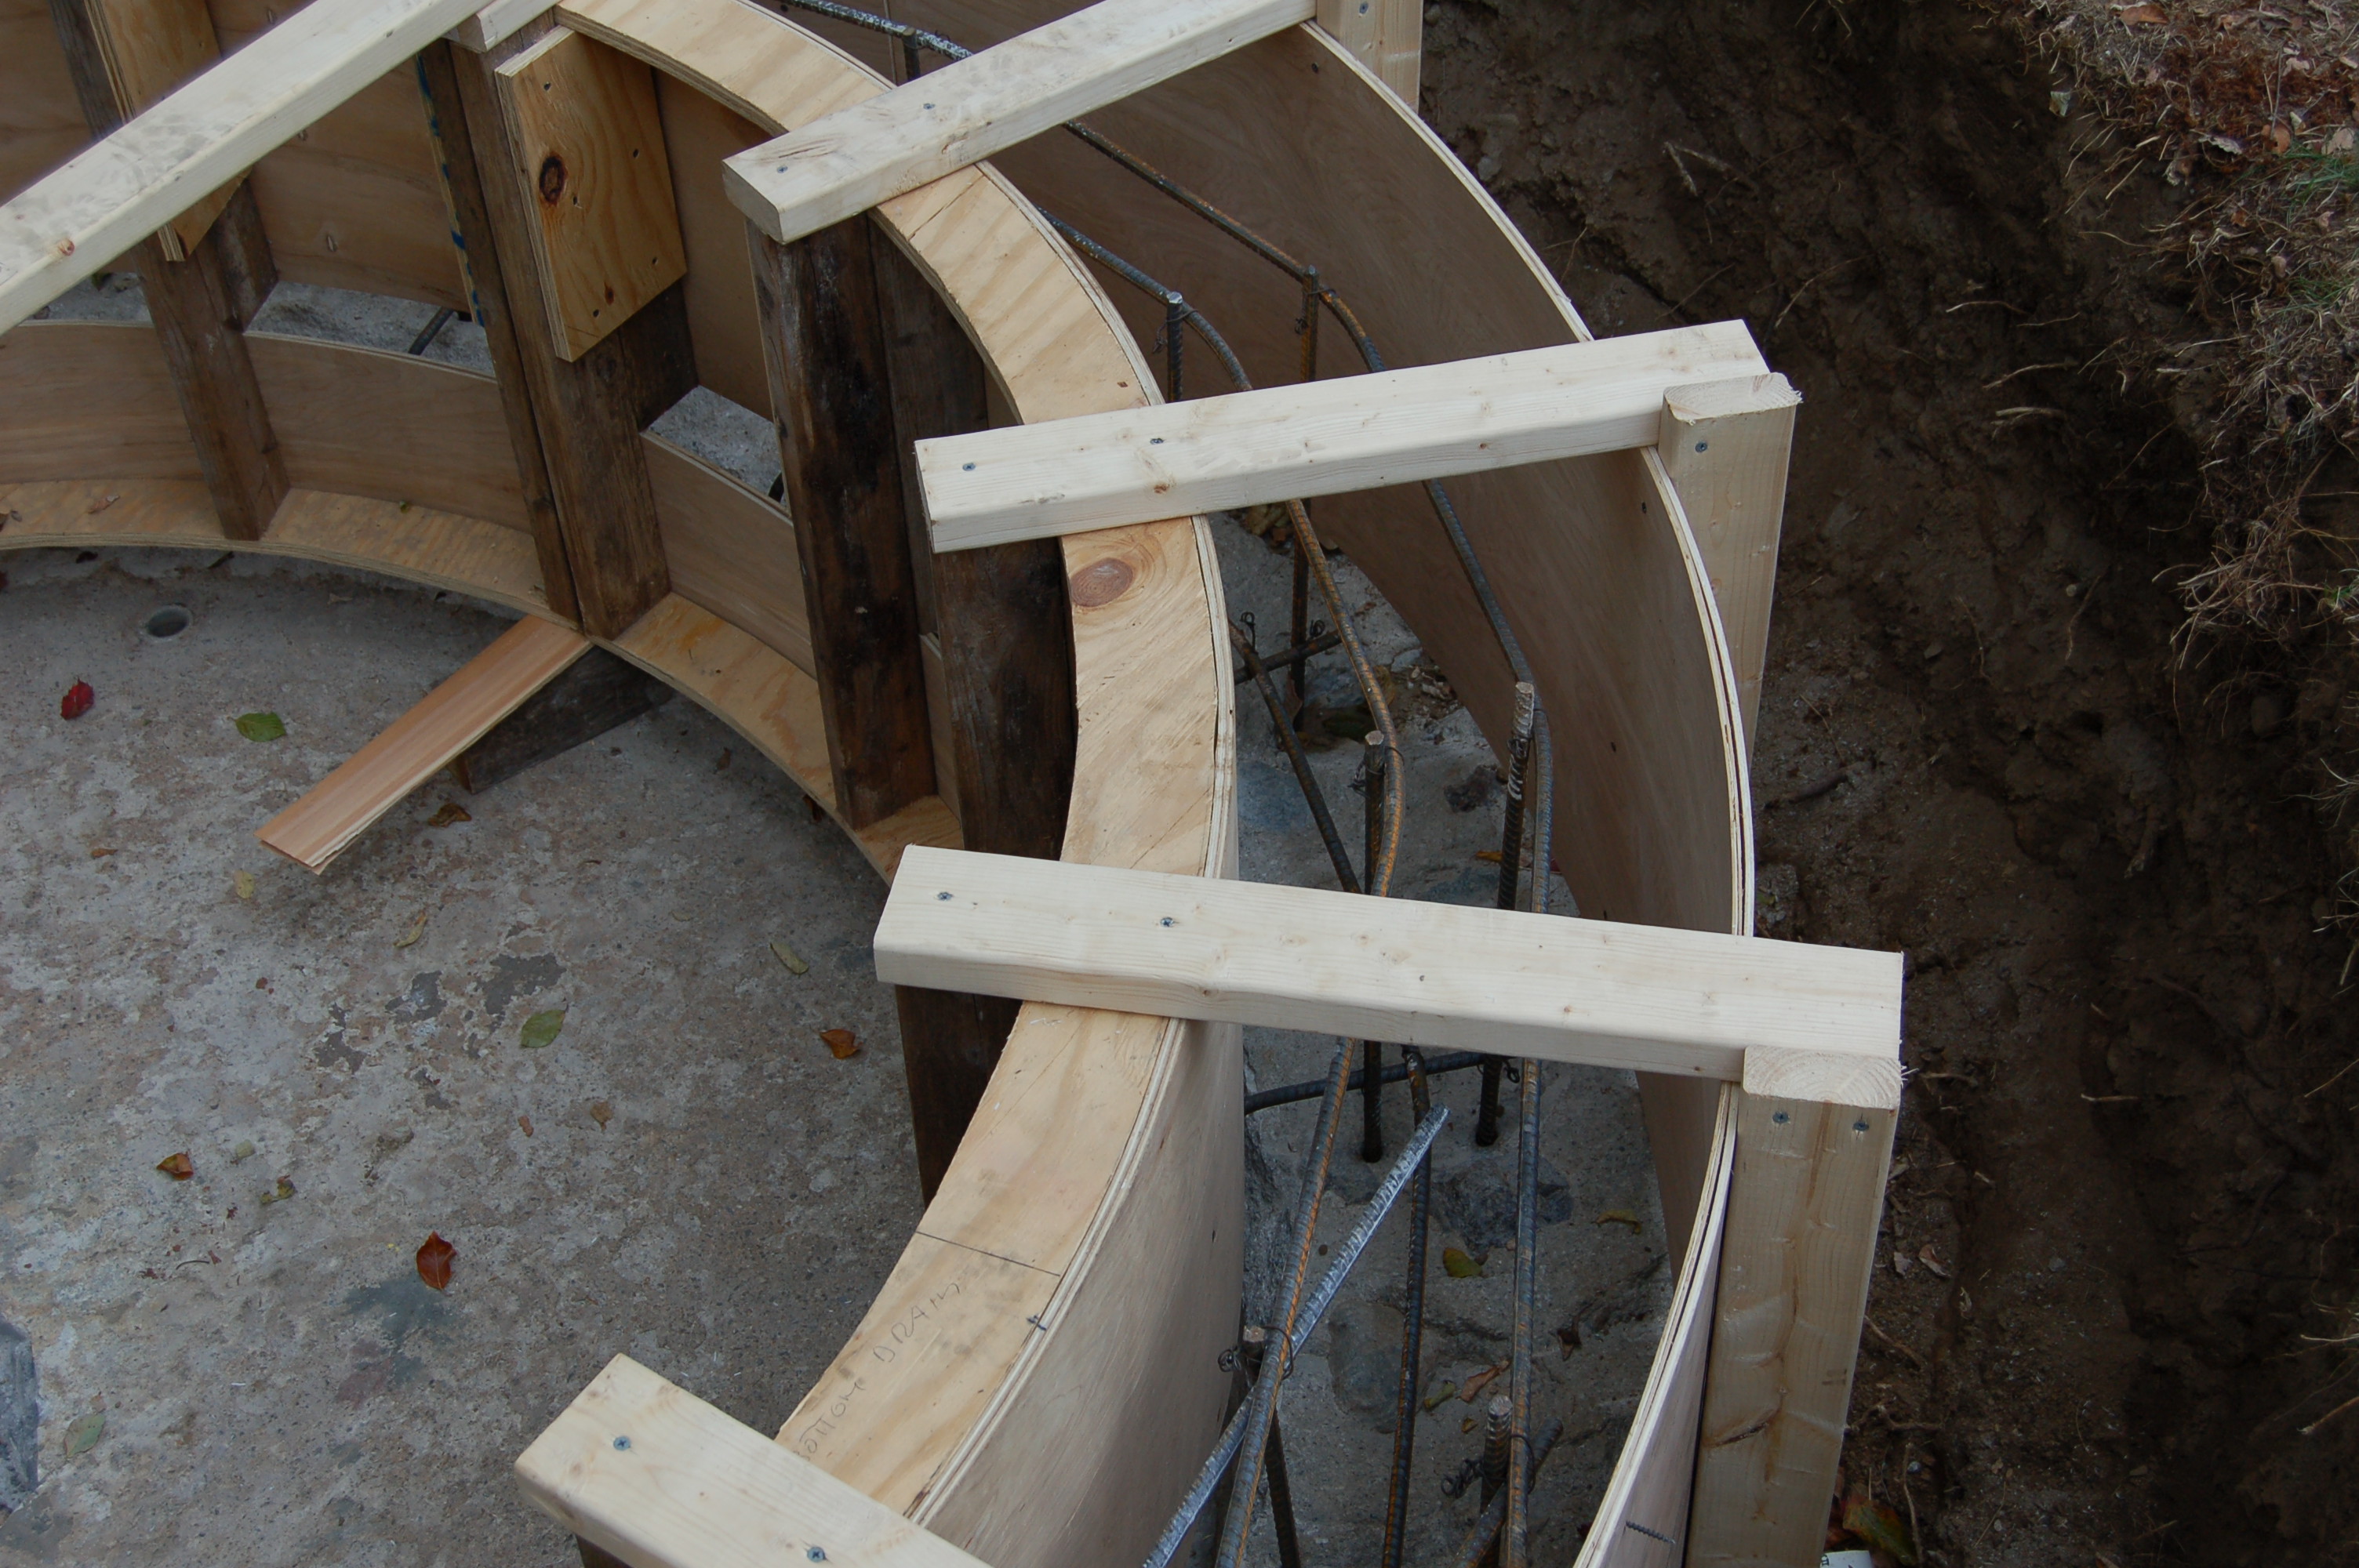
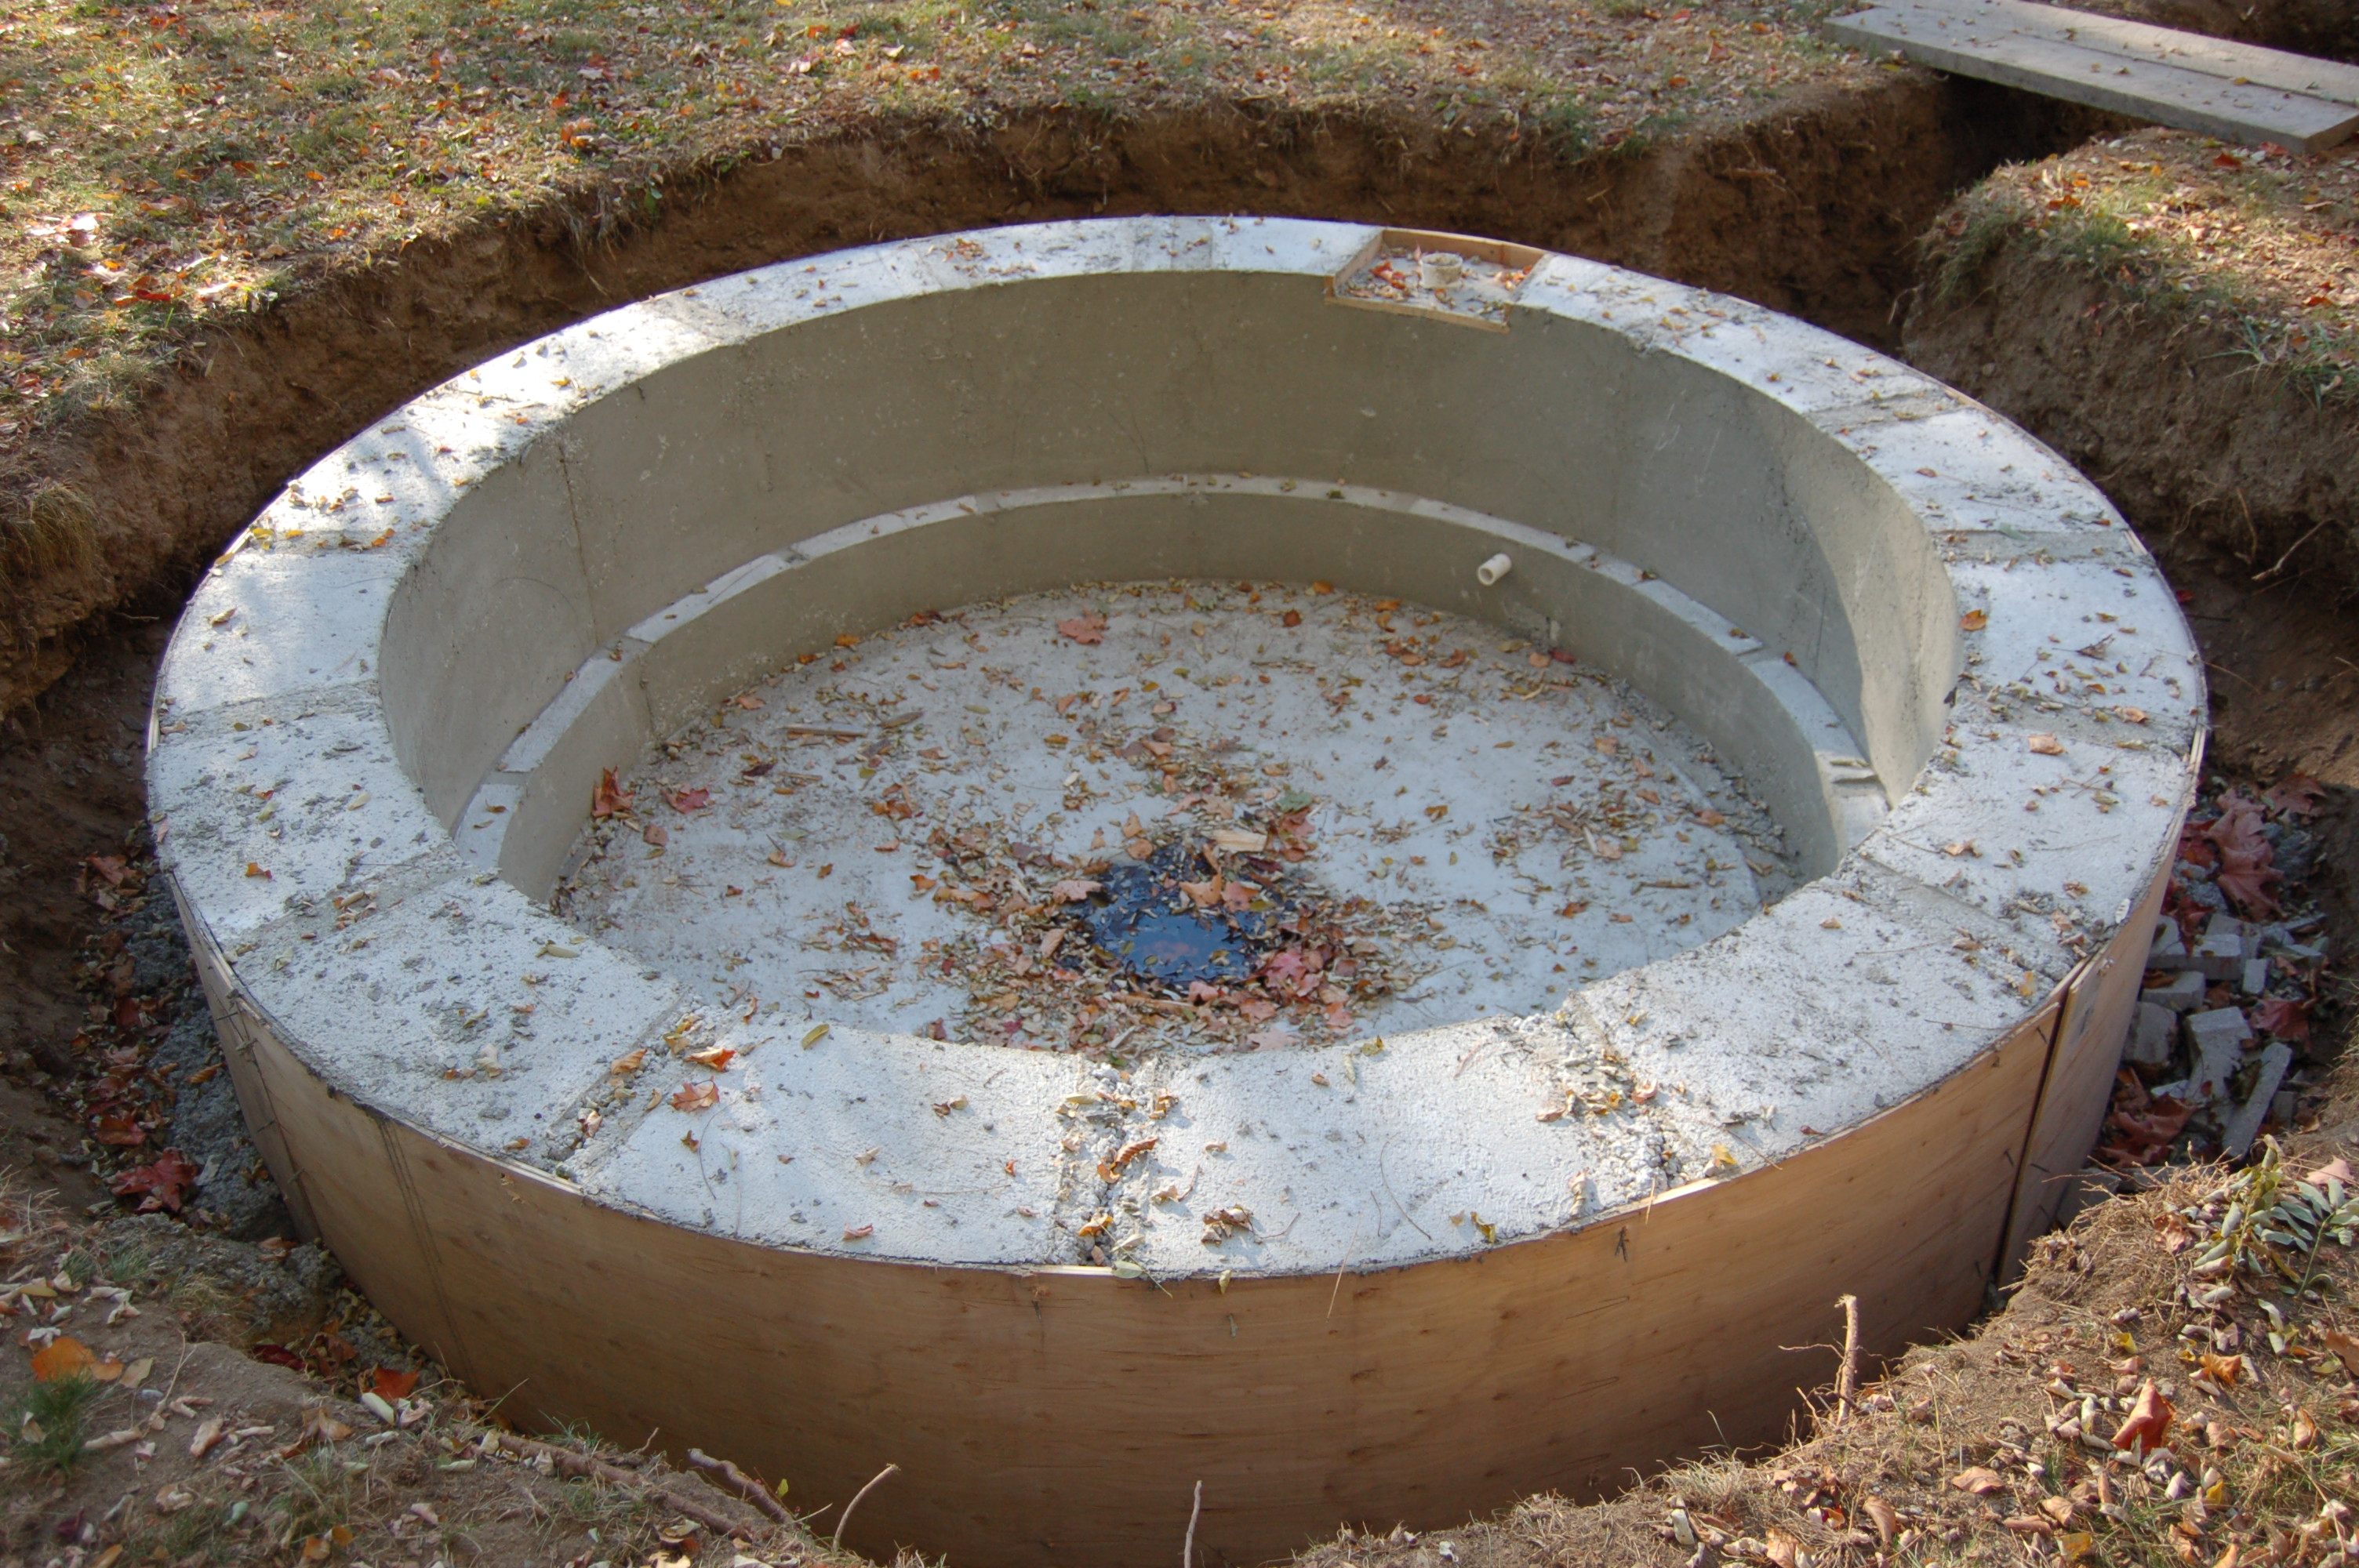
The original plumbing simply had running water which drained away constantly. I opted for a remote filter system which will clean and recirculate the water in the pond. The new bottom has been formed in a shallow 'V' shape pitching toward the center where a bottom drain pipe will transport the water and debris to the remote filter. A skimmer has been fitted into the wall to remove surface water as well. The granite coping will fit above the plumbing and hide the skimmer.
A trench has been dug for the piping transporting the water to the remote filter and back in the pond. The filter will be located outside the garden on the other side of the perimeter wall. While the concrete of the pond was curing all the soil and roots from behind the fountain were dug out and the loose interior of the wall was taken out until stucturally sound mortar was encountered. A few photos were taken for reference and the original stones organized for putting it all back together as close to the original as possible. Some stones disintegrated and were replaced with indigenous stones.
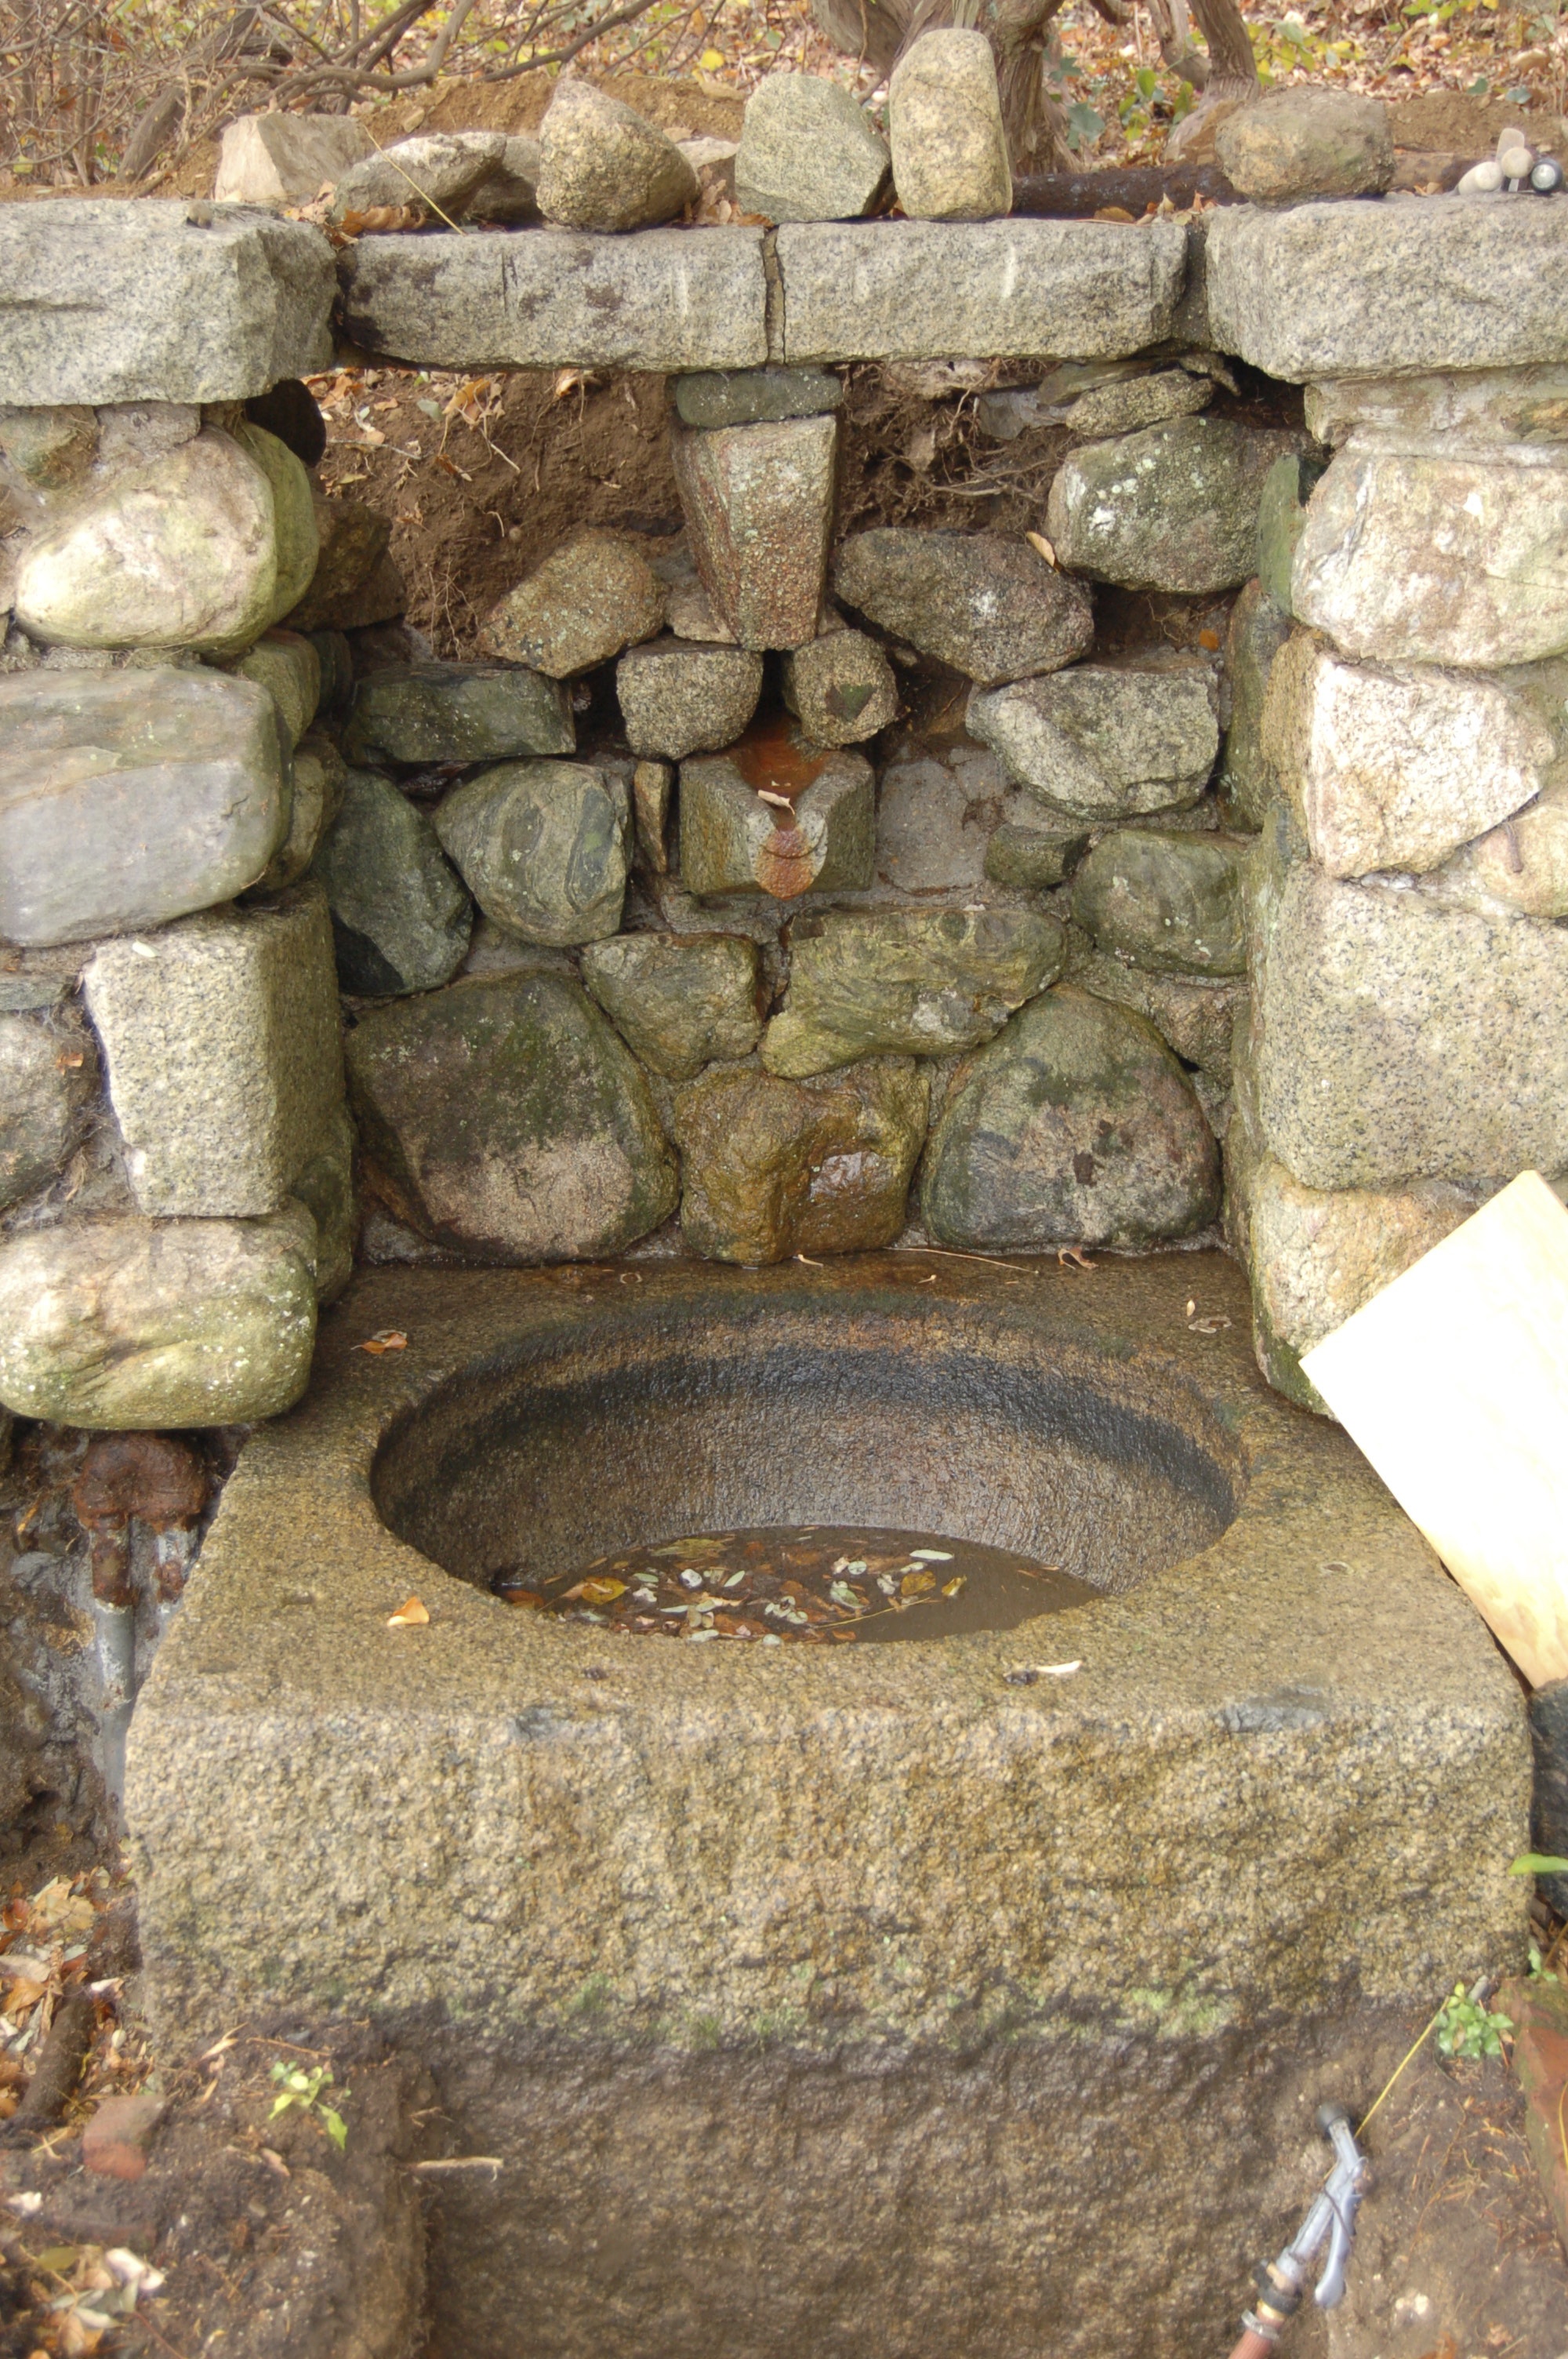
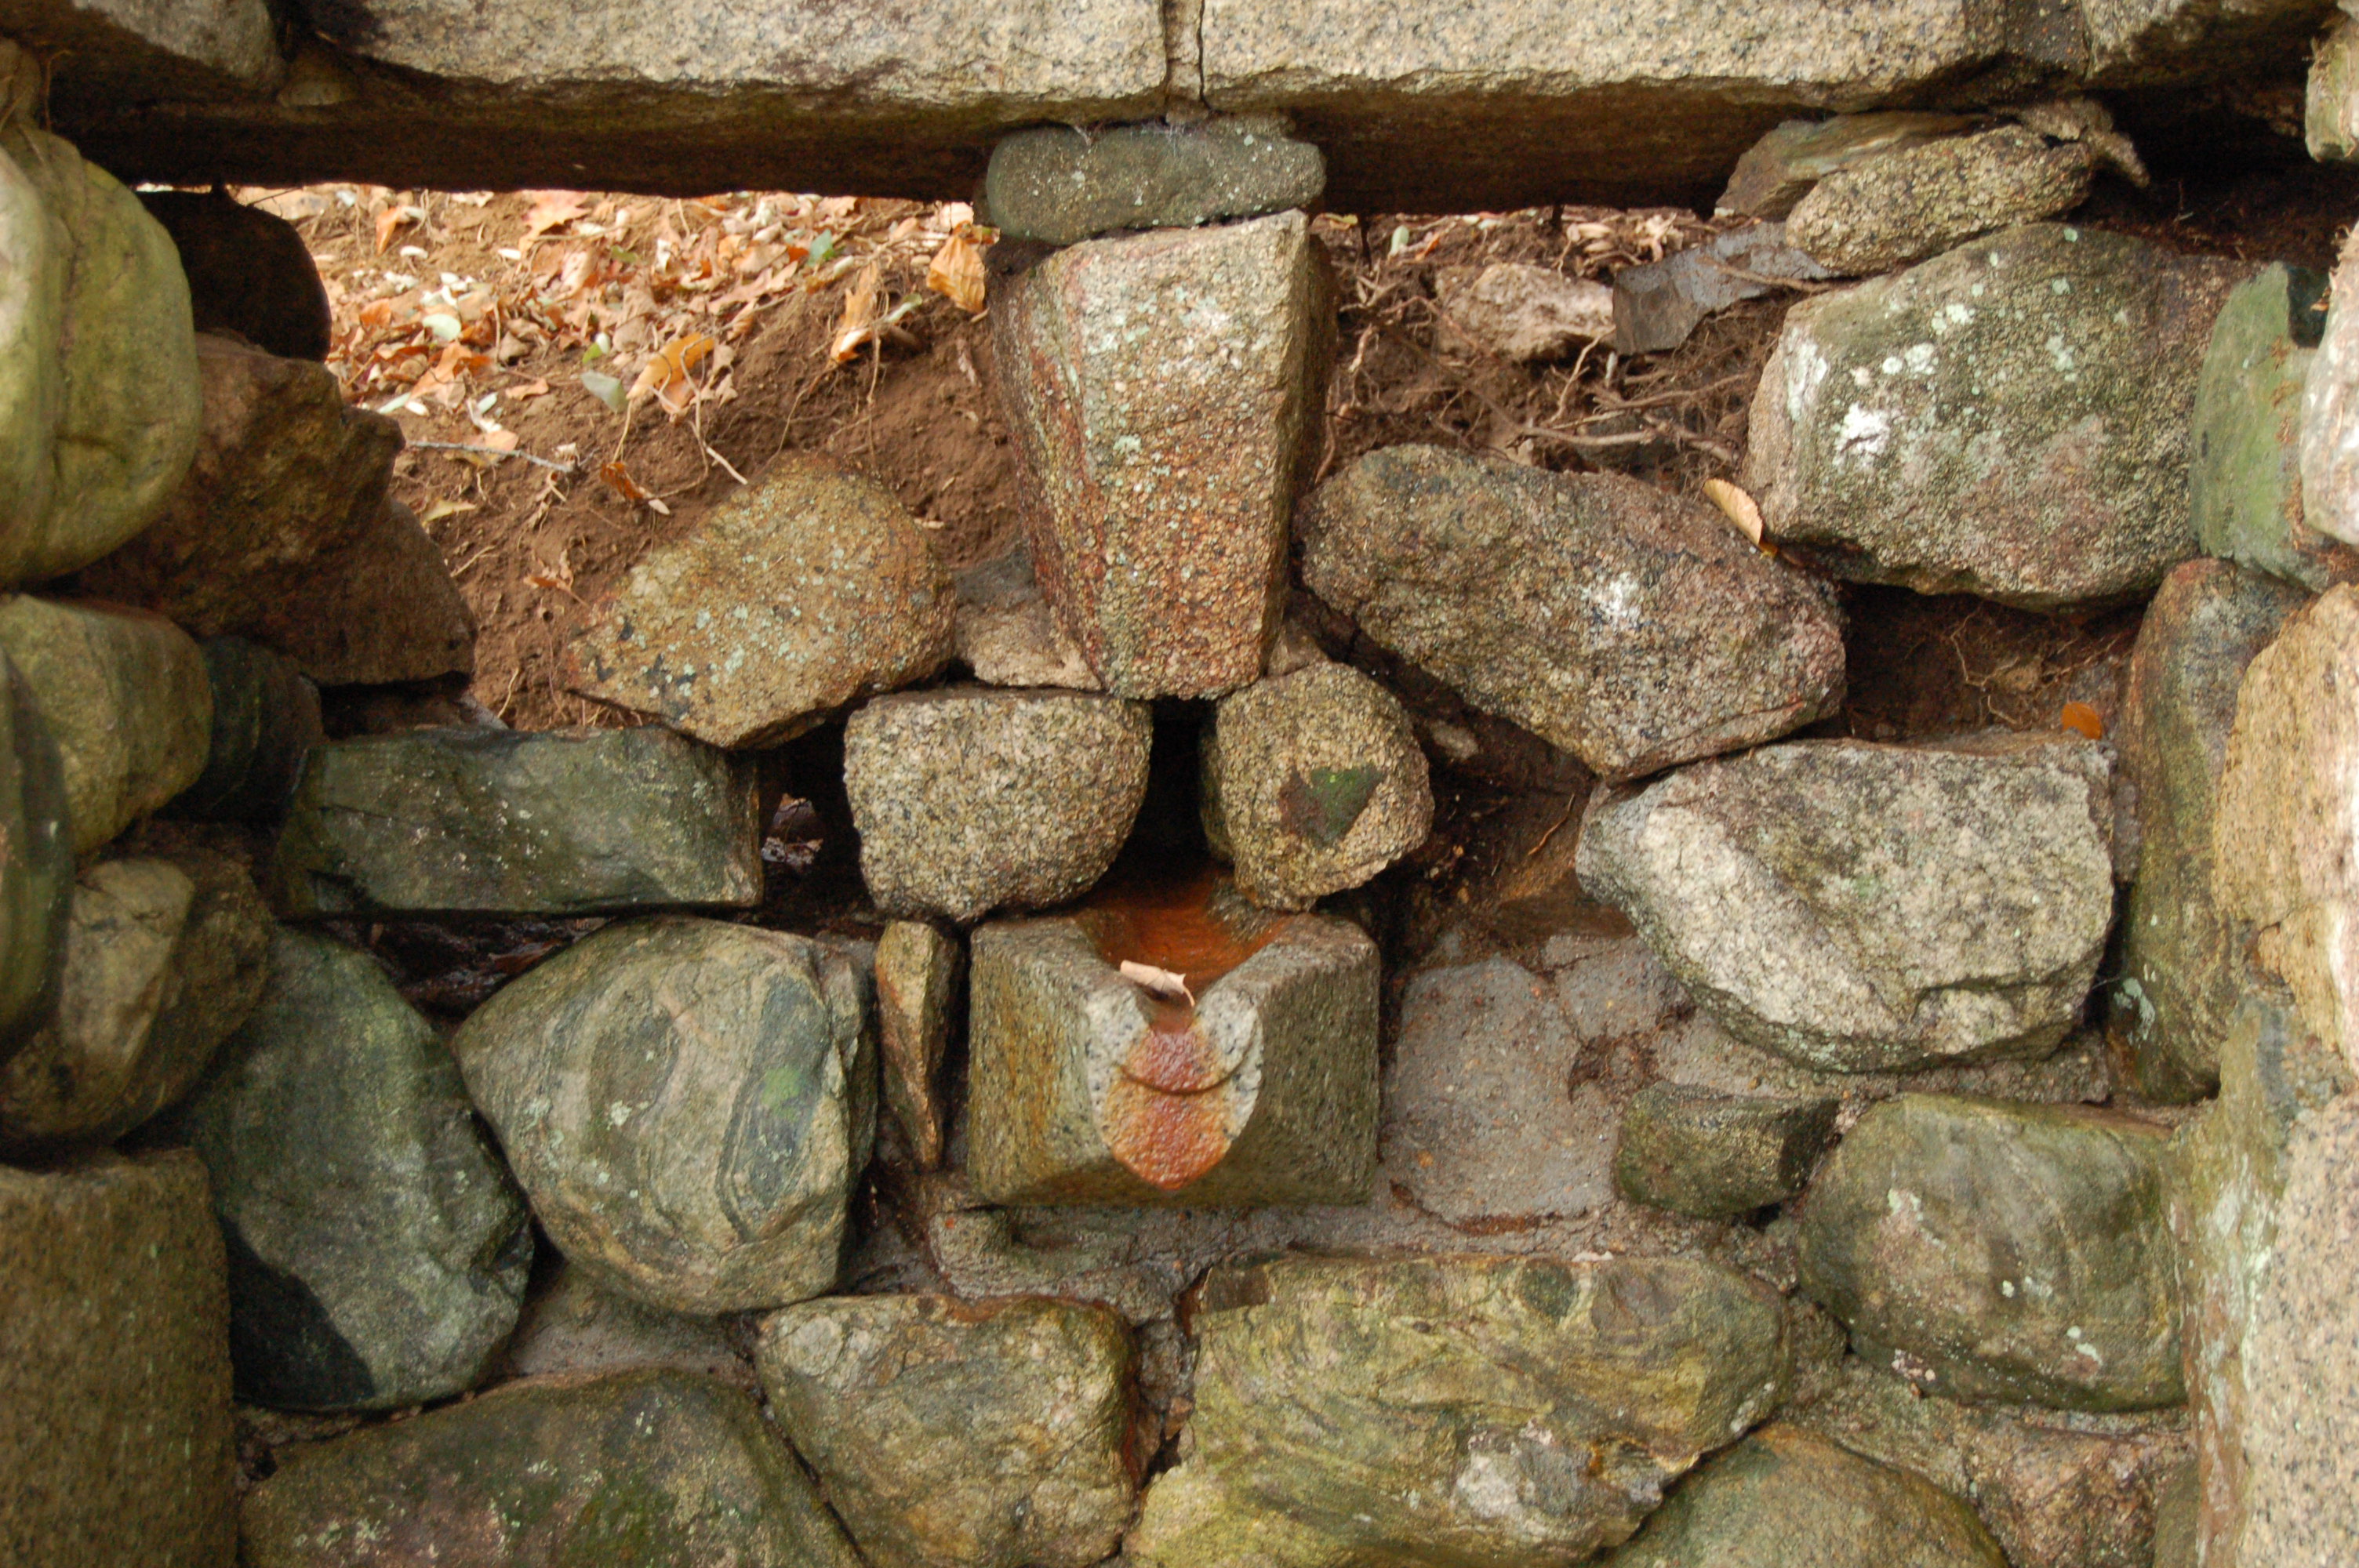
You can see the two heavy granite coping stones barely balancing on top af a wobbly stack of stone at the center. The fountain was plumbed with a continious flow of water as well. This was also converted to a recirculating system.
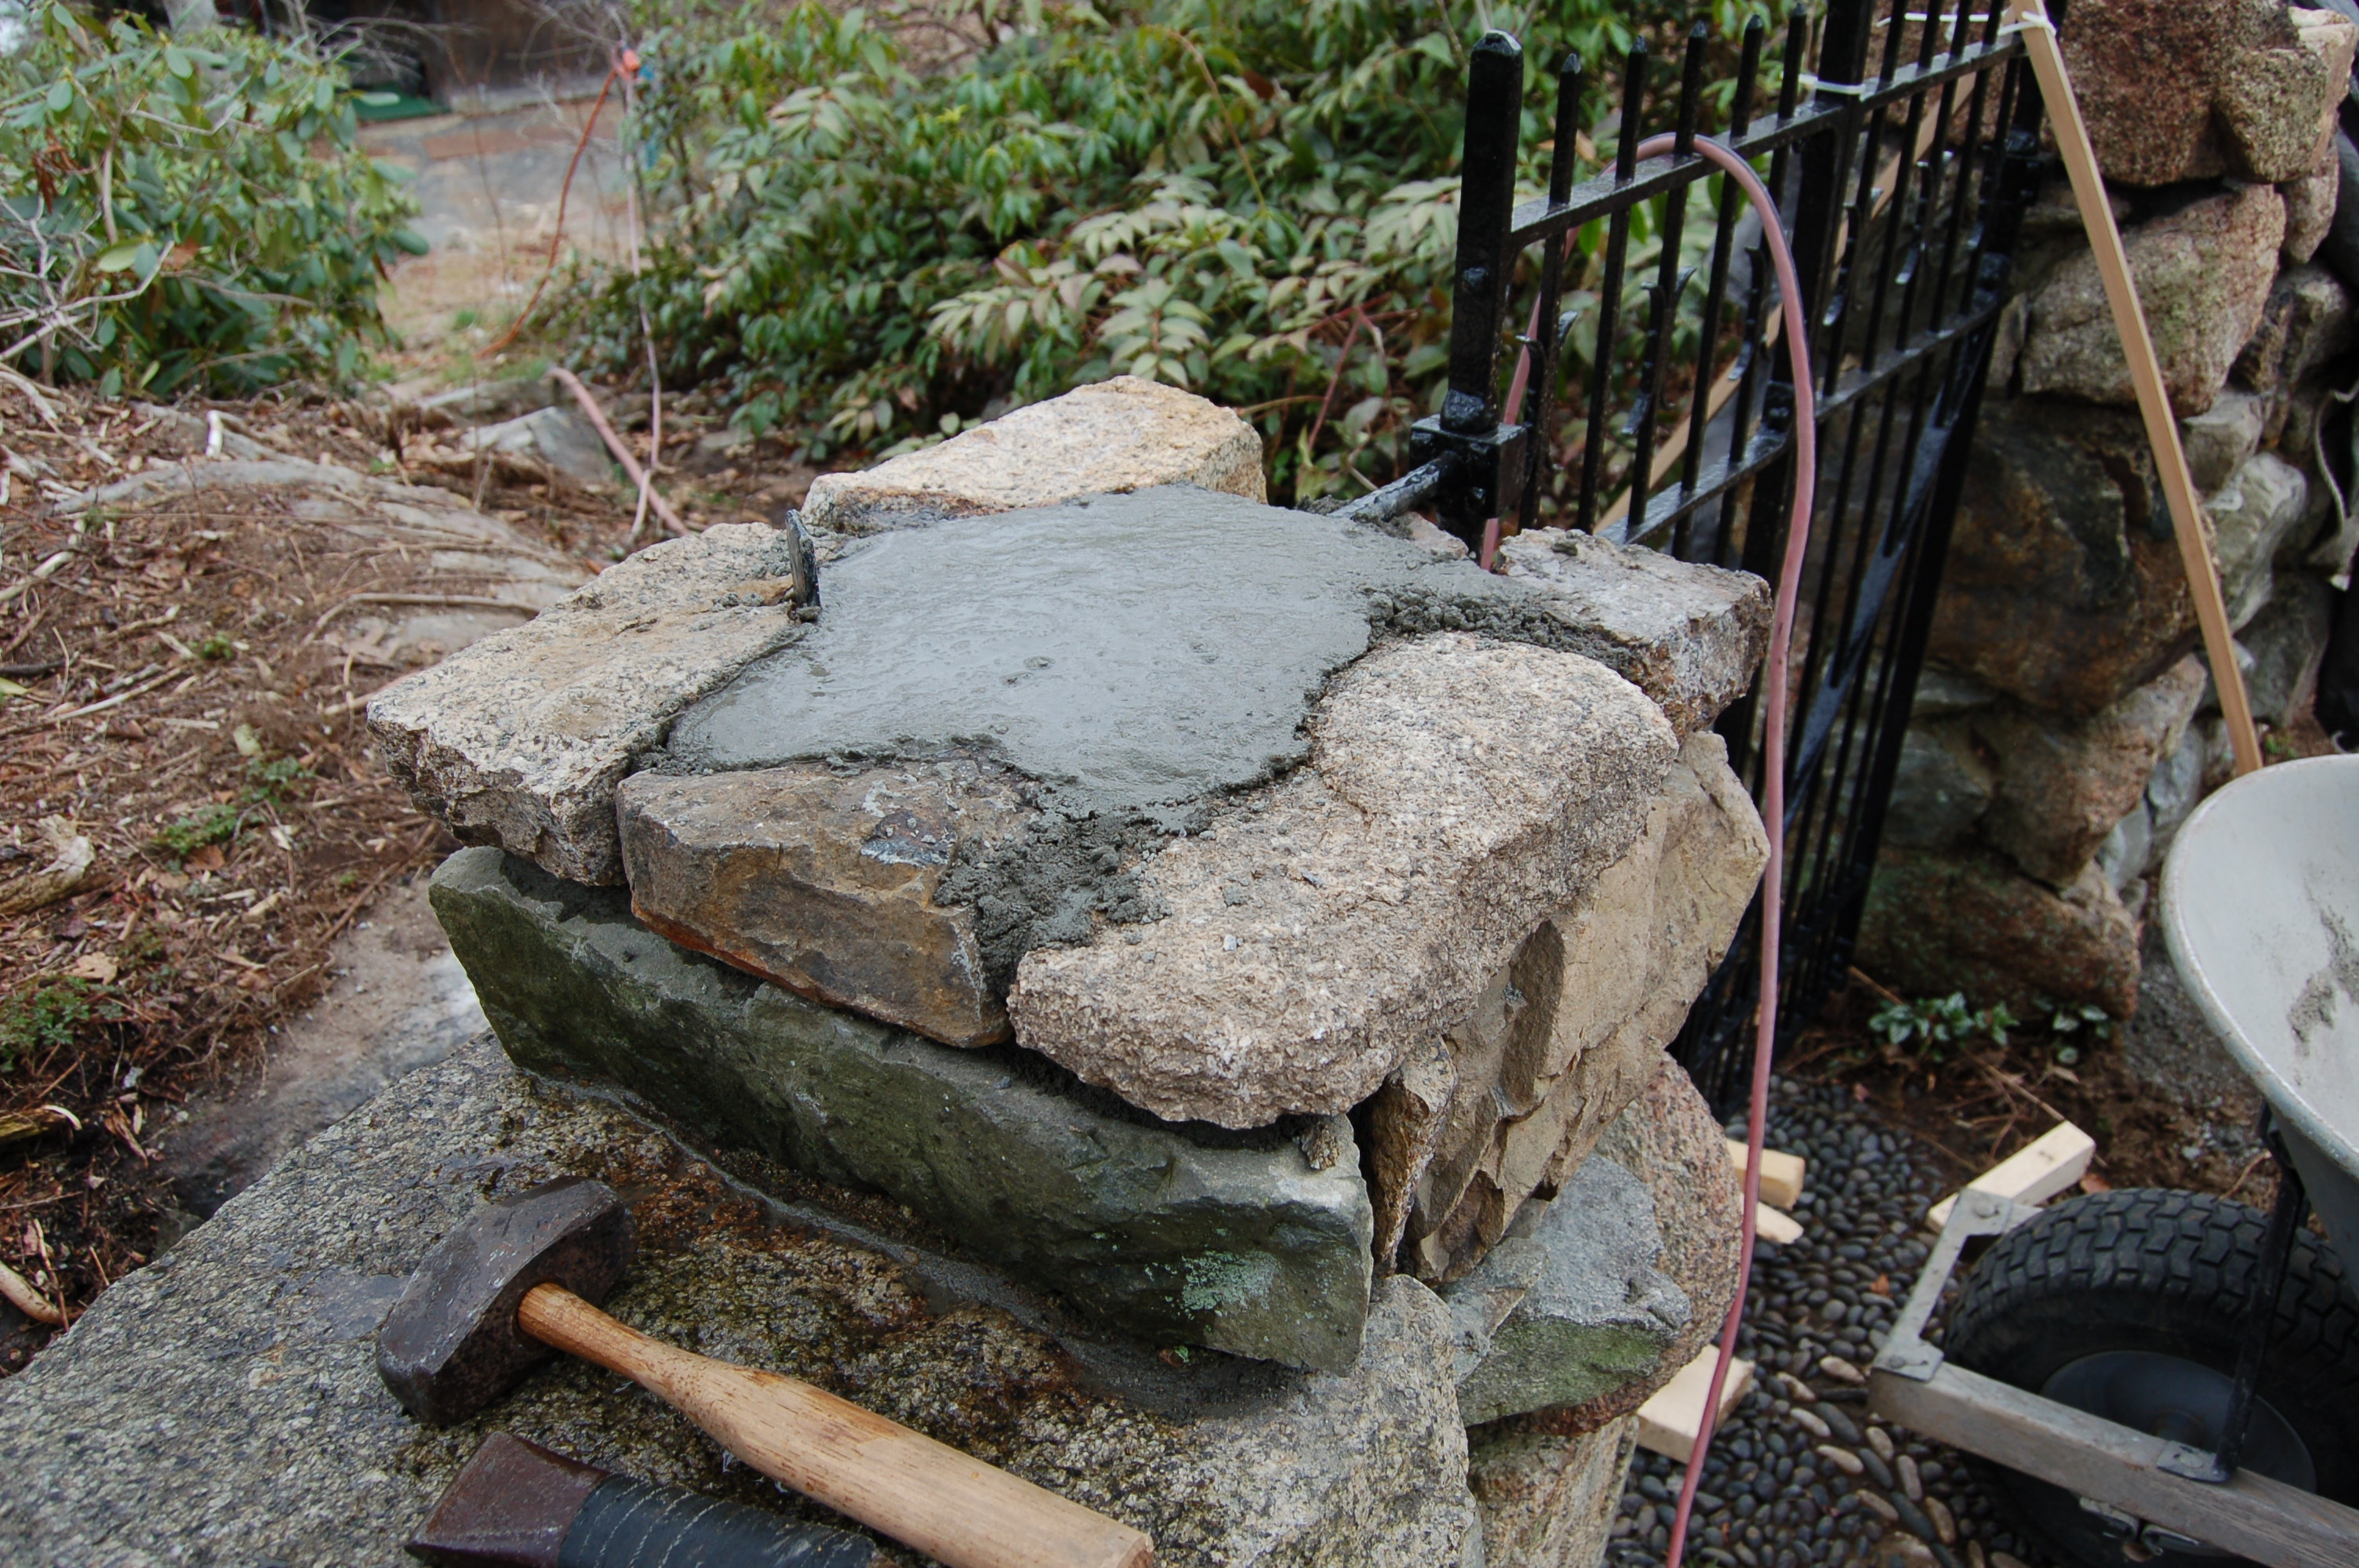
The iron gates and arbors needed to be worked on so they were removed from the posts and sent in to be restored.
The compromised section of wall was also removed. The columns were partly disassembled in order to remove the gates and hinges.

The gates and arbors are back and the restoration of the gate posts begins.
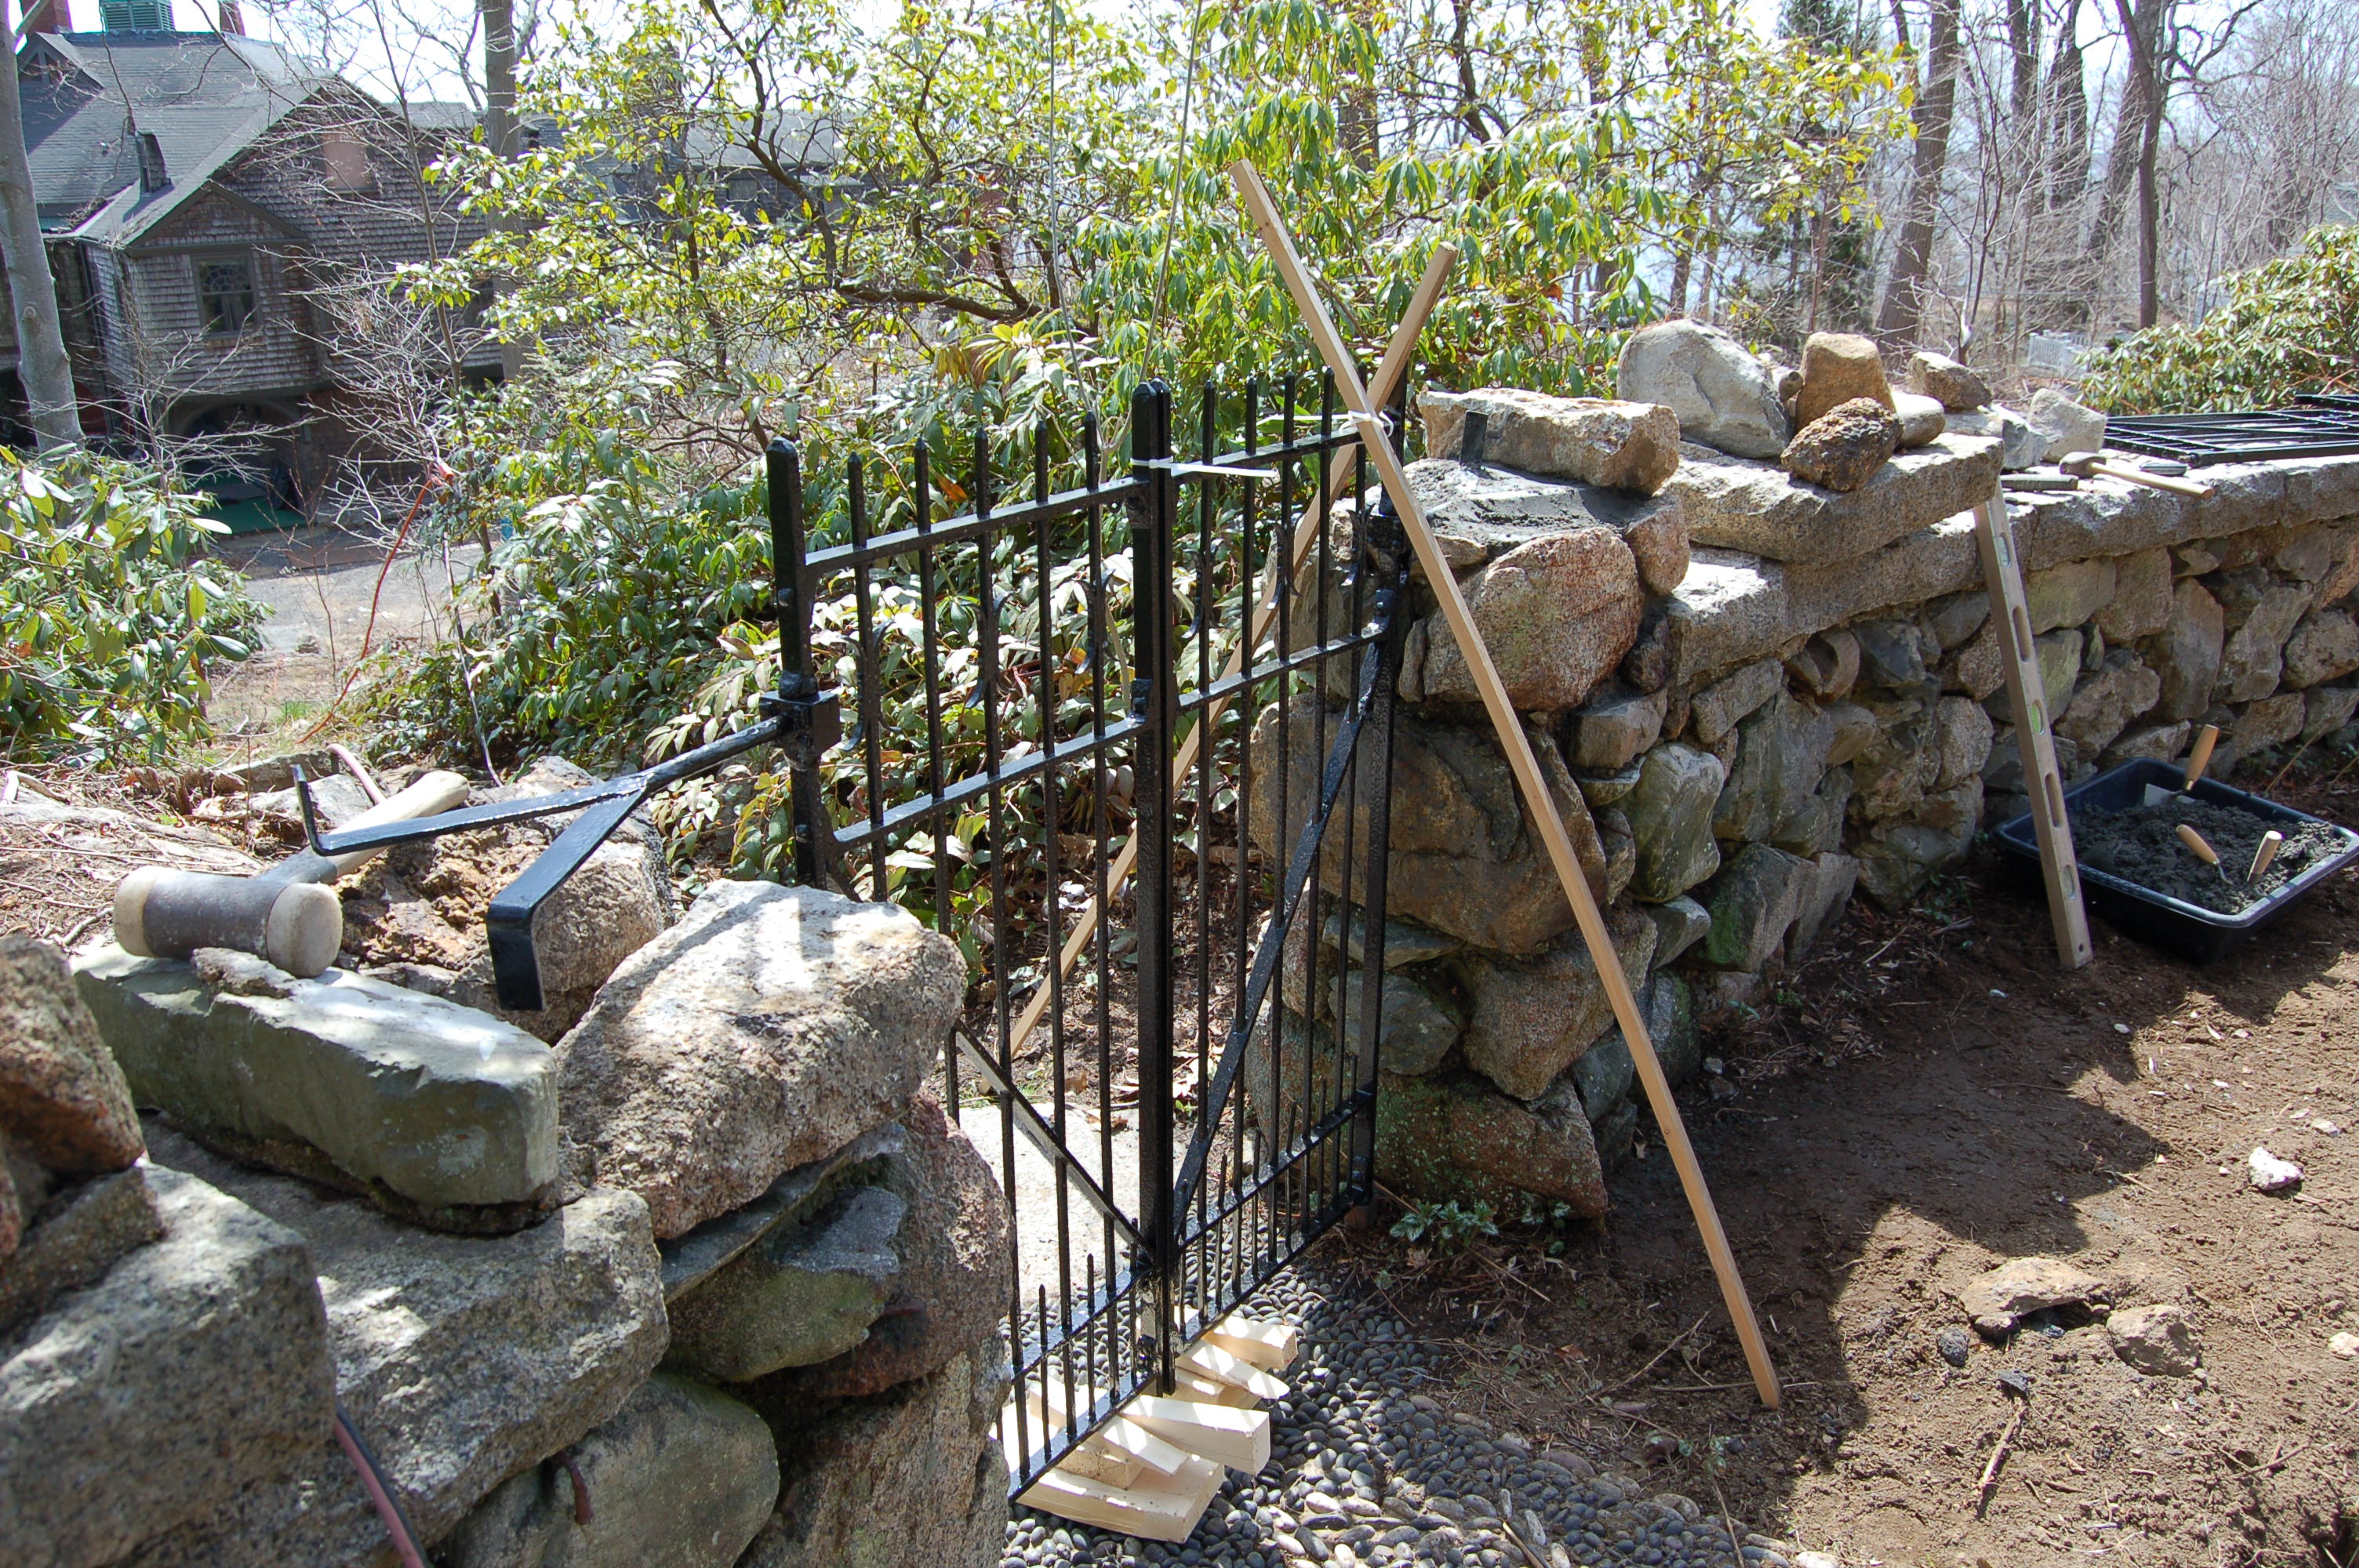
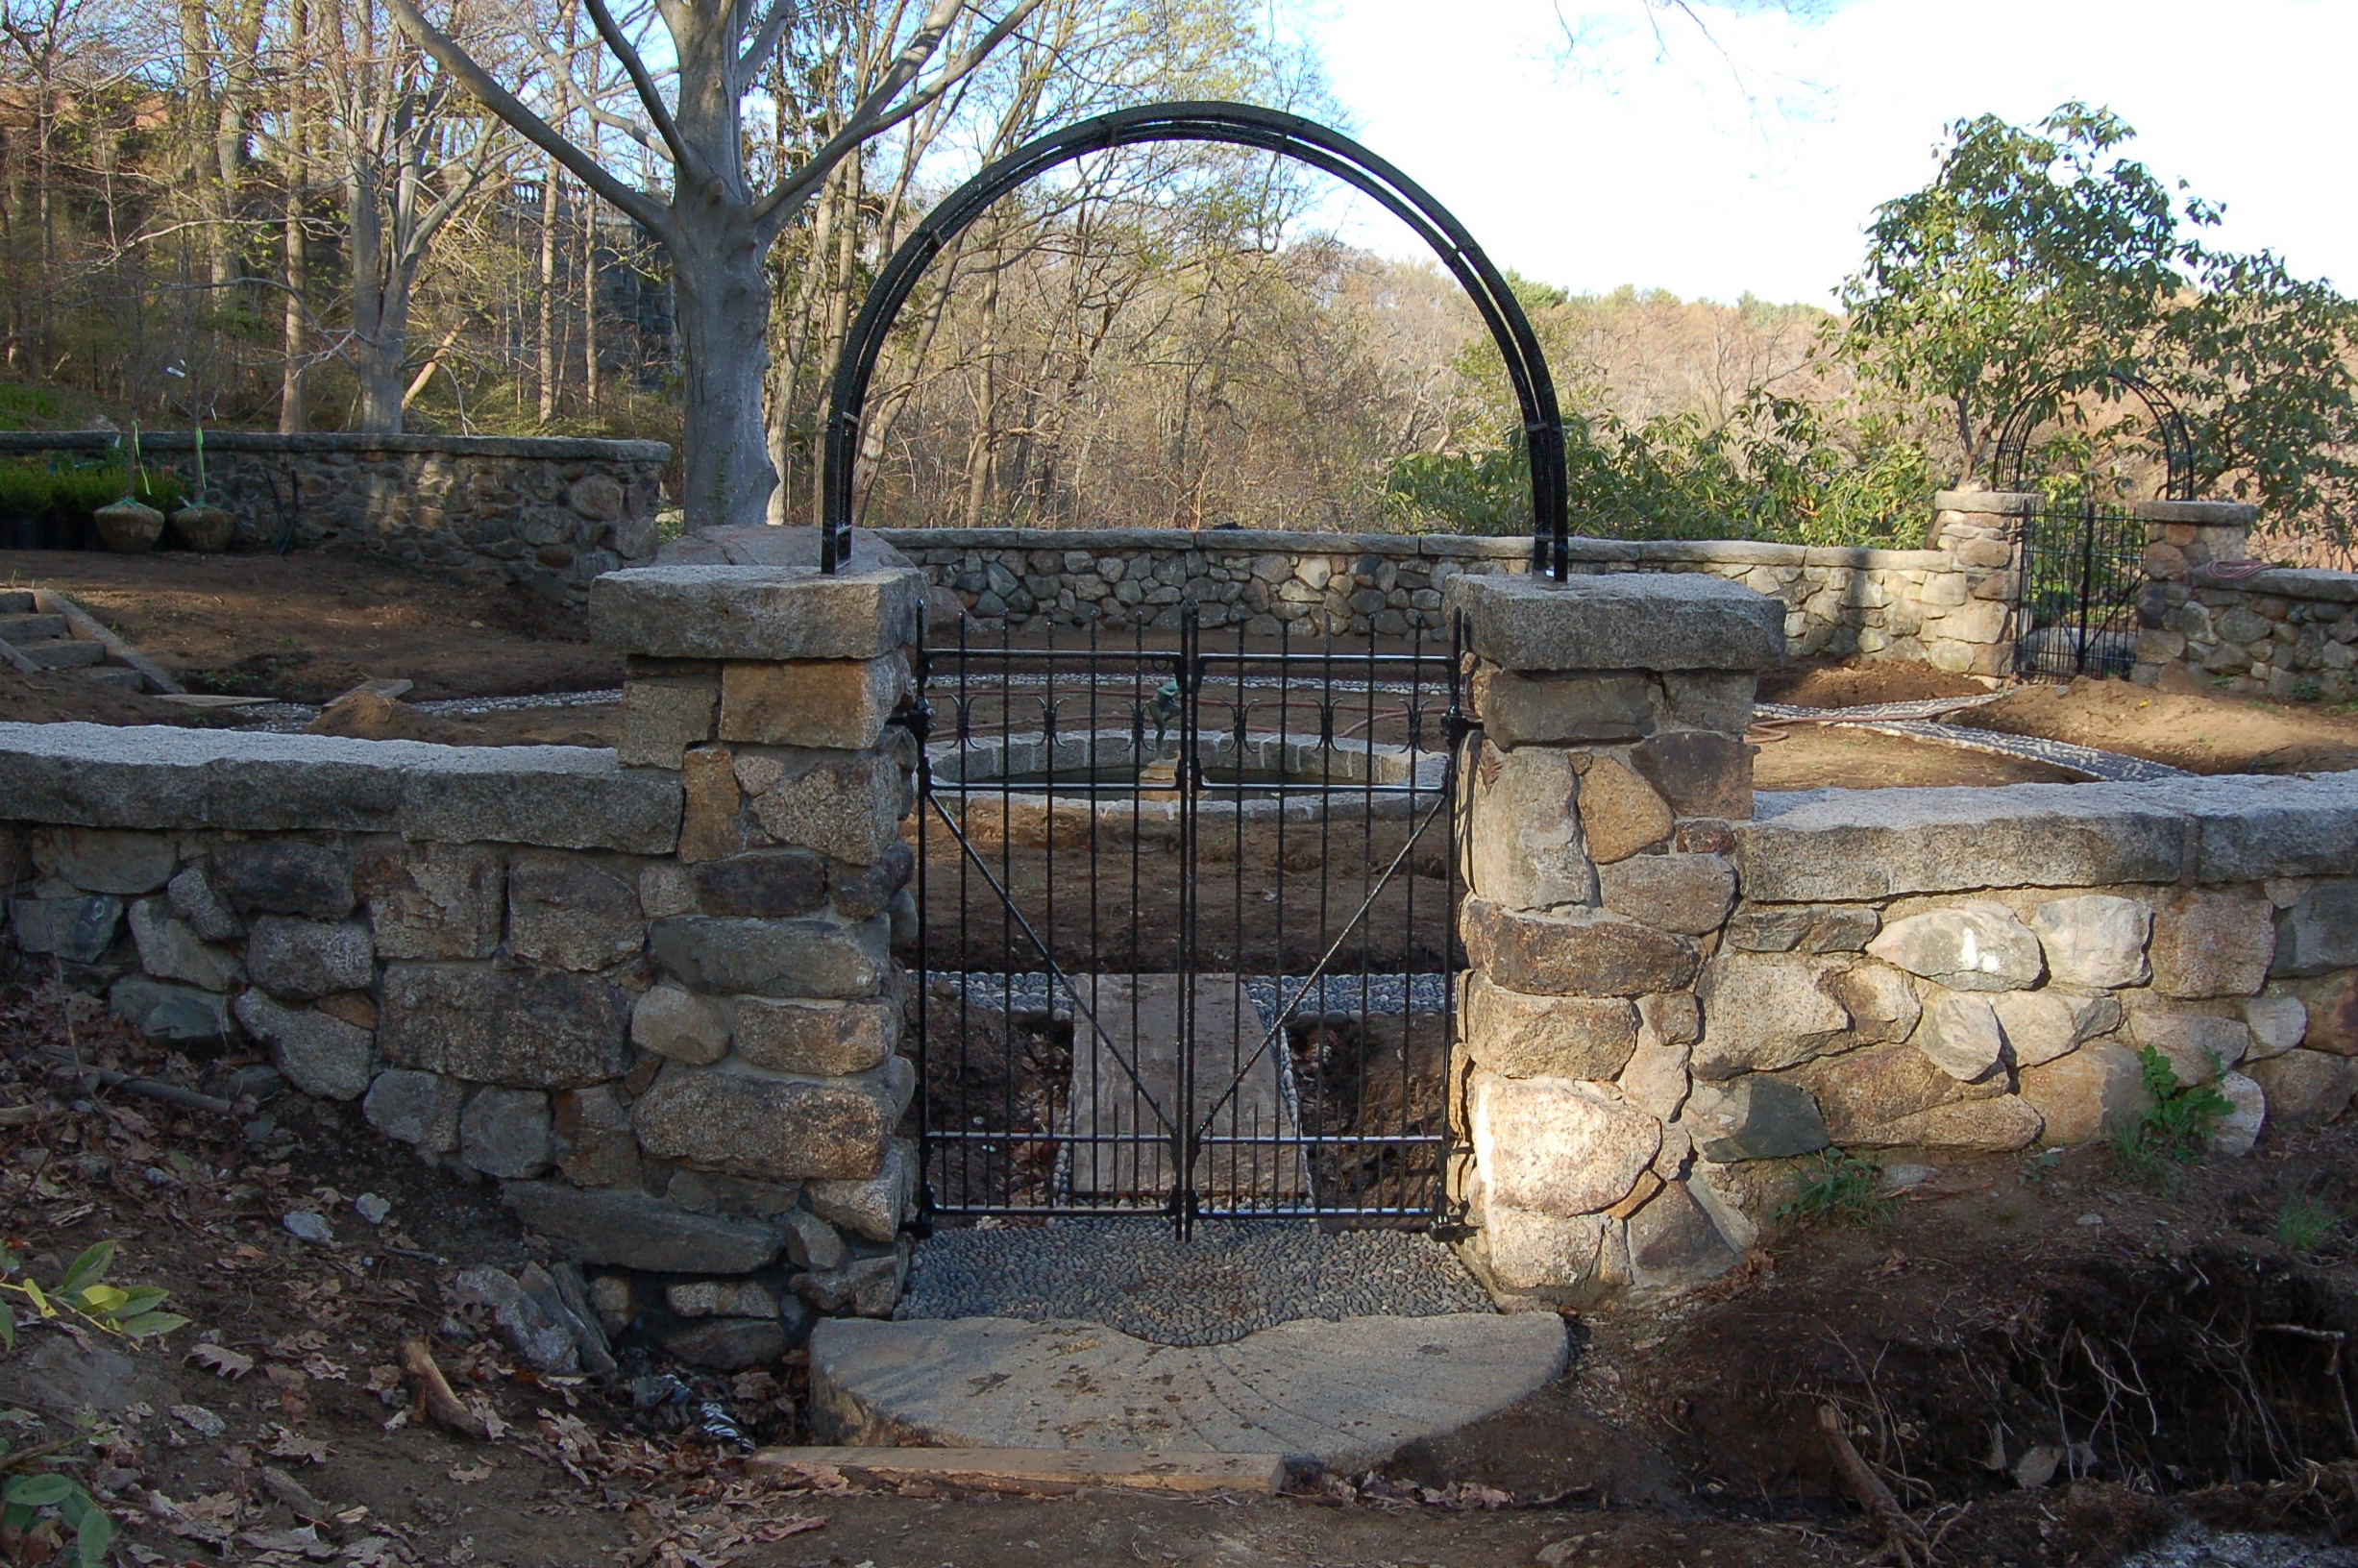

The original gates and arbors are back in place and look great! The blacksmith did a fantastic job at bending everything back to shape, restoring the hinges and painting everything. I was fearful that I would see lots of replaced metal parts or even worse, a bad attempt at reproduction. The fountain is back together and the plumbing is next.
I utilized the original clogged drain hole at the left of the fountain which entailed removing some of the stone work but prevented additional holes or modifications.
I installed a chamber in front of the fountain which contains a small recirculating pump. The return pipe line goes under the wall to the left and to the back of the fountain. The electrical wire from the pump goes under the wall to a receptacle hidden behind the wall as well.
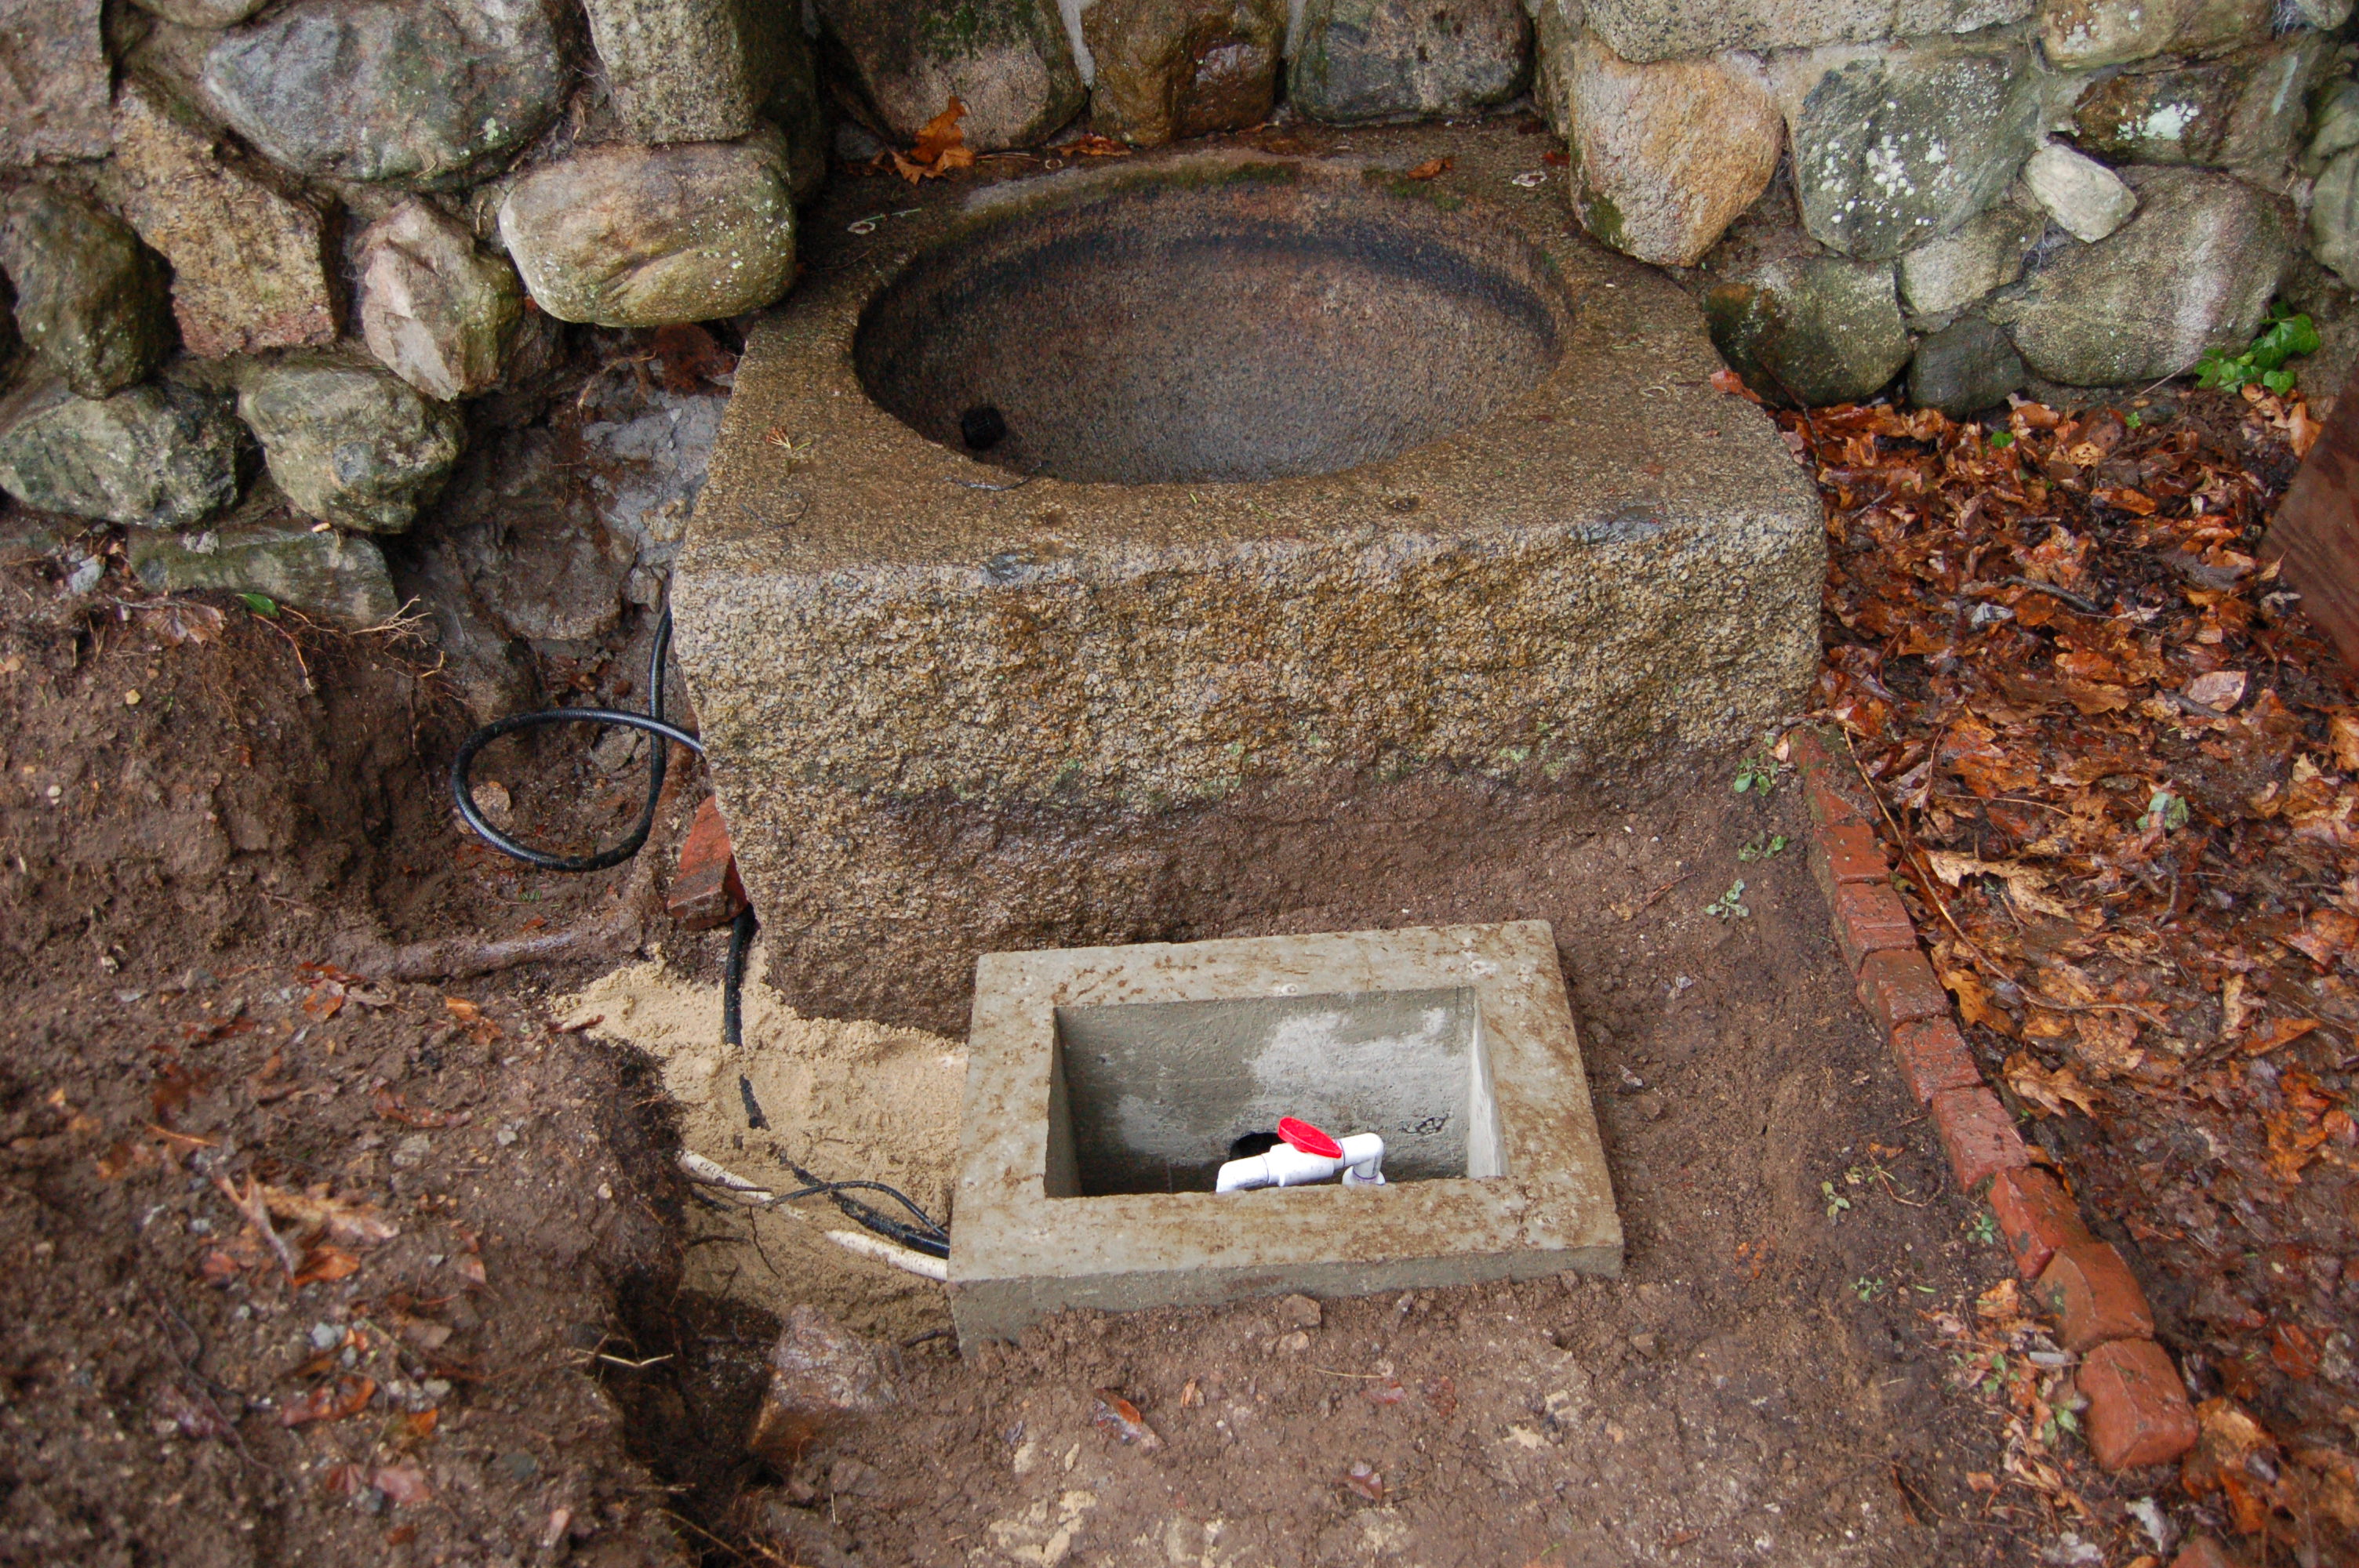
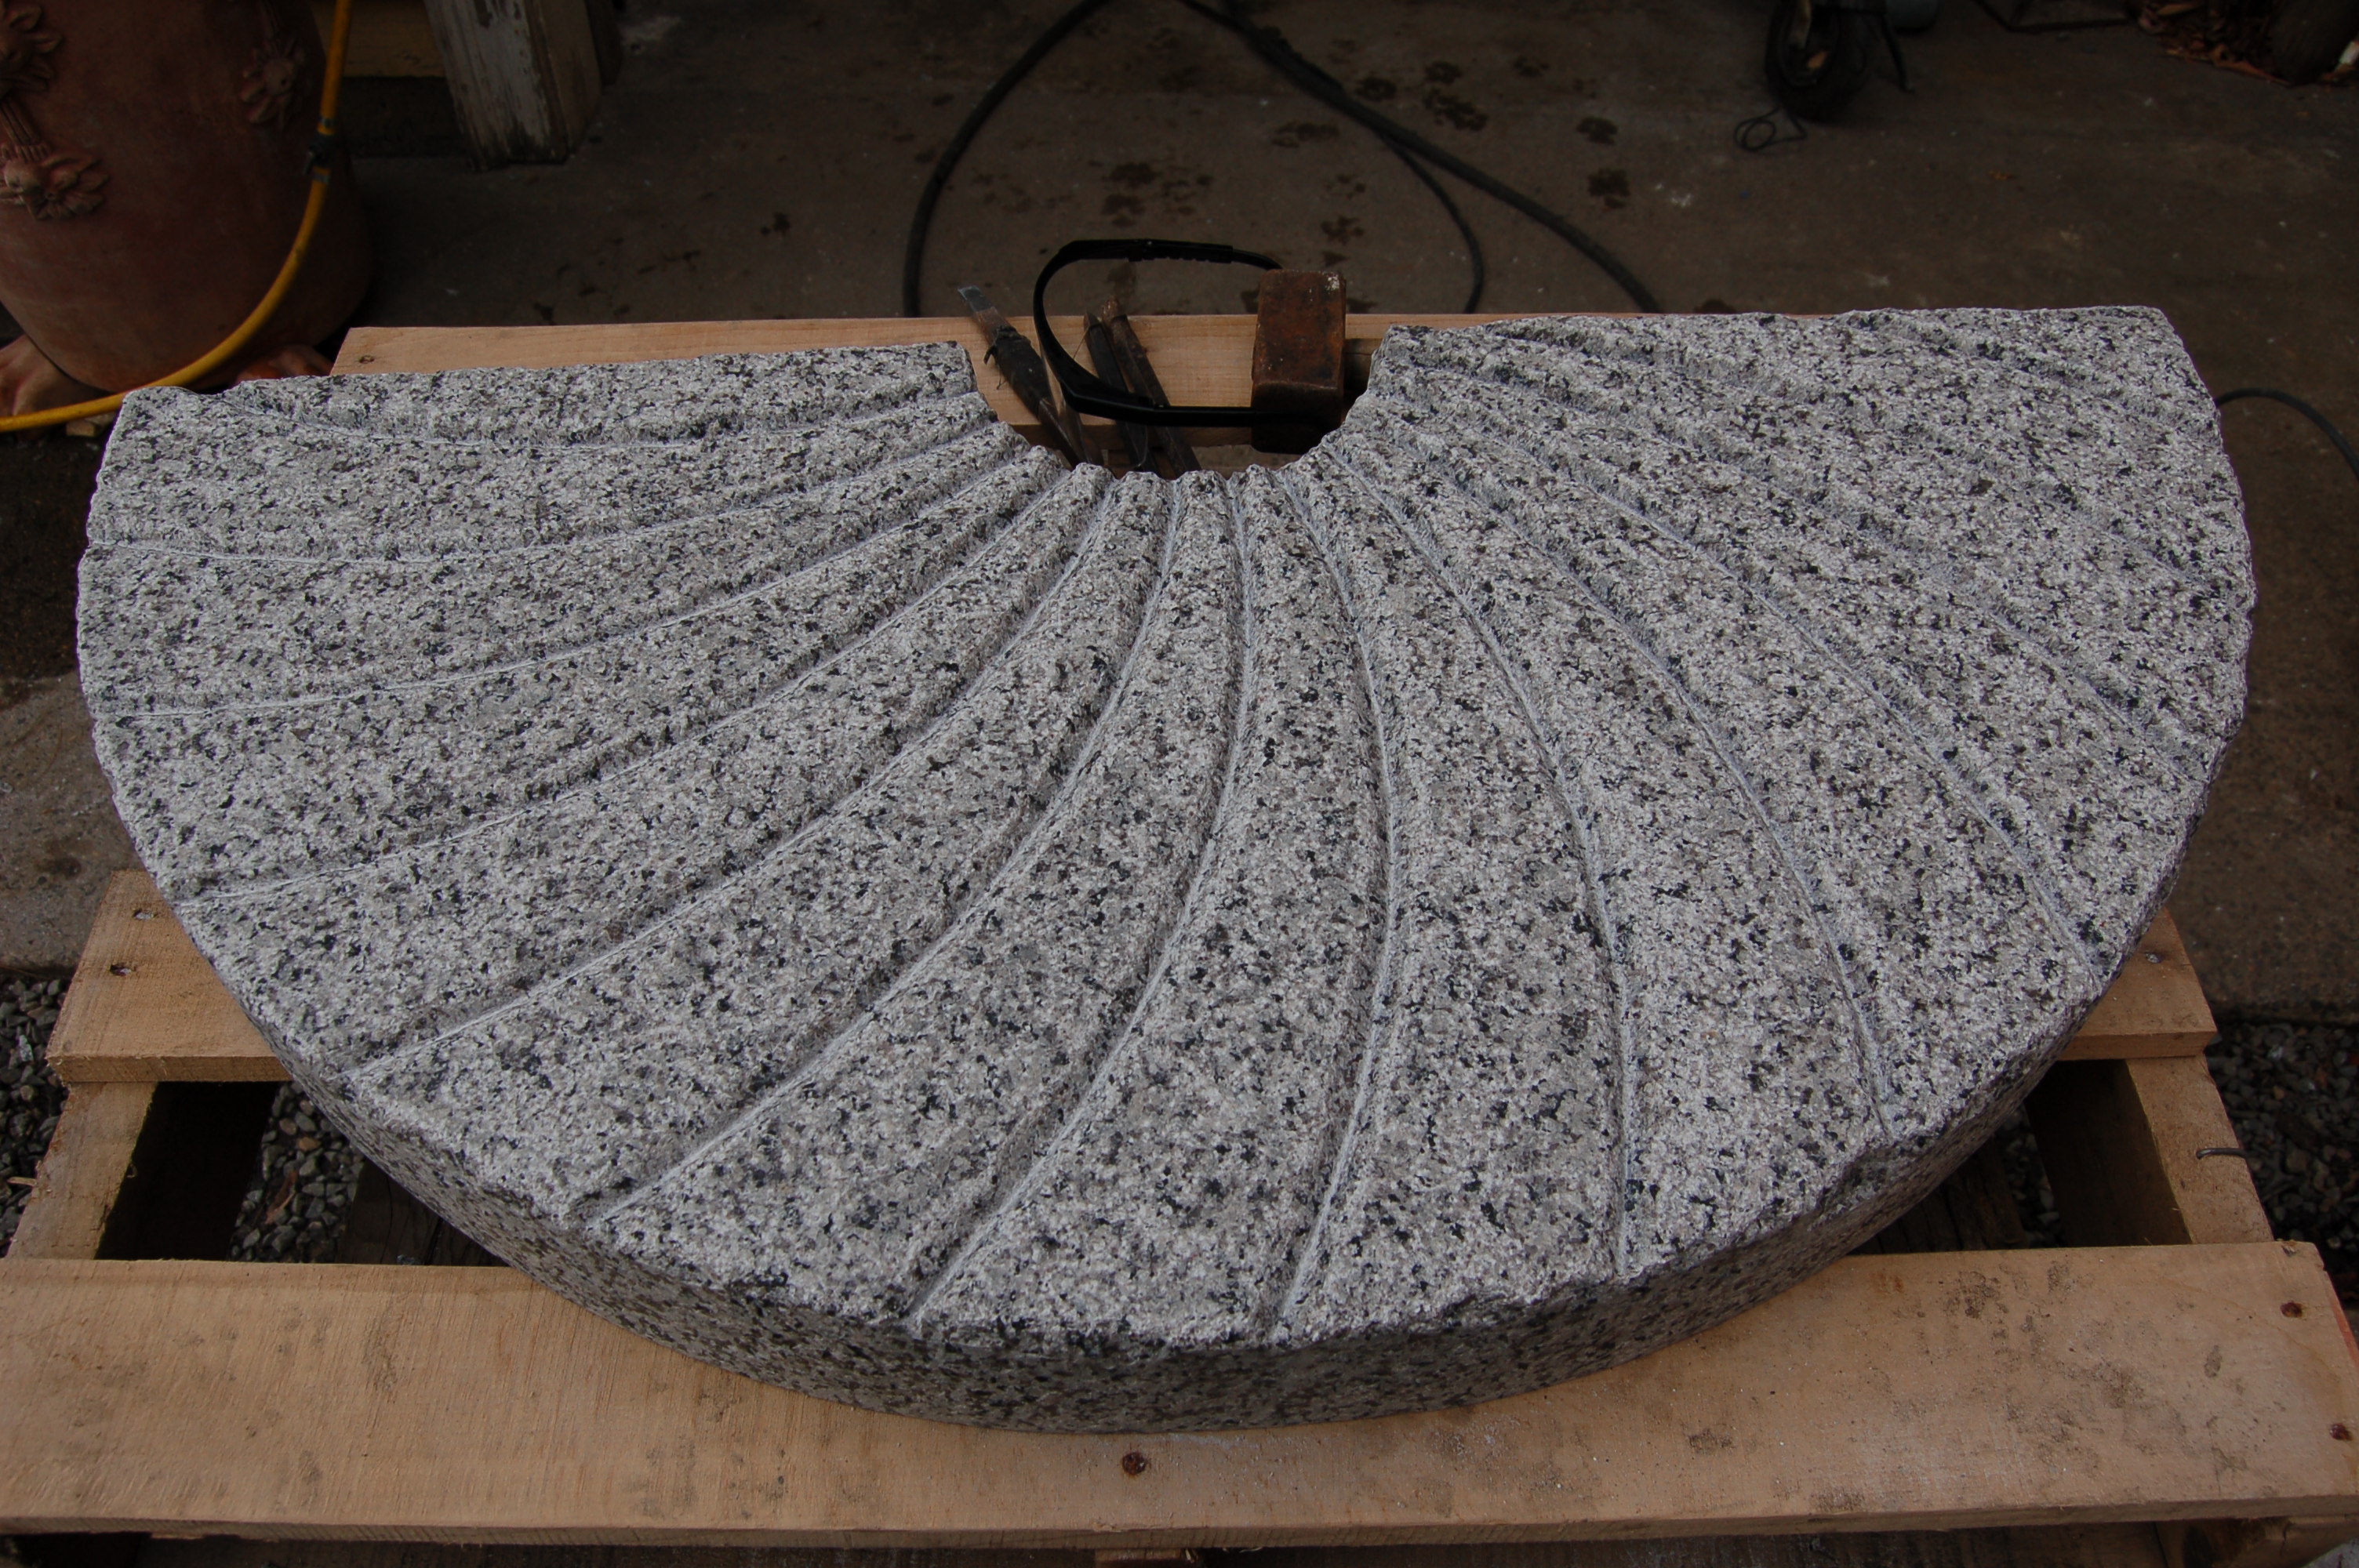
I carved out a slab of Cape Ann granite for the cover of the pump chamber, in style with the millstones in front of the two gate entrances.
The restoration of the path was next. I cleaned all growth and dirt from the pebble path and found many of the original pebbles buried in the soil on either side of the path. I scavanged for some closely matching pebbles as well to replace what was missing.

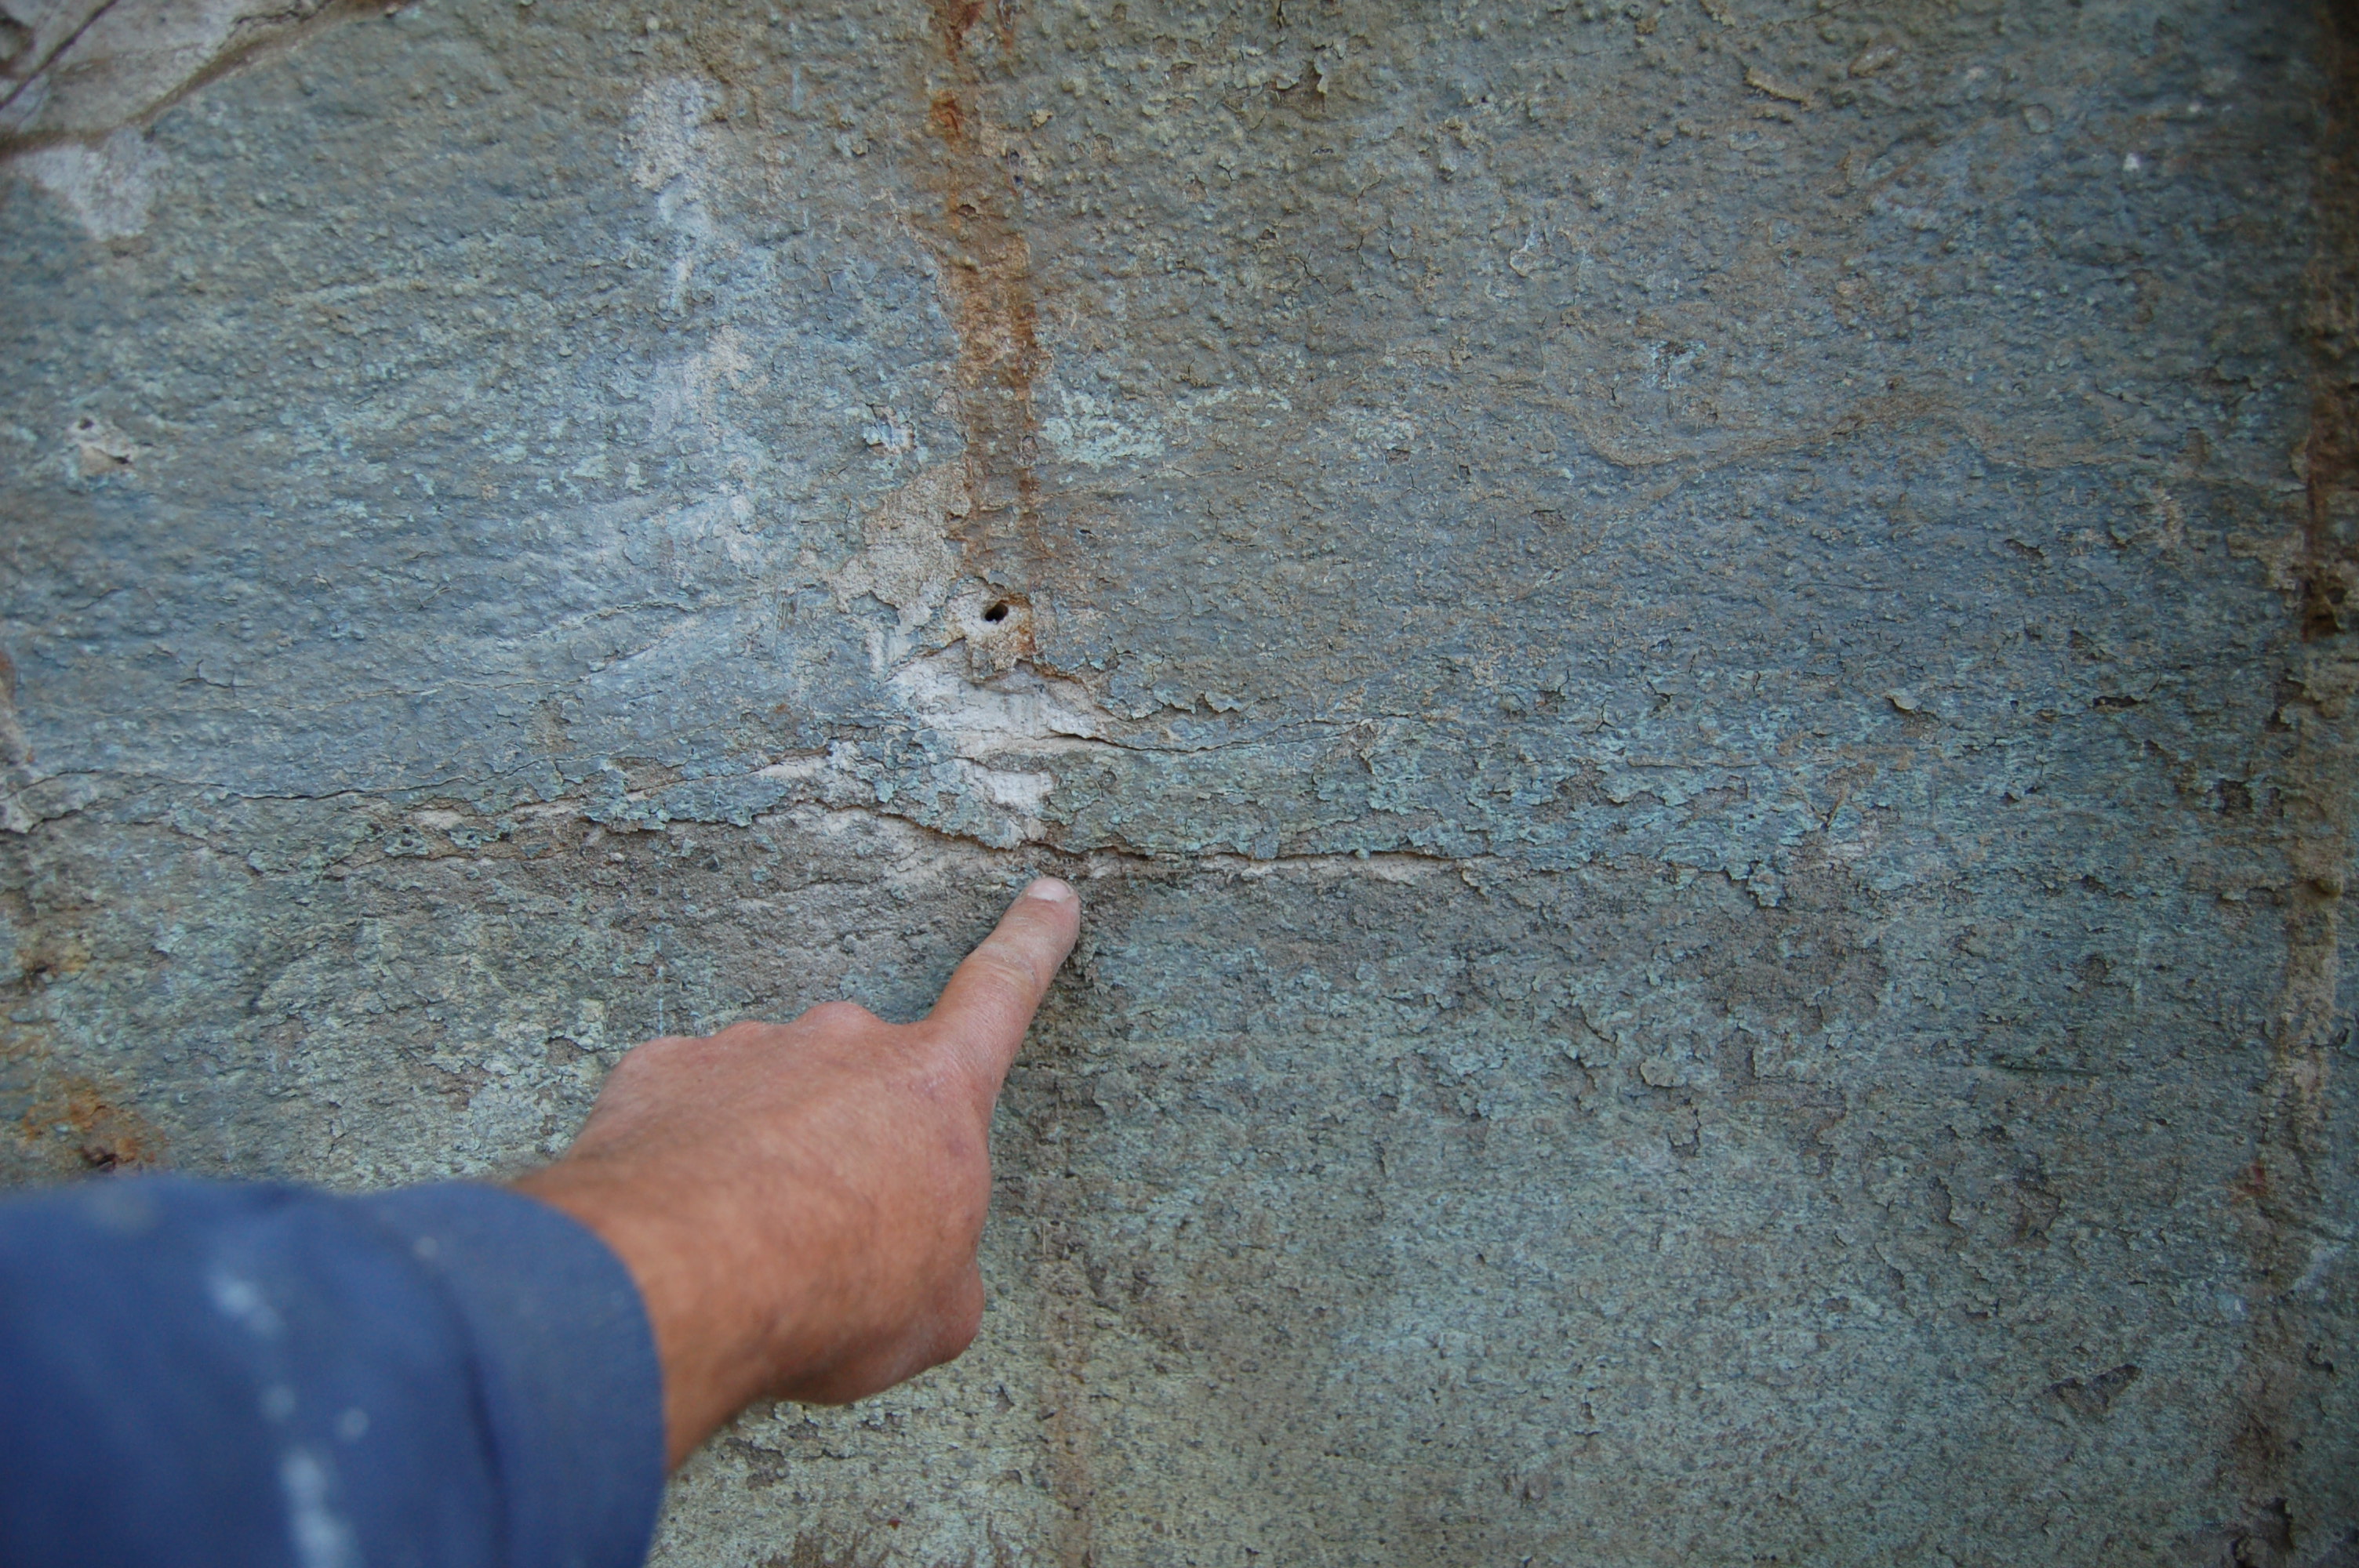
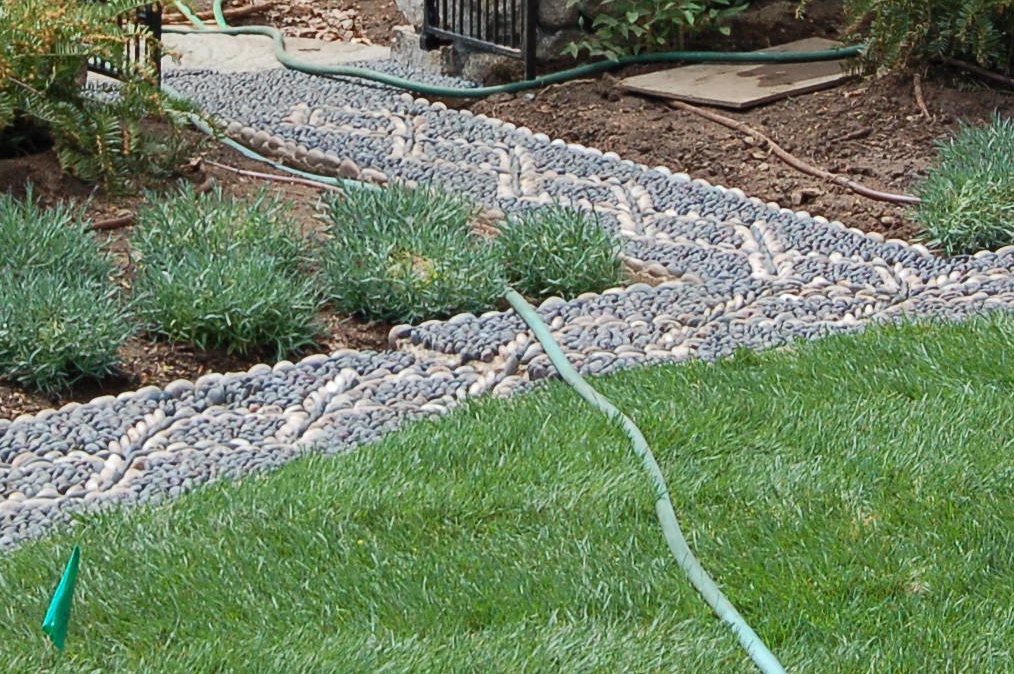
The path had two places where it had split and was raised by tree roots. This made for toe stubbers and very unsightly spots (see below image). I dug and severed the roots on either sides and very carefully pried the low sections of the path up on either sides simultaniously and packed the base underneath from either side. This brought the path to level again and hopefully roots will not grow back for a long time.
About a hundred pebbles later I completed the path restoration.
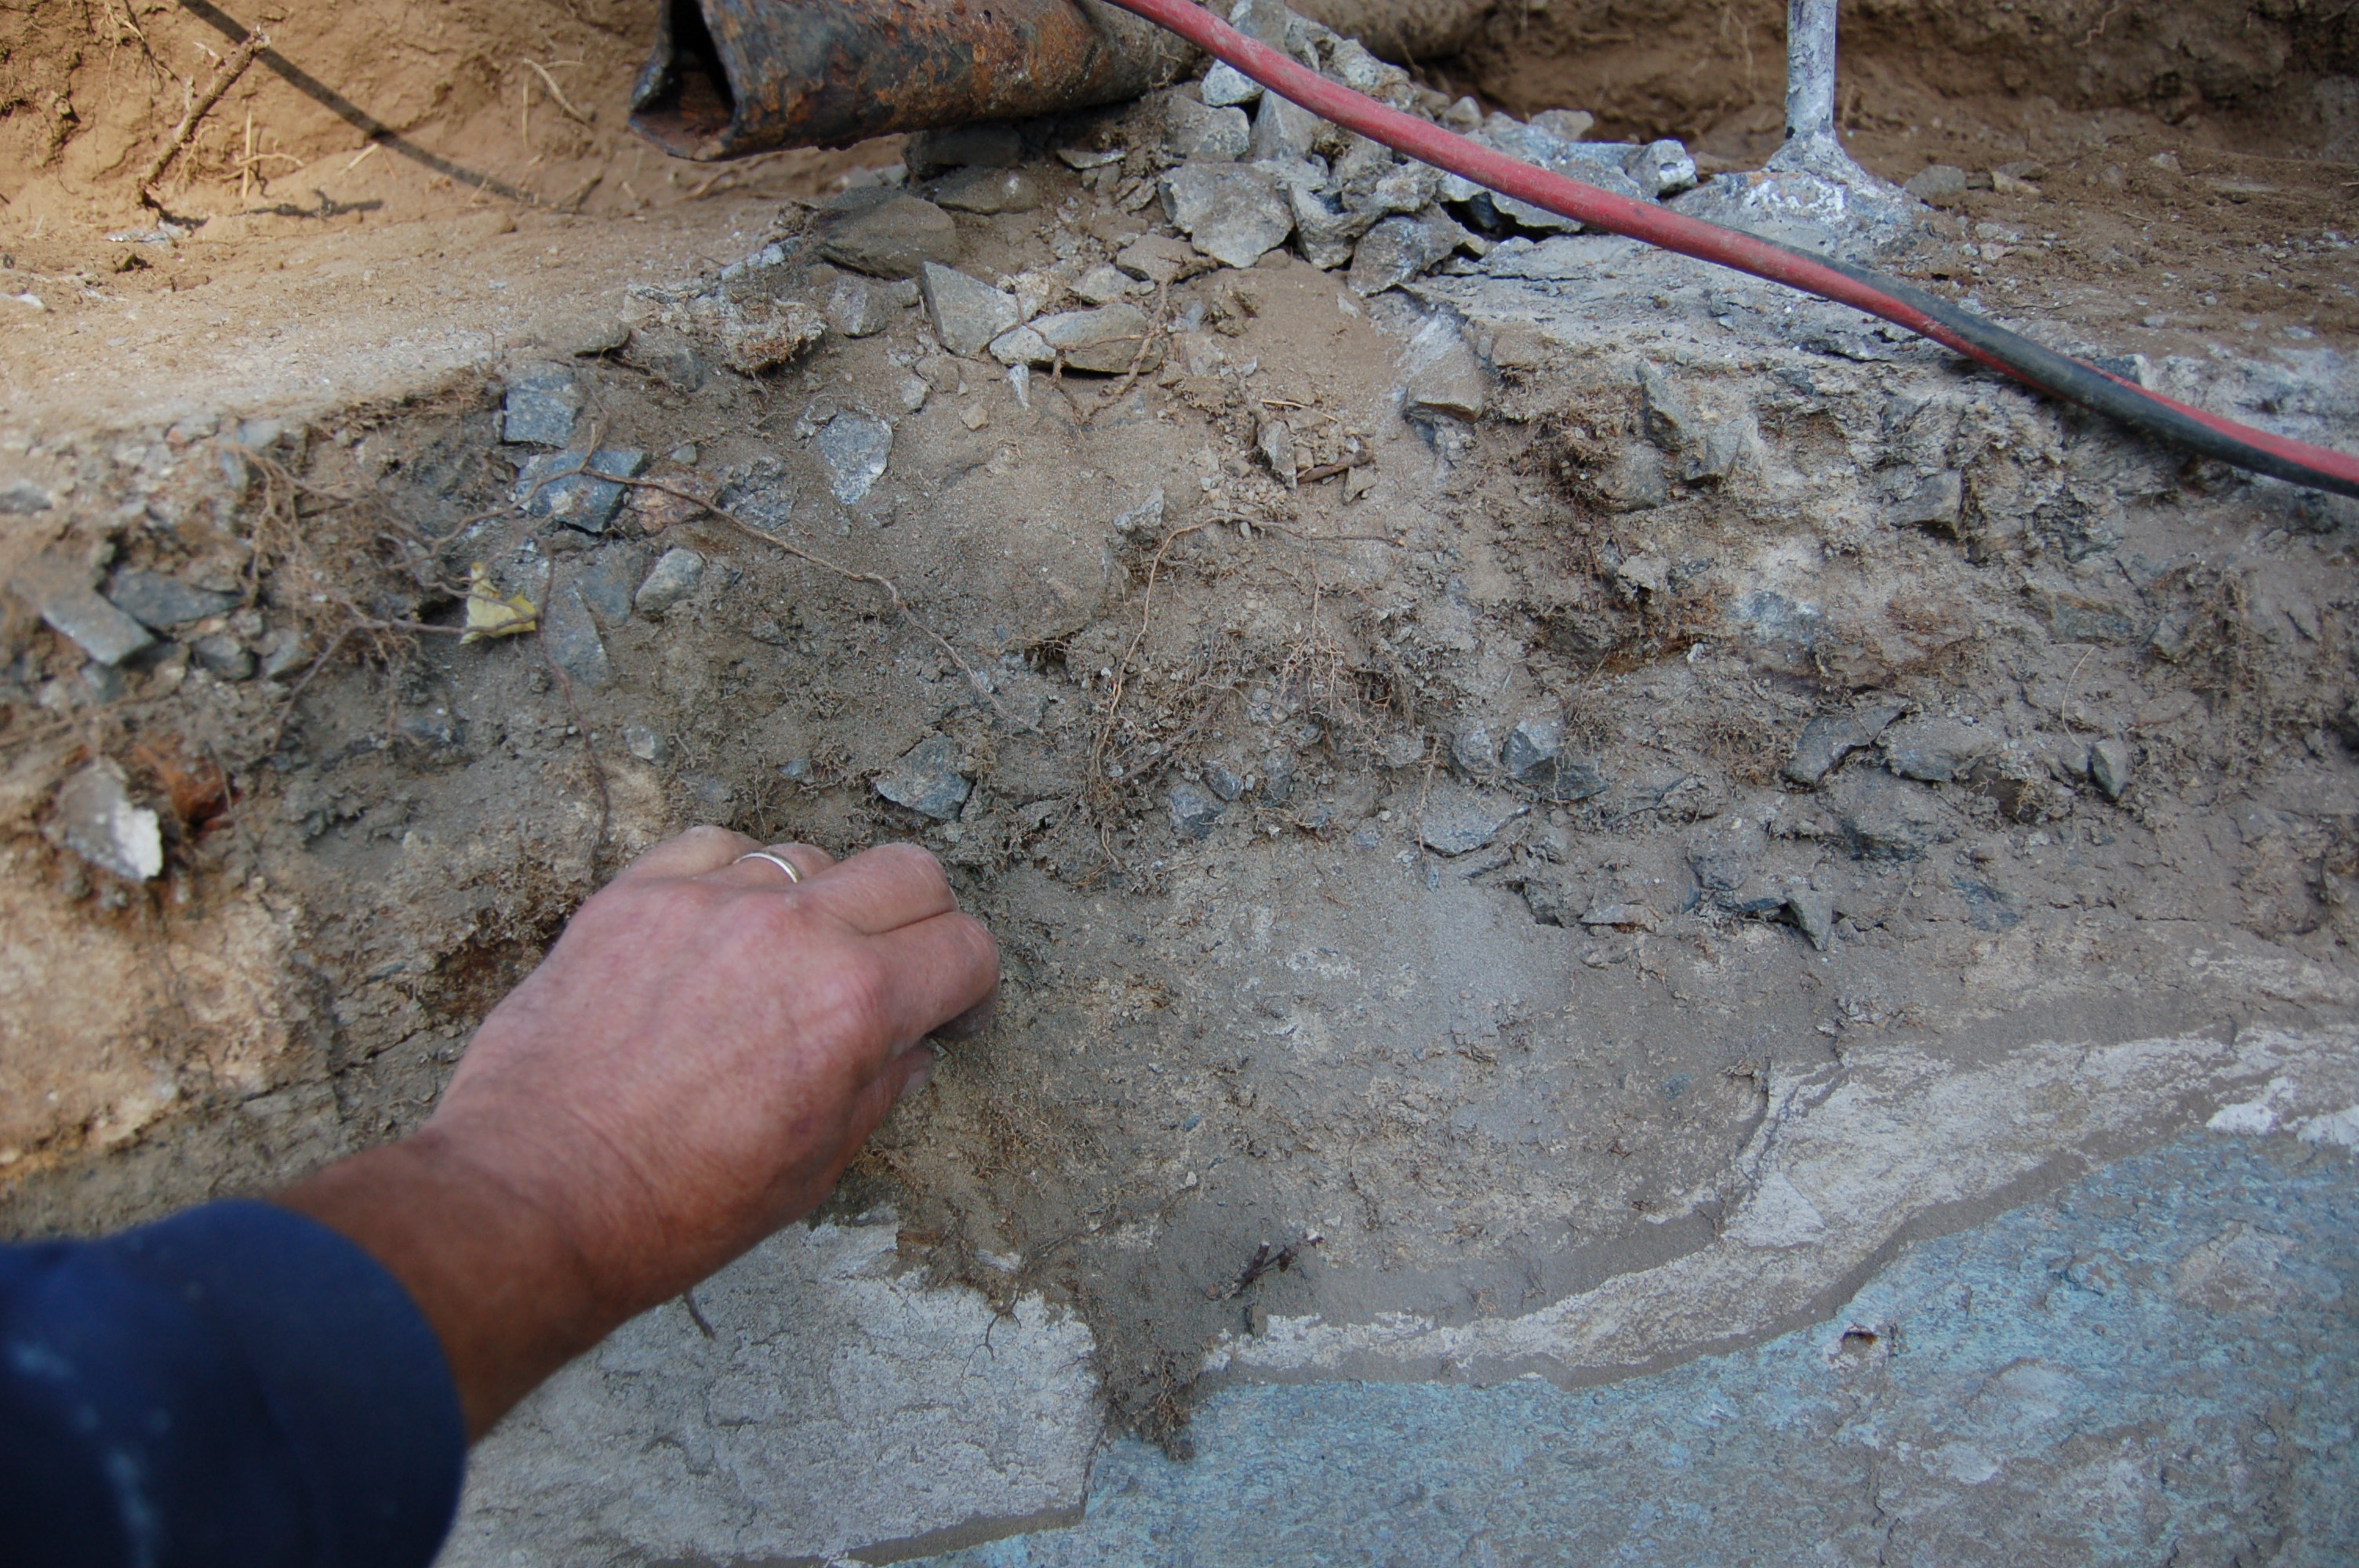
This path has held up remakably well considering its age and that it's hardly 4" thick. What made this possible is the original choice of base material it was built upon.
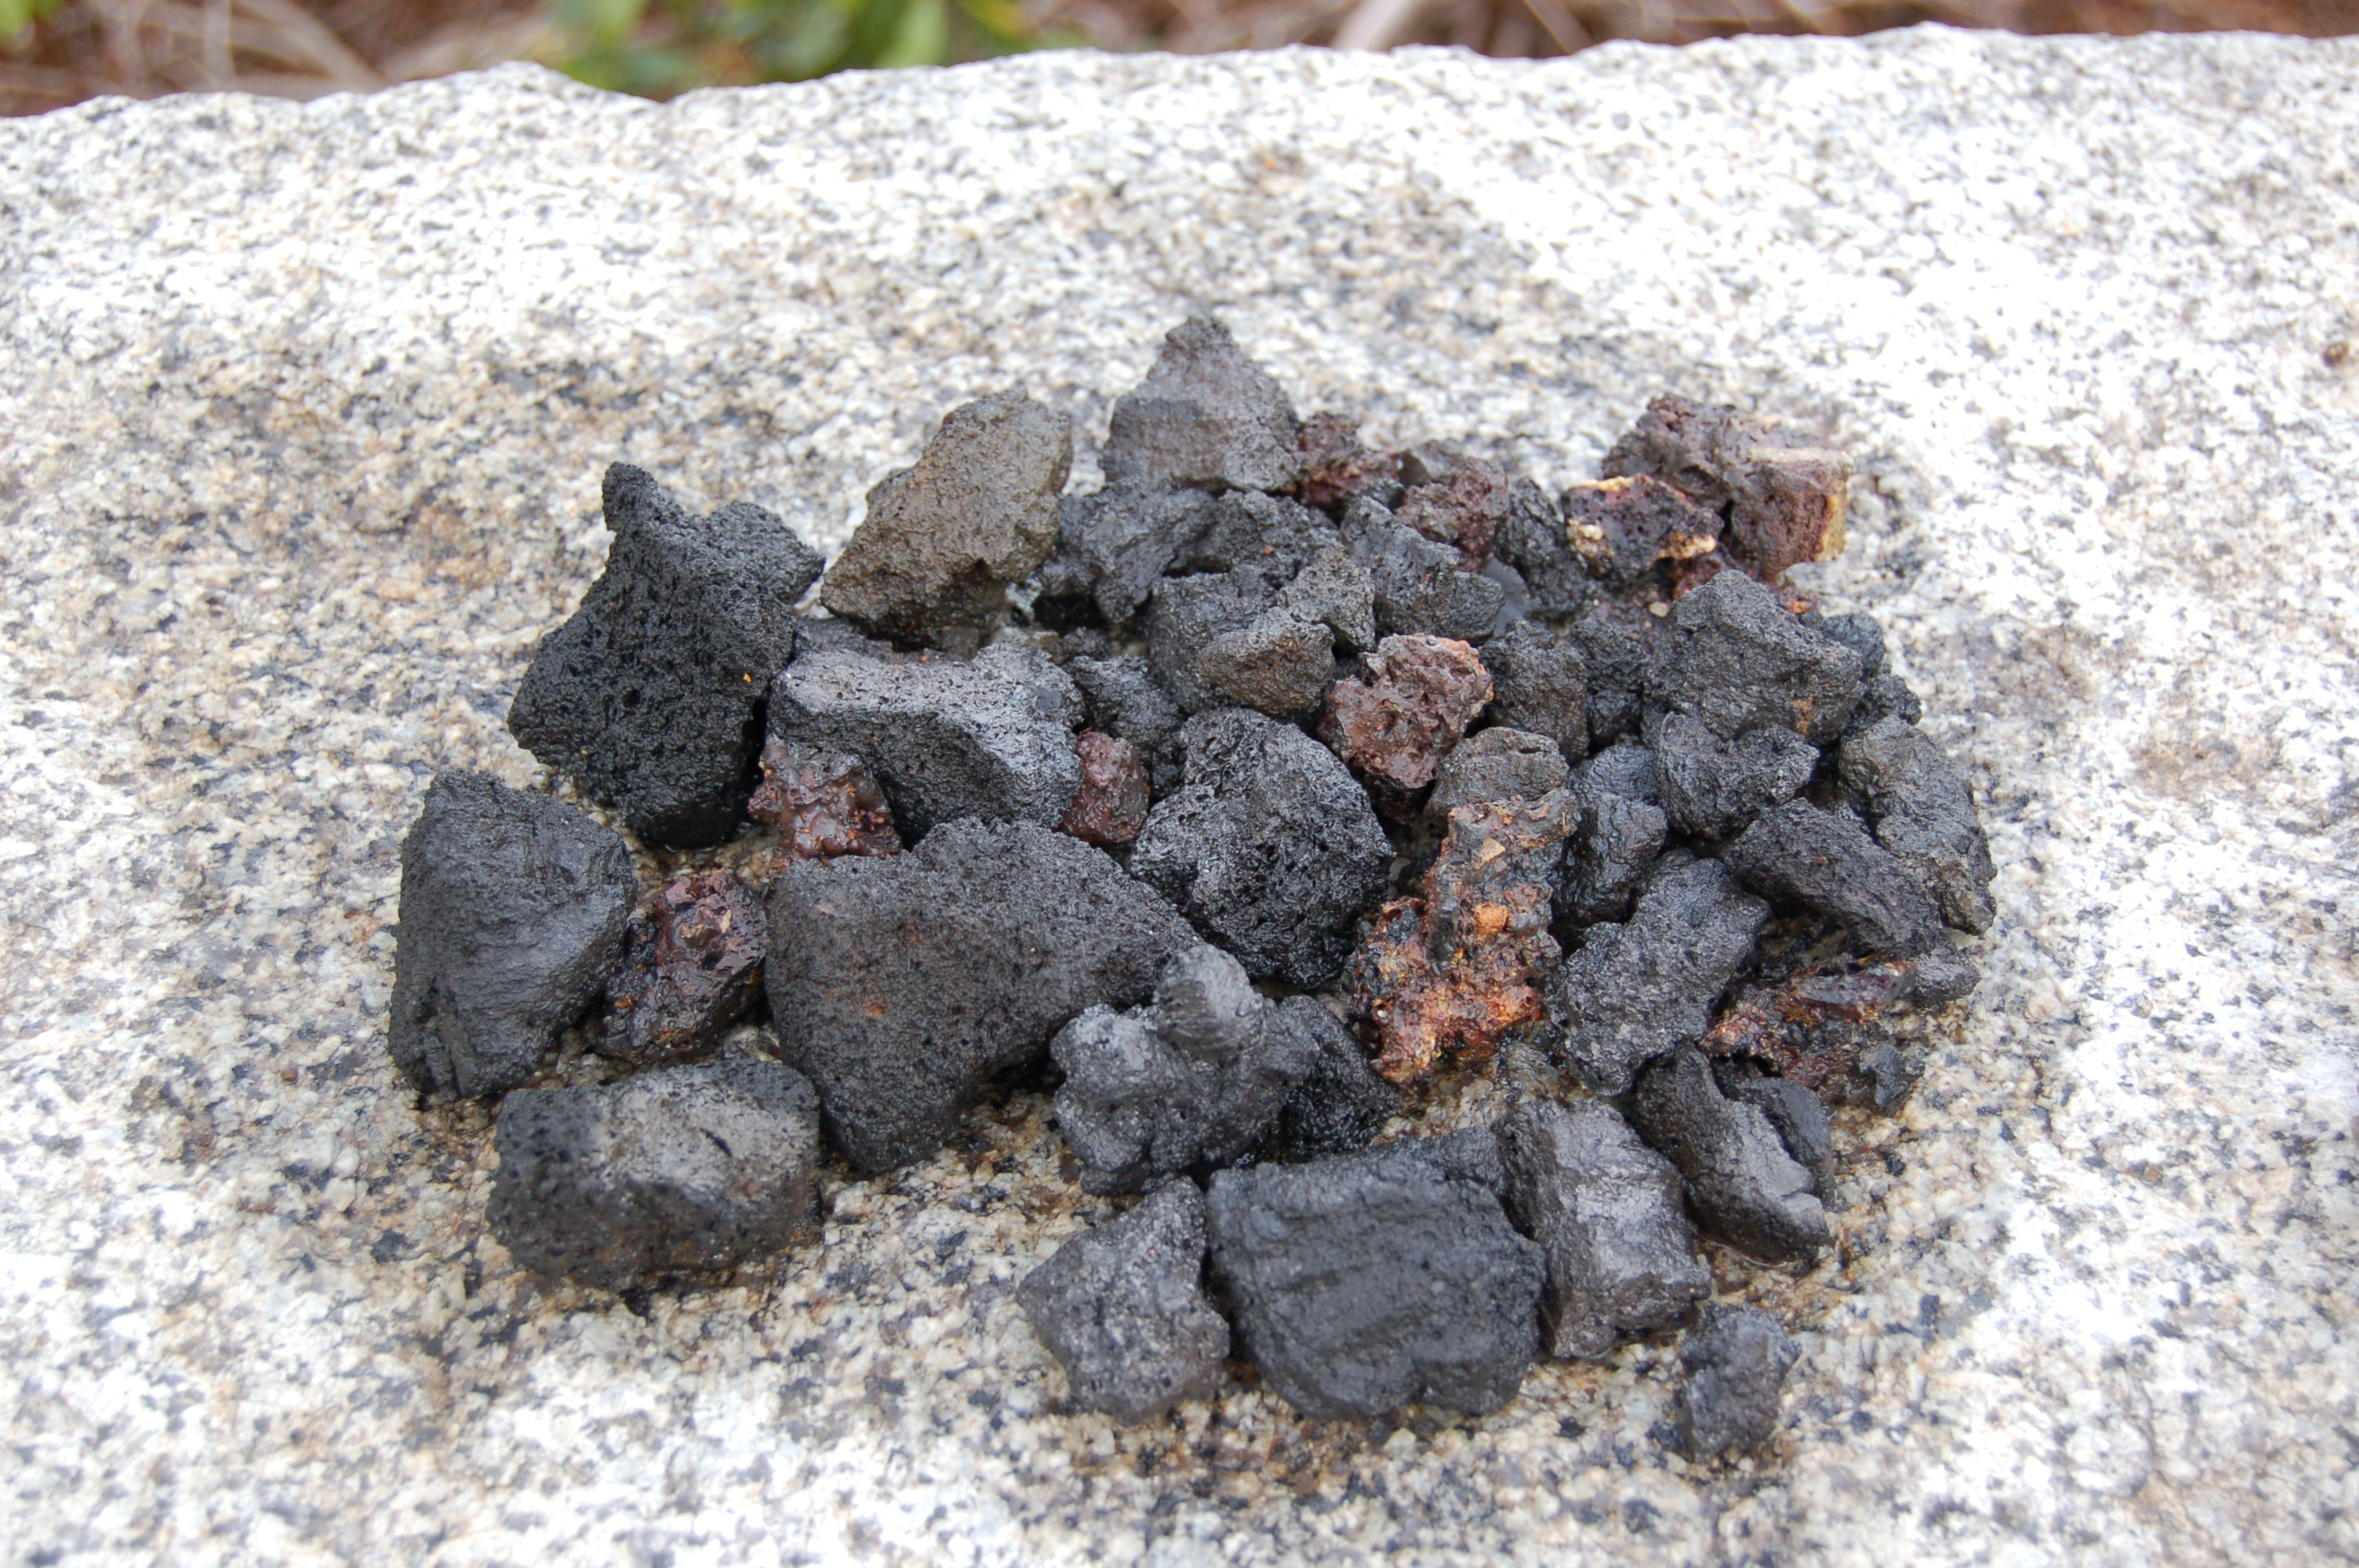
This highly porous aggregate, most likely "waste" slag from iron smelting, was used as the base and kept the ground beneath from fully saturating with water. This helped it survive through the decades of freeze-thaw cycles. A good old trick!
Lava rock, pumice, expanded clay or shale, coal, crushed reclaimed brick aggregate and the like would achieve the same result. The dramatic life expectancy increase on such a thin layer of concrete is clearly worth the additional effort.
The pond is up and running again and looking great.
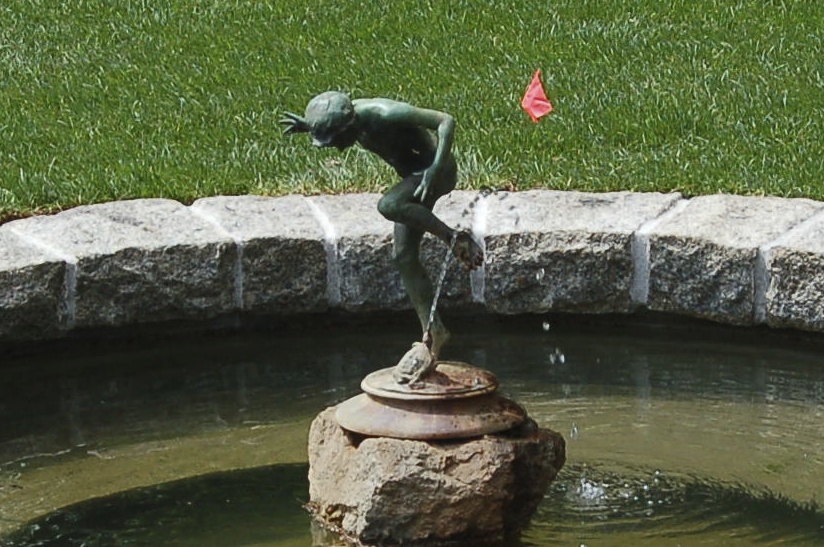
The original fountain center piece is back and running as well.
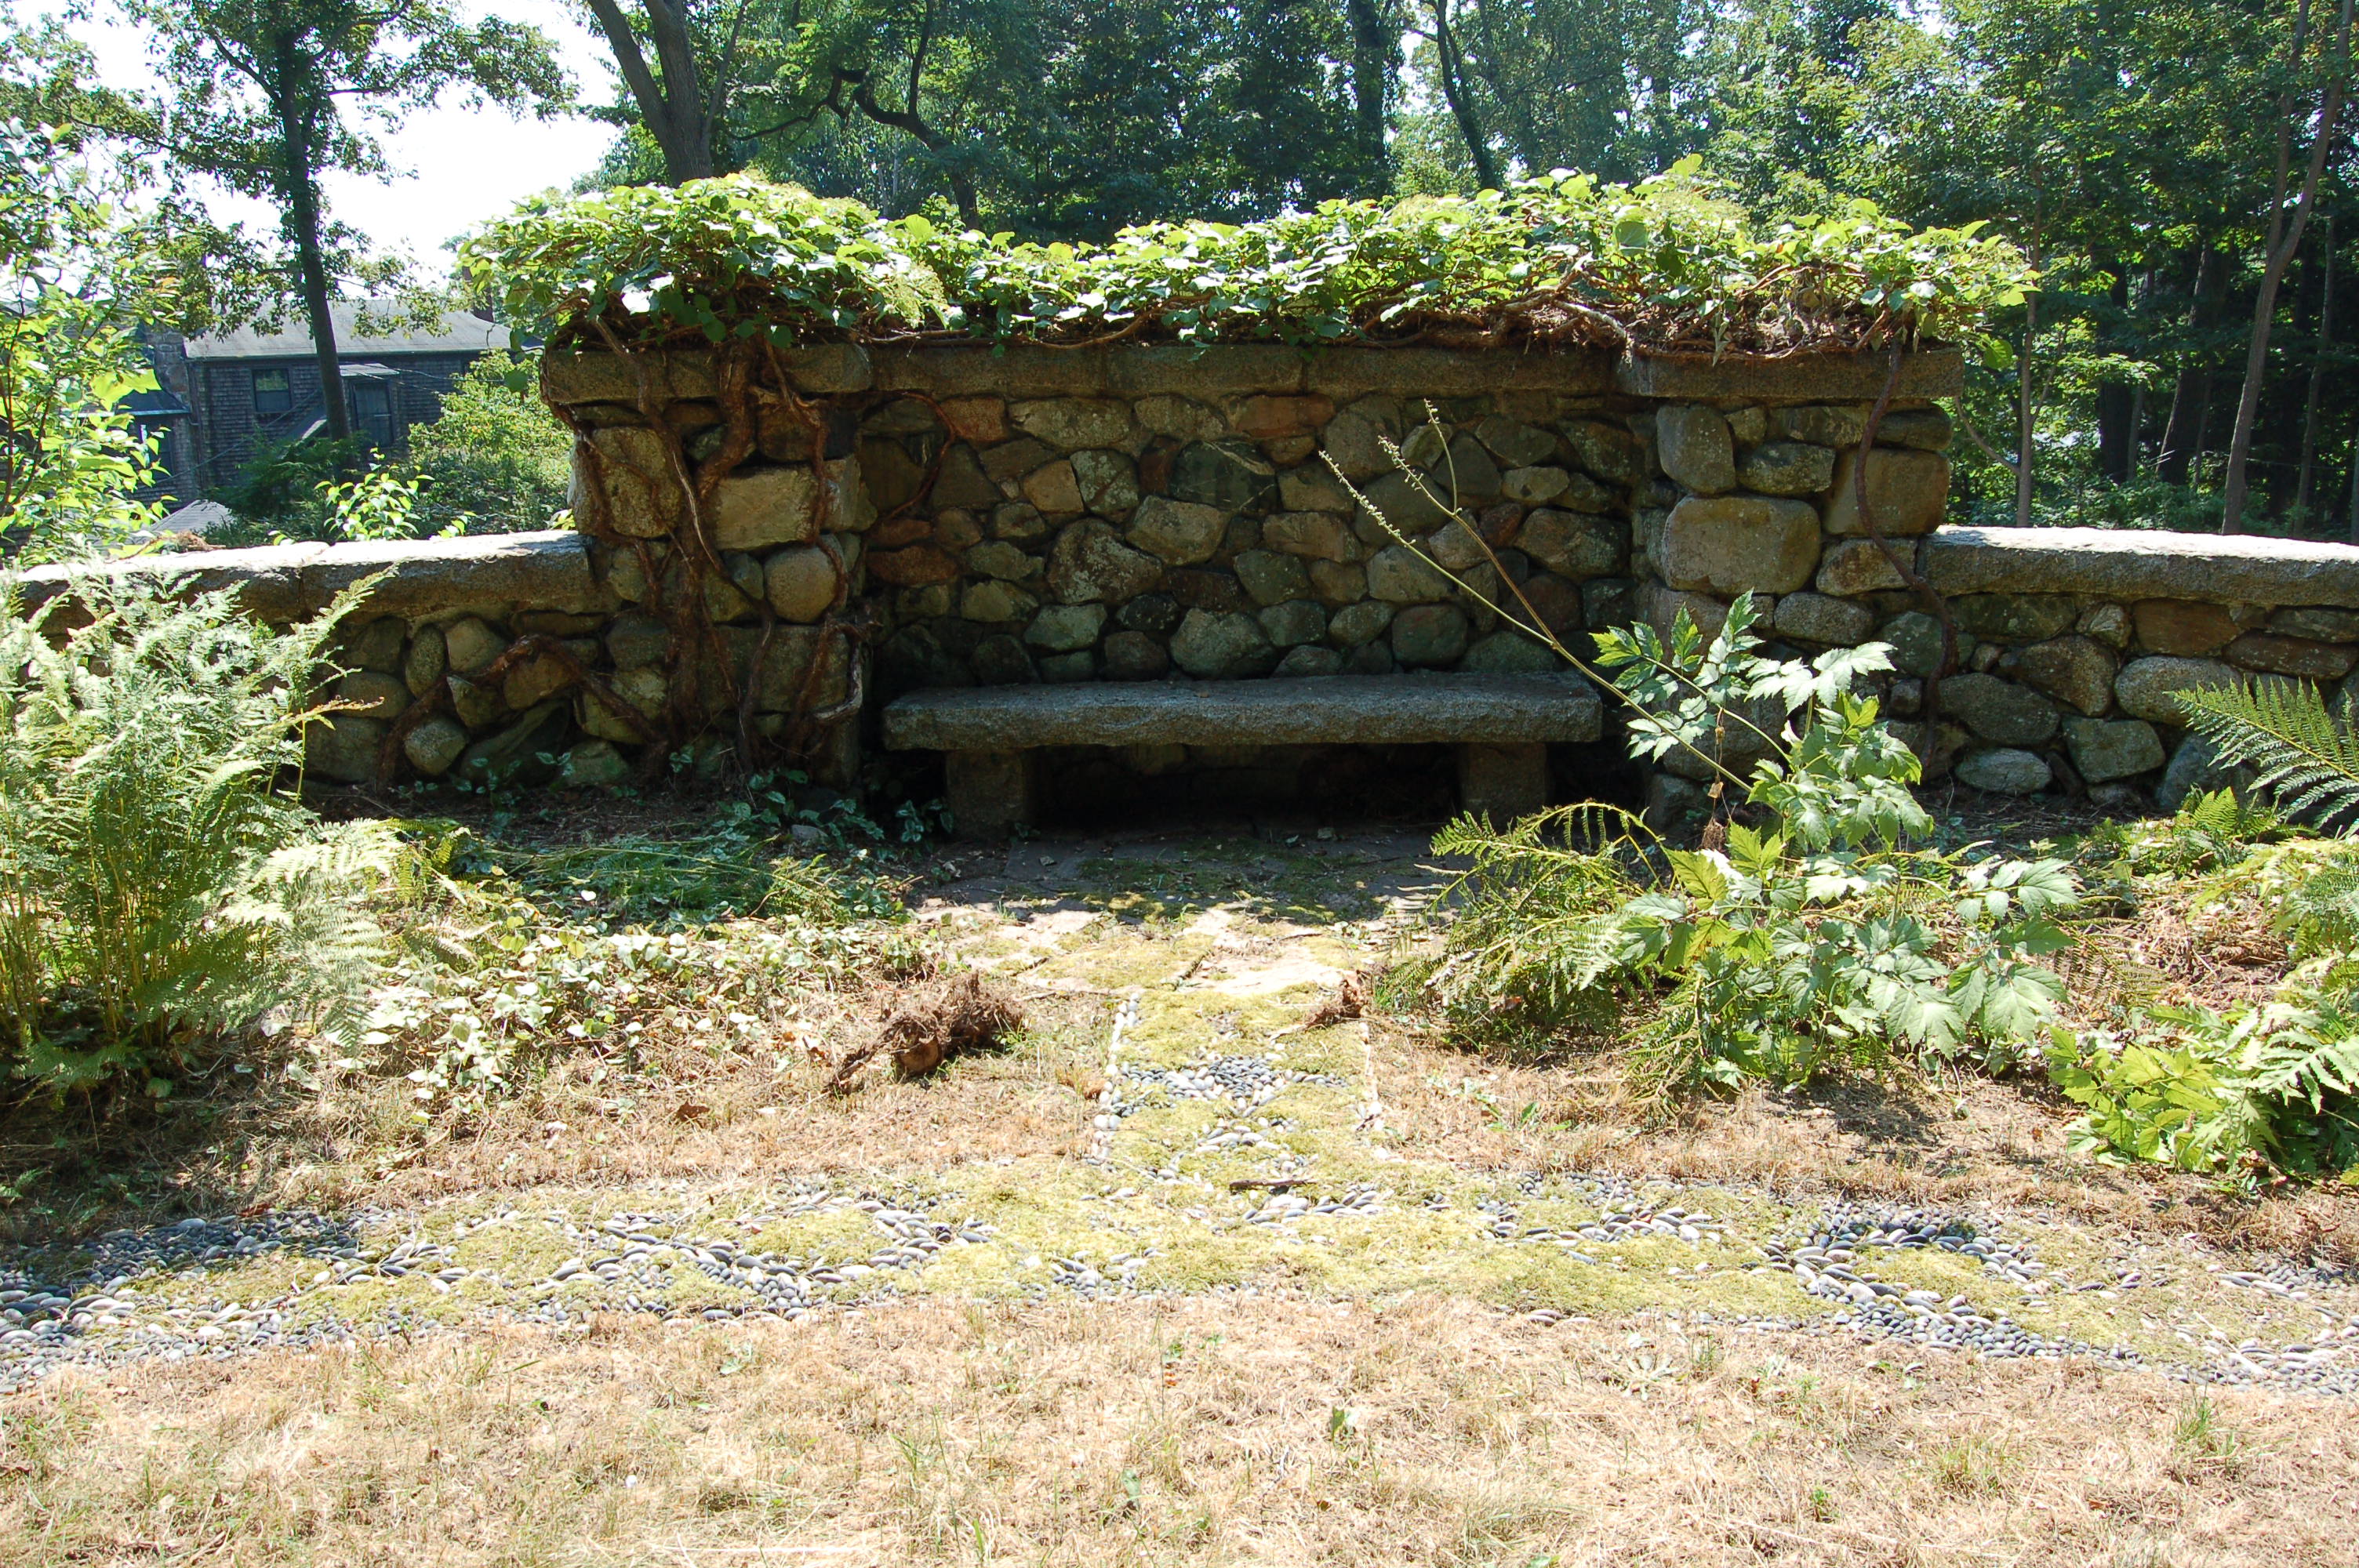
The upper level fountain is completed and running.
Restoring the garden and seeing it back again as it once was has been a very interesting and rewarding job.
